Turning Your Wishes into Sweet Realities, One Homemade Treat at a Time. 🌟

Thursday, 15 February 2024

Carrot Chocolate Chip Cheesecake Muffins: Indulgent Fusion Delight

Indulge in the perfect marriage of flavors with these Carrot Chocolate Chip Cheesecake Muffins. Combining the sweet taste of carrot cake with creamy cheesecake filling and decadent chocolate chips, these muffins are a delightful treat for any occasion.

Origin Story: Carrot Chocolate Chip Cheesecake Muffins

Carrot Chocolate Chip Cheesecake Muffins are a delightful fusion of flavors and textures, combining the moistness of carrot cake, the richness of cheesecake, and the sweetness of chocolate chips. These muffins are a treat that can be enjoyed as a breakfast item, a snack, or a dessert, offering a unique twist on traditional baked goods.

Historical Roots

Carrot cake has a history that dates back to medieval Europe when sweeteners were scarce and expensive. Carrots, naturally high in sugar, were used to sweeten cakes and puddings. This tradition carried over to America, where carrot cake became especially popular in the mid-20th century, often associated with health food movements due to the presence of carrots.

Cheesecake, on the other hand, has ancient roots dating back to the Greeks and Romans. The modern cream cheese-based cheesecake we know today was developed in the United States in the late 19th century.

Combining carrot cake and cheesecake in a muffin form is a more recent innovation, reflecting the contemporary trend of blending classic desserts to create new and exciting treats.

Cultural Significance

These muffins embody the creativity and innovation that characterize modern baking. By merging the flavors of carrot cake, cheesecake, and chocolate chips, they appeal to a wide audience, offering something familiar yet novel. They are perfect for holidays, brunches, and any occasion where you want to impress with a unique and delicious treat.

Personal Connection

My inspiration for creating Carrot Chocolate Chip Cheesecake Muffins came from a desire to combine my favorite elements of several beloved desserts. I love the spiced, moist texture of carrot cake, the creamy richness of cheesecake, and the decadent sweetness of chocolate chips. Bringing these together in a single muffin was a fun challenge that resulted in a truly delightful treat.

Recipe Evolution

Creating these muffins involves layering different components to achieve the perfect balance of flavors and textures. The carrot cake batter is spiced with cinnamon and nutmeg and mixed with shredded carrots and chocolate chips. The cheesecake filling is made with cream cheese, sugar, and a touch of vanilla, providing a creamy contrast to the cake.

The process involves preparing the carrot cake batter and the cheesecake filling separately, then layering them in muffin tins. The muffins are baked until they are golden brown and the cheesecake filling is set, resulting in a deliciously moist and flavorful treat.

Sharing the Tradition

Today, Carrot Chocolate Chip Cheesecake Muffins are a favorite in my household. They are the muffins I bake when I want to offer a special treat that combines the best of several classic desserts. Each bite is a celebration of creativity in baking and the joy of discovering new flavors.

Ingredients

✅For the Cheesecake Filling:
1/2 cup cream cheese, softened
1/4 cup (50g) granulated sugar
1 large egg
1/2 teaspoon vanilla extract

✅For the Muffin Batter:
1 and 1/2 cups (190g) all-purpose flour
1/2 cup (100g) granulated sugar
1 teaspoon baking powder
1/2 teaspoon baking soda
1/4 teaspoon salt
1 teaspoon ground cinnamon
1/2 cup (120ml) vegetable oil
2 large eggs
1 teaspoon vanilla extract
1 cup (120g) grated carrots
1/2 cup (85g) chocolate chips

Preparation Time: 20 minutes
Baking Time: 18-20 minutes
Yield: 12 muffins

Instructions

  1. Preheat your oven to 350°F (175°C). Line a muffin tin with paper liners or grease with non-stick cooking spray.
  2. In a small bowl, beat the softened cream cheese, sugar, egg, and vanilla extract together until smooth and creamy. Set aside.
  3. In a large mixing bowl, whisk together the flour, sugar, baking powder, baking soda, salt, and ground cinnamon.
  4. In another bowl, whisk together the vegetable oil, eggs, and vanilla extract until well combined.
  5. Pour the wet ingredients into the dry ingredients and stir until just combined. Do not overmix.
  6. Fold in the grated carrots and chocolate chips until evenly distributed throughout the batter.
  7. Fill each muffin cup with a spoonful of batter, filling each about halfway.
  8. Add a dollop of the cheesecake filling on top of the muffin batter in each cup.
  9. Cover the cheesecake filling with another spoonful of muffin batter until the muffin cups are nearly full.
  10. Bake in the preheated oven for 18-20 minutes, or until the muffins are lightly golden and a toothpick inserted into the center comes out clean.
  11. Remove the muffins from the oven and allow them to cool in the tin for a few minutes before transferring them to a wire rack to cool completely.

Pro Tips

  • Make sure the cream cheese is softened to room temperature for smooth and creamy cheesecake filling.
  • Grate the carrots finely for even distribution throughout the muffins.
  • Use mini chocolate chips for better distribution in the muffin batter.

Secret Tips

For an extra indulgent twist, sprinkle some chopped nuts or coconut flakes on top of the muffins before baking.

Serving Options

Enjoy these Carrot Chocolate Chip Cheesecake Muffins warm or at room temperature for a delightful breakfast or snack.

Health Benefits

Incorporating carrots into these muffins adds a boost of vitamin A and fiber, making them a healthier treat option.

Variations & Customization Options

  • Swap out the chocolate chips for raisins or chopped nuts for a different flavor profile.
  • Drizzle some cream cheese frosting on top of the cooled muffins for added sweetness and decadence.

With their irresistible combination of flavors and textures, these Carrot Chocolate Chip Cheesecake Muffins are sure to become a new favorite in your baking repertoire. Whether enjoyed for breakfast, brunch, or dessert, they're bound to impress with every delicious bite.

Happy Baking!
Sam

Wednesday, 14 February 2024

Valentine's Day Chocolate Lava Cake

Impress your Valentine with this irresistible Valentine's Day Chocolate Lava Cake. With its rich, gooey center and decadent chocolatey flavor, this indulgent dessert is sure to set hearts aflutter.

Origin Story: Chocolate Lava Cake

Chocolate Lava Cake, also known as Molten Chocolate Cake, is a rich, decadent dessert featuring a delicate chocolate cake exterior with a warm, gooey chocolate center. This indulgent treat has become a favorite in fine dining and home kitchens alike, celebrated for its irresistible combination of textures and flavors.

Historical Roots

The origin of Chocolate Lava Cake is attributed to two renowned chefs who claim to have invented it independently around the same time in the 1980s. Jean-Georges Vongerichten, a French chef based in New York, is often credited with popularizing the dessert in the United States. According to his story, the dessert was accidentally created when he pulled a chocolate sponge cake out of the oven too early, discovering that while the outside was set, the inside remained molten.

Meanwhile, Jacques Torres, another celebrated French pastry chef, also lays claim to the invention of Chocolate Lava Cake. He contends that the dessert was a deliberate creation designed to showcase the richness of high-quality chocolate.

Regardless of its exact origin, the dessert quickly gained popularity in upscale restaurants and became a staple of contemporary dessert menus.

Cultural Significance

Chocolate Lava Cake holds a special place in modern culinary culture. It is often associated with luxury and indulgence, making it a popular choice for special occasions and romantic dinners. The dramatic presentation of the cake, with its molten center flowing out upon cutting, adds a touch of theater to the dining experience.

The dessert's simplicity and elegance have also made it a favorite among home bakers. With just a few ingredients and minimal preparation, Chocolate Lava Cake offers an impressive and delicious end to any meal.

Personal Connection

My first experience with Chocolate Lava Cake was at a fine dining restaurant, where the server dramatically cut into the cake, releasing the molten chocolate center. The combination of the warm, flowing chocolate with a scoop of cold vanilla ice cream was unforgettable. Inspired by this experience, I decided to recreate the dessert at home.

Experimenting with different recipes, I found that the key to a perfect Chocolate Lava Cake lies in the timing. Baking the cakes just long enough to set the edges while keeping the center molten requires careful attention. Using high-quality chocolate is also essential to achieve a rich and flavorful molten center.

Recipe Evolution

Creating the perfect Chocolate Lava Cake involves a few key steps. The batter typically consists of a combination of chocolate, butter, eggs, sugar, and a small amount of flour. Melting the chocolate and butter together creates a smooth, rich base. Whisking the eggs and sugar until light and fluffy helps incorporate air, giving the cake a light texture.

The batter is poured into individual ramekins or molds, which are then baked at a high temperature for a short time. This ensures that the outer edges set while the center remains molten. Careful attention to the baking time is crucial, as even an extra minute in the oven can cause the center to set completely.

For an added touch of decadence, the cakes can be served with a dusting of powdered sugar, a dollop of whipped cream, or a scoop of ice cream. Fresh berries or a drizzle of raspberry sauce can also complement the rich chocolate flavor.

Sharing the Tradition

Today, Chocolate Lava Cake is a favorite dessert in my household, especially for celebrations and special dinners. It is the dessert I make when I want to impress guests with a simple yet sophisticated treat. Each bite is a reminder of the magic of combining rich chocolate with careful baking techniques.

Ingredients

1/2 cup high-quality dark chocolate, chopped
1/2 cup (115g) unsalted butter
1/2 cup (100g) granulated sugar
2 large eggs
2 large egg yolks
1 teaspoon vanilla extract
1/4 cup (30g) all-purpose flour
Pinch of salt
Optional: Cocoa powder or powdered sugar for dusting, fresh berries for garnish

Preparation Time: 15 minutes
Baking Time: 12-14 minutes
Yield: 4 servings

Instructions

  1. Preheat your oven to 425°F (220°C). Grease four ramekins or oven-safe mugs with butter and dust with cocoa powder or powdered sugar, tapping out any excess.
  2. In a heatproof bowl set over a pot of simmering water (double boiler), melt the chopped chocolate and butter together, stirring until smooth. Remove from heat and let cool slightly.
  3. In a separate mixing bowl, whisk together the granulated sugar, eggs, egg yolks, and vanilla extract until well combined.
  4. Slowly pour the melted chocolate mixture into the egg mixture, whisking constantly until smooth.
  5. Sift the flour and salt into the chocolate mixture and gently fold until just combined. Be careful not to overmix.
  6. Divide the batter evenly among the prepared ramekins or mugs, filling each about 3/4 full.
  7. Place the filled ramekins or mugs on a baking sheet and bake in the preheated oven for 12-14 minutes, or until the edges are set but the centers are still soft and slightly jiggly.
  8. Remove the lava cakes from the oven and let them cool for 1-2 minutes. Carefully run a knife around the edges of each cake to loosen them from the ramekins or mugs.
  9. Invert each lava cake onto a serving plate and gently lift off the ramekin or mug. The lava cakes should release easily.
  10. Serve the Valentine's Day Chocolate Lava Cakes immediately, garnished with fresh berries if desired. Enjoy them warm and gooey!

Pro Tips

  • For the best results, use high-quality dark chocolate with at least 60% cocoa content for a rich and intense chocolate flavor.
  • Be sure not to overbake the lava cakes, as the centers should remain molten and gooey. The edges should be set, but the centers should still jiggle slightly when gently shaken.

Secret Tips

For an extra touch of indulgence, serve the chocolate lava cakes with a scoop of vanilla ice cream or a dollop of whipped cream on top.

Serving Options

These Valentine's Day Chocolate Lava Cakes are perfect for a romantic dinner at home. Pair them with a glass of red wine or champagne for a truly decadent experience.

Health Benefits

While these chocolate lava cakes are undeniably indulgent, they can be enjoyed as an occasional treat to celebrate special occasions like Valentine's Day.

Variations & Customization Options

  • Experiment with different types of chocolate, such as milk or white chocolate, to create variations of this classic dessert.
  • Add a teaspoon of instant espresso powder to the batter for a hint of coffee flavor that complements the chocolate beautifully.
Treat yourself and your loved one to the ultimate indulgence with these Valentine's Day Chocolate Lava Cakes. With their molten centers and rich chocolatey flavor, they're sure to make hearts melt and create unforgettable memories on this special day of love.

Bake with Love!
Sam

Valentine's Day Chocolate Covered Strawberries

Indulge in the sweetness of Valentine's Day with these delectable homemade chocolate-covered strawberries. Whether you're celebrating with a special someone or treating yourself, these delightful treats are sure to add a touch of romance to your day.

Ingredients

  • Fresh strawberries
  • Dark, milk, or white chocolate chips
  • Optional toppings: crushed nuts, shredded coconut, sprinkles
Preparation Time: 15 minutes
Chilling Time: 30 minutes
Yield: Varies based on the number of strawberries


Instructions

  1. Wash and thoroughly dry the strawberries, leaving the stems intact.
  2. In a microwave-safe bowl, melt the chocolate chips in 30-second intervals, stirring in between, until smooth and fully melted.
  3. Dip each strawberry into the melted chocolate, coating it halfway or fully as desired.
  4. Allow any excess chocolate to drip off, then place the dipped strawberries onto a parchment-lined baking sheet.
  5. If desired, sprinkle the dipped strawberries with toppings of your choice while the chocolate is still wet.
  6. Place the baking sheet in the refrigerator for about 30 minutes, or until the chocolate has hardened.
  7. Once hardened, remove the chocolate-covered strawberries from the refrigerator and serve immediately, or store them in an airtight container in the refrigerator until ready to enjoy.

Pro Tips

  1. Ensure the strawberries are completely dry before dipping them in chocolate to prevent the chocolate from seizing.
  2. Use high-quality chocolate for best results, and feel free to mix and match different types of chocolate for a variety of flavors.
  3. Get creative with toppings! Crushed nuts, shredded coconut, and colorful sprinkles are popular choices, but you can also try drizzling melted white chocolate over dark chocolate-covered strawberries for an elegant touch.

Secret Tips

For an extra touch of indulgence, consider adding a splash of liqueur, such as Grand Marnier or Chambord, to the melted chocolate for a boozy twist.

Serving Options

Serve the chocolate-covered strawberries as a romantic dessert for two, or package them in a decorative box for a thoughtful homemade gift.

Health Benefits

    While these chocolate-covered strawberries are certainly a treat, they also offer the health benefits of fresh fruit, including vitamins, minerals, and antioxidants
  • .

Variations & Customization Options

  1. Experiment with different types of chocolate and toppings to create your own unique flavor combinations.
  2. For a healthier option, you can also try dipping strawberries in Greek yogurt instead of chocolate for a tangy twist.

Celebrate love in its sweetest form this Valentine's Day with these irresistible chocolate-covered strawberries. Whether enjoyed with your significant other, shared with friends, or savored solo, these homemade treats are sure to make your heart flutter. Wishing you a day filled with love, joy, and delicious indulgence!

Prepare with Love!
Sam

Velvet Bliss Chocolate Truffles: A Sweet Symphony of Love

Celebrate the sweetness of love with these luxurious Decadent Chocolate Truffles. Made with rich, creamy chocolate and coated in your favorite toppings, these homemade treats are the perfect indulgence for Valentine's Day or any special occasion.

Origin Story: Velvet Chocolate Truffles

Velvet Chocolate Truffles are a luxurious and decadent treat, known for their smooth, creamy texture and rich chocolate flavor. These indulgent confections are perfect for special occasions, gifts, or simply enjoying as a sweet treat.

Historical Roots

The origin of chocolate truffles dates back to France in the 1920s. According to legend, the creation of truffles was somewhat accidental. Chef Auguste Escoffier, while attempting to create a pastry cream, accidentally poured hot cream into a bowl of chocolate chunks instead of eggs and sugar. The resulting mixture hardened into a paste that could be rolled into balls. These chocolate balls were then coated in cocoa powder, creating a resemblance to the luxurious truffles found in the forest, hence the name.

The term "truffle" itself is derived from the Latin word "tuber," which refers to a type of edible fungus. The chocolate truffle’s resemblance to these rare and expensive fungi contributed to their name and luxurious connotation.

Cultural Significance

Chocolate truffles have since become a symbol of luxury and indulgence. They are often given as gifts during holidays and special occasions and are a staple in gourmet chocolate shops around the world. The simplicity of their ingredients—chocolate, cream, and flavorings—belies the sophistication of their flavor and texture.

The versatility of truffles allows for endless variations. They can be infused with liqueurs, rolled in nuts or powdered sugar, or flavored with spices and extracts. This adaptability has made them a favorite among both professional chocolatiers and home bakers.

Personal Connection

My journey with Velvet Chocolate Truffles began during a visit to a renowned chocolatier in Brussels. The experience of tasting a freshly made truffle, with its silky center and perfect balance of flavors, was unforgettable. Inspired by this, I decided to recreate the experience at home, aiming for that perfect velvety texture.

Through experimentation, I discovered that the key to perfect truffles lies in the quality of the chocolate and the cream. Using high-quality chocolate with a high cocoa content ensures a rich flavor, while fresh cream provides the smooth, melt-in-your-mouth texture. The addition of a touch of butter helps to stabilize the mixture and add an extra layer of creaminess.

Recipe Evolution

Creating Velvet Chocolate Truffles involves a few key steps. The ganache, a mixture of chocolate and cream, forms the base of the truffles. Heating the cream just until it begins to boil and then pouring it over finely chopped chocolate ensures a smooth mixture. Stirring gently until the chocolate is fully melted and incorporating butter creates a glossy, smooth ganache.

After the ganache is chilled until firm, it can be scooped and rolled into balls. The truffles can then be coated in cocoa powder, chopped nuts, or melted chocolate for a finishing touch. Refrigerating the truffles until firm ensures they hold their shape and maintain their velvety texture.

Sharing the Tradition

Today, Velvet Chocolate Truffles are a favorite treat in my household, especially during holidays and special occasions. They are the perfect gift to share with friends and family, embodying the luxurious and indulgent nature of fine chocolate.

Ingredients

2 cups high-quality dark chocolate, finely chopped
1/2 cup (120ml) heavy cream
1 tablespoon unsalted butter, at room temperature
1 teaspoon vanilla extract
Optional toppings: cocoa powder, powdered sugar, crushed nuts, shredded coconut, sprinkles
Preparation Time: 15 minutes
Chilling Time: 2 hours
Yield: About 24 truffles

Instructions

  1. Place the finely chopped dark chocolate in a heatproof bowl.
  2. In a small saucepan, heat the heavy cream over medium heat until it just begins to simmer. Remove from heat immediately.
  3. Pour the hot cream over the chopped chocolate and let it sit undisturbed for 2-3 minutes to allow the chocolate to soften.
  4. Gently whisk the chocolate and cream together until smooth and glossy. If any chocolate chunks remain, you can gently microwave the mixture in 10-second intervals and continue stirring until smooth.
  5. Stir in the unsalted butter and vanilla extract until fully incorporated.
  6. Cover the chocolate ganache with plastic wrap, pressing it directly onto the surface to prevent a skin from forming. Refrigerate the ganache for about 2 hours, or until firm enough to handle.
  7. Once the ganache has chilled and firmed up, use a small spoon or a melon baller to scoop out portions of the ganache and roll them into small balls with your hands.
  8. Roll the truffles in your desired toppings, such as cocoa powder, powdered sugar, crushed nuts, shredded coconut, or sprinkles, until evenly coated.
  9. Place the coated truffles on a parchment-lined baking sheet and refrigerate for another 30 minutes to set.
  10. Once set, transfer the truffles to an airtight container and store them in the refrigerator until ready to enjoy.

Pro Tips

  • For the best flavor and texture, use high-quality dark chocolate with at least 70% cocoa content.
  • Be sure not to overheat the heavy cream to prevent it from scalding or curdling the chocolate.
  • Experiment with different toppings to create a variety of flavors and textures in your truffle assortment.

Secret Tips

  • Add a splash of liqueur, such as Grand Marnier or Bailey's Irish Cream, to the chocolate ganache for an extra layer of flavor and sophistication.
  • Serving OptionsServe these Decadent Chocolate Truffles as a romantic dessert for two, or package them in a decorative box for a thoughtful homemade gift.

Health Benefits

  1. While these chocolate truffles are undeniably indulgent, they can be enjoyed in moderation as part of a balanced diet.
  2. Variations & Customization OptionsCustomize your truffles by incorporating different flavored extracts or spices into the chocolate ganache, such as peppermint extract, almond extract, or cinnamon.
  3. Experiment with coatings such as finely chopped toasted nuts, colored sprinkles, or edible gold dust for an elegant touch.

Indulge in the ultimate chocolate experience with these Decadent Chocolate Truffles, a luxurious treat that's sure to delight your taste buds and warm your heart. Whether shared with a loved one or savored solo, these homemade truffles are a delicious expression of love and affection on Valentine's Day and beyond.

Bake with Love!
Sam

Saturday, 10 February 2024

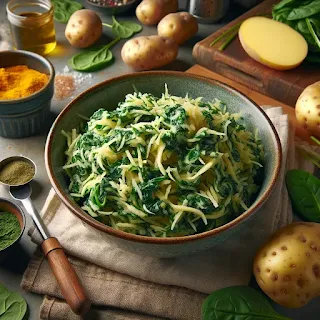
SnackSavy Series | Wholesome Bites for Every Craving: Spinach-Infused Potato Hash Browns

Welcome back to SnackSavvy, where I elevate your snacking game with innovative and delicious recipes! Today, I'm putting a nutritious twist on a classic favorite with my Spinach Hash Browns. Packed with the goodness of crispy potatoes and vibrant spinach, these hash browns are a satisfying and flavorful snack that's perfect for any time of day.

Ingredients

2 large potatoes, peeled and grated
1 cup fresh spinach, finely chopped
1/4 cup onion, finely diced
1 garlic clove, minced
2 tablespoons olive oil
Salt and pepper to taste

Preparation Time: 15 minutes
Cooking Time: 10 minutes
Yield: Approximately 8 Spinach Hash Browns


Instructions

  1. Place the grated potatoes in a clean kitchen towel and squeeze out excess moisture.
  2. In a large mixing bowl, combine the squeezed potatoes, chopped spinach, diced onion, minced garlic, salt, and pepper. Mix well to ensure even distribution of ingredients.
  3. Heat olive oil in a skillet over medium heat.
  4. Form the potato mixture into patties and carefully place them in the skillet.
  5. Cook the hash browns for 4-5 minutes on each side, or until golden brown and crispy.
  6. Once cooked, transfer the hash browns to a paper towel-lined plate to drain any excess oil.

Pro Tips

  • Squeeze Out Moisture: Removing excess moisture from the grated potatoes ensures crispier hash browns.
  • Uniform Patties: Use a measuring cup or cookie cutter to shape the hash brown patties for consistent size and cooking.

Secret Tips

  • Seasoning: Experiment with your favorite herbs and spices to enhance the flavor of the hash browns. Try adding paprika, thyme, or cayenne pepper for an extra kick.

Serving Options

  • Enjoy the Spinach Hash Browns on their own as a delicious snack.
  • Serve them alongside eggs and toast for a hearty breakfast.
  • Pair them with a side salad or soup for a light lunch or dinner option.

Health Benefits

  • Spinach is rich in vitamins A, C, and K, as well as folate, iron, and antioxidants, promoting overall health and well-being.
  • Potatoes provide a good source of energy, fiber, and essential nutrients like potassium and vitamin C.

Variations & Customization Options

  1. Cheesy Spinach Hash Browns: Add grated cheese to the potato mixture for extra flavor and richness.
  2. Spicy Spinach Hash Browns: Incorporate diced jalapeños or a pinch of cayenne pepper for a spicy kick.
  3. Sweet Potato Spinach Hash Browns: Substitute sweet potatoes for regular potatoes for a sweeter twist.

Indulge in the wholesome goodness of our Spinach Hash Browns, a delightful blend of crispy potatoes and nutritious spinach. Whether enjoyed as a snack or part of a meal, these hash browns are sure to tantalize your taste buds and leave you craving more. Stay tuned for more SnackSavvy recipes coming your way!

Happy Snacking!
Sam

Thursday, 8 February 2024

SnackSavy Series | Wholesome Bites for Every Craving: Crunchy Cabbage and Carrot Patties

Welcome back to SnackSavvy, where I'm constantly innovating in the kitchen to bring you delicious and nutritious snack options! Today, I'm excited to introduce my latest creation: Crunchy Cabbage and Carrot Patties. Packed with wholesome ingredients like cabbage, carrots, oats, cheese, and peanuts, these patties are a flavorful and satisfying snack that's perfect for any time of day.

Here's what you need (Ingredients)

2 cups shredded cabbage
1 cup grated carrots
1/2 cup rolled oats
1/4 cup grated cheese (cheddar or any preferred cheese)
1/4 cup crushed peanuts
1/4 cup finely chopped onion
1 garlic clove, minced
1/4 teaspoon salt
1/4 teaspoon black pepper
2 eggs, beaten


Preparation Time: 15 minutes
Cooking Time: 10 minutes per batch
Yield: Approximately 12 Cabbage and Carrot Patties


Now let's make (Instructions):

  1. In a large mixing bowl, combine shredded cabbage, grated carrots, rolled oats, grated cheese, crushed peanuts, chopped onion, minced garlic, salt, and black pepper.
  2. Add beaten eggs to the mixture and stir until well combined.
  3. Heat a non-stick skillet over medium heat and lightly grease it with oil.
  4. Form the mixture into patties of desired size and thickness.
  5. Place the patties onto the skillet and cook for 4-5 minutes on each side, or until golden brown and cooked through.
  6. Once cooked, remove the patties from the skillet and drain on a paper towel-lined plate.

Pro Tips

  • Even Cooking: Ensure all ingredients are evenly mixed to promote consistent cooking and flavor throughout each patty.
  • Compact Patties: Press the mixture firmly when forming the patties to prevent them from falling apart during cooking.

Secret Tips

  • Enhance Flavor: Add a dash of your favorite herbs or spices to the mixture for an extra burst of flavor. Consider options like paprika, cumin, or Italian seasoning.

Serving Options

  • Serve the Crunchy Cabbage and Carrot Patties hot as a standalone snack or appetizer.
  • Pair them with a side of yogurt-based dipping sauce or a tangy salsa for added flavor.

Variations & Customization Options

  • Spicy Twist: Add diced jalapeños or a pinch of cayenne pepper for a spicy kick.
  • Asian Fusion: Incorporate soy sauce, ginger, and sesame seeds for an Asian-inspired flavor profile.
  • Vegetarian Option: Omit the eggs and use a flaxseed meal-water mixture as a binding agent for a vegan-friendly version.

Nutritional Benefits

  • Cabbage and carrots provide essential vitamins and minerals, including vitamin C, vitamin K, and beta-carotene.
  • Rolled oats offer fiber for digestive health and slow-release energy.
  • Cheese contributes protein and calcium for bone health.
  • Peanuts provide healthy fats, protein, and essential nutrients like vitamin E and magnesium.


I hope you enjoy these Crunchy Cabbage and Carrot Patties as much as I do! With their crunchy texture, flavorful ingredients, and versatile serving options, they're sure to become a favorite snack in your household. Stay tuned for more SnackSavvy recipes coming your way!

Happy Snacking!
Sam

SnackSavy Series | Wholesome Bites for Every Craving: Spinach and Oatmeal Bites

Welcome to the SnackSavvy Series, where I'm redefining snack time with wholesome and delicious bites! My inaugural recipe, Spinach and Oatmeal Bites, combines the goodness of fresh spinach and hearty oats into irresistible bite-sized treats. Packed with nutrients and flavor, these savory bites are perfect for satisfying cravings while keeping you energized throughout the day.

Here's what you need (Ingredients):

1 cup rolled oats
1 cup fresh spinach, finely chopped
1/2 cup grated cheese (cheddar or mozzarella)
1/4 cup finely chopped onion
1 garlic clove, minced
1/4 teaspoon salt
1/4 teaspoon black pepper
2 large eggs, beaten

Preparation Time: 10 minutes
Cooking Time: 12-15 minutes
Yield: Approximately 24 Spinach and Oatmeal Bites

Now Let's Make (Instructions)

  1. Preheat your oven to 375°F (190°C). Grease a mini muffin tin or line it with paper liners.
  2. In a large mixing bowl, combine rolled oats, chopped spinach, grated cheese, chopped onion, minced garlic, salt, and black pepper.
  3. Add beaten eggs to the mixture and stir until well combined.
  4. Spoon the mixture into the prepared mini muffin tin, filling each cup about 3/4 full.
  5. Bake in the preheated oven for 12-15 minutes or until the bites are set and golden brown on top.
  6. Allow the bites to cool slightly before removing them from the muffin tin. Serve warm or at room temperature.

Pro Tips

  • Versatile Ingredients: Feel free to customize these bites with your favorite herbs or spices for extra flavor.
  • Make Ahead: These bites can be made ahead of time and stored in an airtight container in the refrigerator for up to 3 days. Simply reheat them in the oven or microwave before serving.

Secret Tips

  • Squeeze Out Moisture: If using frozen spinach, be sure to thaw it completely and squeeze out any excess moisture before adding it to the mixture. This prevents the bites from becoming too wet during baking.
  • Freezing: To extend the shelf life further, you can freeze the Spinach and Oatmeal Bites. Place them in a single layer on a baking sheet and freeze until solid. Once frozen, transfer the bites to a freezer-safe bag or container, removing as much air as possible before sealing. They can be kept frozen for up to 1-2 months.
  1. Health Benefits

    Spinach is a nutritional powerhouse, packed with vitamins A, C, and K, as well as folate, iron, and antioxidants. Its high fiber content supports digestion and helps keep you feeling full and satisfied. Oats are another nutritious ingredient, providing a good source of complex carbohydrates, fiber, and protein. Together, spinach and oats make a winning combination for a healthy snack that nourishes your body and supports overall well-being.

  1. Serving Options

  • Dipping Sauces: Serve the Spinach and Oatmeal Bites with a variety of dipping sauces to enhance their flavor. Options include marinara sauce, tzatziki, hummus, ranch dressing, or a simple yogurt-based dip flavored with herbs and spices.
  • Fresh Vegetable Crudité: Create a colorful and nutritious snack platter by serving the Spinach and Oatmeal Bites alongside an assortment of fresh vegetable crudité such as carrot sticks, cucumber slices, cherry tomatoes, and bell pepper strips. This adds crunch and freshness to balance the savory bites.
  • Mixed Green Salad: Pair the Spinach and Oatmeal Bites with a simple mixed green salad dressed with a light vinaigrette. The combination of textures and flavors makes for a satisfying and well-rounded meal or snack option.
  • Fruit Platter: Balance out the savory flavors of the Spinach and Oatmeal Bites with a refreshing fruit platter featuring seasonal fruits such as grapes, berries, melon slices, and citrus segments. The natural sweetness of the fruit complements the savory bites perfectly.
  • Soup or Salad: Serve the Spinach and Oatmeal Bites as a side dish alongside a bowl of hearty soup or a crisp green salad. This creates a balanced and satisfying meal that's perfect for lunch or dinner.
  • Brunch Spread: Include the Spinach and Oatmeal Bites as part of a brunch spread alongside other breakfast favorites such as scrambled eggs, bacon or sausage, fresh fruit, and pastries. They're also great for brunch gatherings or potluck parties.
  1. Variations & Customization Options

  • Cheesy Spinach and Oatmeal Bites: Increase the amount of grated cheese or try different varieties such as feta, Parmesan, or goat cheese for added flavor.
  • Spicy Spinach and Oatmeal Bites: Add a kick of heat by incorporating diced jalapeños, crushed red pepper flakes, or a pinch of cayenne pepper to the mixture.
  • Herb-infused Spinach and Oatmeal Bites: Enhance the flavor profile with the addition of fresh or dried herbs such as parsley, basil, thyme, or oregano. Experiment with different herb combinations to suit your taste preferences.
  • Mediterranean Spinach and Oatmeal Bites: Mix in chopped sun-dried tomatoes, black olives, and crumbled feta cheese for a Mediterranean-inspired twist.
  • Protein-packed Spinach and Oatmeal Bites: Boost the protein content by adding cooked quinoa, diced cooked chicken, or canned chickpeas to the mixture. This variation is perfect for those looking to add more protein to their diet.
  • Veggie-loaded Spinach and Oatmeal Bites: Mix in finely diced vegetables such as bell peppers, carrots, zucchini, or mushrooms for an extra dose of nutrients and flavor.
  • Sweet and Savory Spinach and Oatmeal Bites: Incorporate a touch of sweetness by adding dried cranberries or raisins to the mixture. The combination of sweet and savory flavors creates a unique and delicious snack option.
  1. Indulge in the goodness of wholesome snacking with our Spinach and Oatmeal Bites. Whether you're enjoying them on-the-go or as a satisfying afternoon pick-me-up, these bites are sure to delight your taste buds and nourish your body. Stay tuned for more SnackSavvy recipes coming your way!


    1. Happy Snacking! Sam