Turning Your Wishes into Sweet Realities, One Homemade Treat at a Time. 🌟
Showing posts with label Easy Baking Ideas. Show all posts

Tuesday, 5 November 2024

Maple Pecan Streusel Muffins

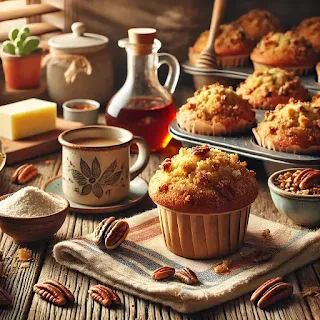
These Maple Pecan Streusel Muffins are a delightful way to bring cozy flavors to your kitchen. With warm maple undertones, a hint of cinnamon, and crunchy pecan streusel, each bite offers a comforting taste of home. Perfect with a cup of coffee or tea, they’re a lovely treat for any time of day.

Origin Story: Maple Pecan Streusel Muffins

Maple Pecan Streusel Muffins are like a cozy sweater for your taste buds—warm, comforting, and just the right amount of sweet. These muffins bring together the flavors of rich maple syrup, buttery pecans, and a crumbly streusel topping, making them perfect for chilly mornings or lazy afternoons with a hot drink in hand. The story behind these muffins is as charming as the muffins themselves, capturing the essence of a simple treat that feels like a big, warm hug.

A Muffin Born from a Sweet Accident

Legend has it that the idea for Maple Pecan Streusel Muffins came about one frosty morning in Vermont, where a young baker found herself in a bit of a breakfast crisis. She had promised her family fresh muffins, but her pantry was nearly bare. She managed to dig up some basic ingredients but was missing her usual sweeteners. The only thing left? A bottle of pure maple syrup, a local favorite.

Determined not to give up, she decided to try maple syrup as her sweetener, thinking it would add a unique twist. Just as she was mixing it in, her little brother—whose “help” often meant making a bit of a mess—accidentally tipped a bag of chopped pecans into the batter. She sighed, but, instead of removing them, she shrugged and stirred them in. The pecans would, after all, add some crunch.

To top it all off, she sprinkled a quick streusel mixture on top for a little extra flair, hoping it would make the muffins look more “intentional.” As the muffins baked, the kitchen filled with the cozy aroma of maple, butter, and toasted nuts, and she knew she was onto something special.

The Maple Pecan Craze

When her family bit into the warm, crumbly muffins, they were instantly hooked. The combination of maple’s natural sweetness, the nuttiness of pecans, and the crispy streusel topping was the stuff of breakfast legend. Word quickly spread around town, and soon everyone was asking for “those maple pecan muffins with the crumbly top.”

Before long, the recipe became a local hit, and the baker found herself making batch after batch for friends, neighbors, and eventually the town bakery. The Maple Pecan Streusel Muffins became a go-to treat for chilly days and autumn gatherings, celebrated for their comforting flavor and rustic charm.

Personal Connection

For me, these Cozy Maple Pecan Streusel Muffins aren’t just a breakfast pastry—they’re a reminder of the warmth that simple ingredients can bring. The way the maple syrup caramelizes slightly during baking, the buttery pecans adding a satisfying crunch, and that streusel… well, it’s just the cherry on top (or, in this case, the crumble on top).

Whenever I bake these muffins, I’m reminded of the magic that happens when you embrace imperfections and make the best of what you have. They’re the kind of muffin that doesn’t need a fancy occasion—just a cool morning, a hot drink, and maybe someone special to share them with.

Ingredients

✅Muffins:

  • 1 3/4 cups all-purpose flour
  • 1/2 cup granulated sugar
  • 1/4 cup brown sugar
  • 1 teaspoon baking powder
  • 1/2 teaspoon baking soda
  • 1/4 teaspoon salt
  • 1/2 teaspoon cinnamon
  • 1/2 cup unsalted butter, melted
  • 1/2 cup maple syrup
  • 2 large eggs
  • 1 teaspoon vanilla extract
  • 1/2 cup whole milk

✅Streusel Topping:

  • 1/4 cup all-purpose flour
  • 1/4 cup brown sugar
  • 1/2 teaspoon cinnamon
  • 1/4 cup chopped pecans
  • 2 tablespoons cold butter, cut into small pieces

Recipe Details

  • Preparation Time: 15 minutes
  • Baking Time: 18-20 minutes
  • Yield: 12 muffins

Instructions

  1. Preheat Oven and Prepare Muffin Tin: Preheat your oven to 375°F (190°C) and line a 12-cup muffin tin with paper liners.

  2. Prepare Streusel: In a small bowl, combine the flour, brown sugar, cinnamon, and pecans. Add the cold butter and mix until crumbly. Set aside.

  3. Mix Dry Ingredients: In a large bowl, whisk together flour, granulated sugar, brown sugar, baking powder, baking soda, salt, and cinnamon.

  4. Combine Wet Ingredients: In a separate bowl, whisk the melted butter, maple syrup, eggs, vanilla extract, and milk until smooth.

  5. Combine Wet and Dry Mixtures: Pour the wet ingredients into the dry ingredients, stirring until just combined. Be careful not to overmix.

  6. Fill Muffin Cups: Divide the batter evenly among the muffin cups, filling each about two-thirds full. Sprinkle the streusel topping over each muffin.

  7. Bake: Bake in the preheated oven for 18-20 minutes or until a toothpick inserted in the center comes out clean.

  8. Cool and Serve: Allow the muffins to cool in the pan for a few minutes, then transfer to a wire rack. Enjoy warm or at room temperature!

Pro Tips

  • Room Temperature Ingredients: Ensure ingredients like eggs and milk are at room temperature for the best texture.
  • Double the Streusel: Love a lot of topping? Double the streusel recipe for extra crunch.

Serving Options

  • With Butter: Serve with a light spread of butter for extra richness.
  • Maple Glaze: Drizzle with a simple maple glaze for extra sweetness.

Health Benefits

  • Pecans: A great source of healthy fats and antioxidants.
  • Maple Syrup: A natural sweetener, rich in minerals and antioxidants.

Variations

  • Nut-Free: Substitute pecans with rolled oats for a crunchy oat topping.
  • Gluten-Free: Use a gluten-free flour blend for the muffin base.
These Maple Pecan Streusel Muffins are a true embodiment of cozy baking, combining the natural sweetness of maple syrup with the satisfying crunch of pecan streusel. With their warm flavors and inviting aroma, they’re perfect for any occasion, whether it’s a relaxed morning with family or a treat to share with friends. Each bite offers a balance of soft, moist cake and a crumbly topping that makes these muffins irresistibly comforting. So, gather your ingredients, warm up the oven, and let these muffins bring a touch of joy and warmth to your day. Enjoy every bite, and don’t forget to share the love!

Happy Baking!
Sam

Tuesday, 1 October 2024

Tropical Bliss Coconut Macaroons

Transport yourself to a tropical paradise with these delightful Tropical Bliss Coconut Macaroons! Light, chewy, and full of sweet coconut flavor, these macaroons are the perfect treat for any occasion. Whether you’re hosting a party, looking for a simple dessert, or just want to indulge, these macaroons will quickly become a favorite. With their golden exterior and soft, melt-in-your-mouth center, they offer a little bite of tropical bliss in every bite.

Origin Story: Coconut Macaroons

Coconut Macaroons are delightful, chewy treats with a tropical twist, combining the sweetness of coconut with a light, crispy exterior. These cookies have a history that is both rich and surprising, with origins that span across cultures. The evolution of coconut macaroons from a humble, simple confection to a beloved global treat reflects a story of exploration, creativity, and the joy of discovering new flavors.

Historical Roots

Macaroons, in their earliest form, originated in Italy during the 9th century as part of the culinary repertoire of monasteries. The word “macaroon” is derived from the Italian word maccarone, which means paste, and it originally referred to the ground almonds that were used to make these light, chewy cookies. These early versions of macaroons were almond-based and similar to what we now know as amaretti.

As the recipe spread across Europe, it became particularly popular among Jewish communities because it did not require flour or leavening agents, making it an ideal dessert for Passover. It wasn’t until the recipe traveled to France and then across the Atlantic to the Americas that the use of coconut as a substitute for almonds became common.

The arrival of coconut in Europe and North America, brought by explorers and traders from tropical regions, introduced a new and exciting ingredient to bakers. Coconut was praised for its unique flavor, long shelf life, and ability to add moisture to recipes. Coconut macaroons soon emerged as a variation of the original almond-based cookie, offering a tropical twist to this centuries-old dessert.

A New Twist: Coconut Macaroons’ Global Journey

As coconut macaroons began to spread across continents, they evolved into a symbol of creativity and cultural fusion. In the Caribbean, where coconuts were plentiful, local bakers embraced the recipe, adding their own tropical flair. These coconut macaroons, often baked to perfection under the warm island sun, became a favorite treat at beachside cafés and family gatherings, symbolizing relaxation and celebration.

In other parts of the world, coconut macaroons became a delicate dessert served at elegant tea parties or enjoyed as a quick snack at bustling street markets. The versatility of the recipe allowed it to adapt to different tastes and occasions, making it a universal favorite.

Personal Connection

For me, the inspiration to bake coconut macaroons came from a desire to combine my love for travel and discovery with the comforts of home baking. The first time I tried coconut macaroons was on a beach vacation, where I tasted a version of the cookie that was crisp on the outside, soft on the inside, and bursting with the sweet flavor of coconut. It was unlike anything I had tried before, and I was instantly hooked.

Back home, I experimented with different variations of the recipe, incorporating fresh shredded coconut and adding a touch of vanilla to enhance the natural sweetness. The process of whipping egg whites to give the macaroons their light, airy texture became almost therapeutic, reminding me of the carefree days spent on the beach. With each bite of the macaroons, I was transported back to the sunshine and sea breeze, and I knew I had found something special.

Recipe Evolution

Creating the perfect Coconut Macaroons involves a few essential steps. Using high-quality shredded coconut is key to achieving the right texture—moist but not overly wet. The combination of coconut with egg whites, sugar, and a hint of vanilla creates a batter that is light, chewy, and delicately sweet.

To add a personal twist, some bakers dip their macaroons in melted chocolate or drizzle them with caramel, elevating the simple cookie into a gourmet treat. Others might sprinkle a bit of sea salt on top to balance the sweetness and enhance the flavors.

The beauty of coconut macaroons lies in their simplicity and adaptability. Whether enjoyed plain, with a chocolate coating, or even with a hint of citrus zest for a refreshing touch, these cookies are a blank canvas for creativity.

Sharing the Tradition

Today, Coconut Macaroons are a favorite in my household, especially when I want to bring a taste of the tropics into my kitchen. They are the cookies I bake when I want to share something light, sweet, and filled with warmth and adventure. Each bite is a reminder of the joy of exploring new flavors and the happiness that comes from creating something simple yet special.

Ingredients

  • 3 cups sweetened shredded coconut
  • 1/2 cup sweetened condensed milk
  • 1 teaspoon vanilla extract
  • 2 large egg whites
  • 1/4 teaspoon salt
  • 1/2 cup semi-sweet chocolate chips (optional for dipping)

Recipe Details

  • Preparation Time: 10 minutes
  • Cooking Time: 20-25 minutes
  • Yield: 24 macaroons

Instructions

  1. Preheat and Prepare: Preheat your oven to 325°F (165°C). Line a baking sheet with parchment paper.

  2. Mix the Coconut Base: In a large mixing bowl, combine the shredded coconut, sweetened condensed milk, and vanilla extract. Stir until the mixture is well combined and evenly coated.

  3. Whip the Egg Whites: In a separate bowl, beat the egg whites and salt until stiff peaks form. Gently fold the whipped egg whites into the coconut mixture until fully combined.

  4. Shape the Macaroons: Use a small cookie scoop or spoon to drop rounded spoonfuls of the coconut mixture onto the prepared baking sheet, leaving about an inch between each macaroon.

  5. Bake: Bake in the preheated oven for 20-25 minutes, or until the tops are golden brown and the edges are crispy.

  6. Cool and Dip (Optional): Allow the macaroons to cool on the baking sheet for 5 minutes, then transfer to a wire rack to cool completely. If desired, melt the chocolate chips and dip the bottoms of the macaroons in the chocolate, then place them back on the wire rack to set.

Pro Tips

  • Shape Consistency: Use a cookie scoop for evenly shaped macaroons.
  • Prevent Sticking: Ensure the baking sheet is well-lined to prevent the macaroons from sticking.
  • Egg Whites: Make sure the egg whites are beaten to stiff peaks for the best texture.

Secret Tips

  • Flavor Boost: Add a teaspoon of almond extract for a subtle nutty flavor.
  • Tropical Twist: Add finely chopped dried pineapple or mango to the coconut mixture for an extra tropical kick.

Serving Options

  • With Coffee or Tea: Serve with a warm cup of coffee or tea for a delightful treat.
  • With Ice Cream: Enjoy with a scoop of vanilla or coconut ice cream for a tropical dessert.
  • Gift Idea: Package these macaroons in a decorative tin for a beautiful homemade gift.

Health Benefits

  • Coconut: Packed with healthy fats and fiber, coconut adds a natural sweetness and texture.
  • Gluten-Free: These macaroons are naturally gluten-free, making them a great option for those with gluten sensitivities.

Variations & Customization Options

  • Chocolate Lovers: Drizzle or dip in dark chocolate for a decadent version.
  • Nutty Delight: Fold in some finely chopped almonds or pecans for added crunch.
  • Fruit-Infused: Add dried cranberries or apricots for a fruity variation.


These Tropical Bliss Coconut Macaroons are a heavenly treat that combines the sweetness of coconut with a light, airy texture. Whether you enjoy them plain or dipped in chocolate, they’re sure to bring a little piece of paradise to your kitchen. Perfect for any occasion or just to satisfy your sweet tooth, these macaroons will be a hit wherever they go!

Happy Baking!

Sam

Monday, 30 September 2024

Unique Lemon Crinkle Cookies with a Coconut Twist

 Lemon Crinkle Cookies are a zesty and refreshing treat, but we’re taking them to the next level by adding a coconut twist! These cookies combine the tangy flavor of lemon with the subtle sweetness of coconut, creating a soft, chewy cookie with a crinkled, powdered sugar exterior. Perfect for any occasion, these cookies are sure to become a favorite with their unique blend of flavors.

Origin Story: Lemon Crinkle Cookies

Lemon Crinkle Cookies are a burst of sunshine in every bite, combining the brightness of fresh lemon zest with a soft, chewy texture. These cookies are not only a delightful treat but also carry a story of inspiration, family, and the joy of creating something special from the simplest ingredients. What makes them truly captivating is their unique crinkled appearance, achieved by rolling the dough in powdered sugar before baking, allowing cracks to form as the cookies puff up in the oven.

Historical Roots

Though citrus fruits have been cultivated for thousands of years, lemons became particularly popular in European and American kitchens in the 18th and 19th centuries. Their tangy flavor added a refreshing contrast to sweet desserts, and their zest and juice were often used to balance the richness of butter, cream, and sugar. Cookies, a relatively simple and affordable dessert, became the perfect canvas for experimenting with these bright flavors.

The crinkle effect in baking originated as a simple way to add texture and visual appeal to soft cookies. This technique became popular in recipes like chocolate crinkle cookies, where the powdered sugar highlights the cracks on the cookie’s surface. Applying this technique to lemon-flavored cookies resulted in the delightful Lemon Crinkle Cookie—a blend of tartness and sweetness wrapped in a visually striking appearance.

Cultural Significance

Lemon Crinkle Cookies have found their place in modern baking culture, particularly during the spring and summer months when citrus flavors are at their peak. They are often associated with family gatherings, garden parties, and holiday celebrations, where their refreshing flavor provides a light, uplifting dessert option.

These cookies symbolize a balance between tradition and innovation. Their method, rooted in old-world baking techniques, combines with the fresh, zesty flavor of lemon, making them a favorite for those who seek both comfort and adventure in their baking. The crinkle effect, while simple, adds an artisanal touch, making each cookie feel like a small work of art.

Personal Connection

My personal connection to Lemon Crinkle Cookies began on a warm spring day when I was searching for a dessert that would capture the fresh, bright feeling of the season. I had a bowl of lemons on my kitchen counter, their vibrant yellow skin catching the sunlight, and I knew I wanted to create something that would embody the happiness and renewal that spring brings.

Experimenting in the kitchen, I decided to adapt a family recipe for chocolate crinkle cookies, substituting the rich cocoa with the refreshing flavor of lemon. As I rolled the dough in powdered sugar and watched the cookies bake, I was mesmerized by the way the crinkles formed, giving the cookies a beautiful, rustic appearance.

The moment I tasted the first cookie, I knew I had created something special. The tangy lemon flavor, combined with the soft, chewy texture and the delicate sweetness of the powdered sugar, was a perfect balance. From that day forward, Lemon Crinkle Cookies became a go-to recipe for family gatherings, especially when I wanted to share something bright, fresh, and full of love.

Recipe Evolution

The success of Lemon Crinkle Cookies lies in their simplicity and the quality of their ingredients. Fresh lemon zest and juice are essential for achieving the bold citrus flavor that makes these cookies stand out. The dough should be soft and pliable, made with a combination of flour, butter, sugar, and eggs, creating the ideal base for the crinkles to form during baking.

The key to achieving the crinkle effect is rolling the dough balls generously in powdered sugar before placing them on the baking sheet. As the cookies bake, the dough expands, and cracks naturally form on the surface, revealing the bright yellow dough underneath.

For an extra touch of sophistication, some bakers add a hint of vanilla or almond extract to the dough, complementing the lemon flavor. The cookies are baked until just set, resulting in a soft, chewy texture with a light, crisp exterior.

Sharing the Tradition

Today, Lemon Crinkle Cookies are a beloved treat in my household, especially during the spring and summer months. They are the cookies I bake when I want to brighten someone’s day with a fresh, homemade treat. Each bite is a reminder of the simple joys of baking and the happiness that comes from sharing something special with those we care about.

Ingredients

  • 1 3/4 cups all-purpose flour
  • 1/2 teaspoon baking powder
  • 1/4 teaspoon baking soda
  • 1/4 teaspoon salt
  • 1/2 cup unsweetened shredded coconut
  • 1/2 cup unsalted butter, softened
  • 1 cup granulated sugar
  • 1 large egg
  • 1 tablespoon lemon zest
  • 1 tablespoon freshly squeezed lemon juice
  • 1/2 teaspoon vanilla extract
  • 1/2 teaspoon coconut extract (optional)
  • 1/2 cup powdered sugar (for rolling)

Recipe Details

  • Preparation Time: 15 minutes
  • Chilling Time: 30 minutes
  • Cooking Time: 10-12 minutes
  • Yield: 24 cookies

Instructions

  1. Preheat and Prepare: Preheat your oven to 350°F (175°C). Line a baking sheet with parchment paper.

  2. Mix Dry Ingredients: In a medium bowl, whisk together the flour, baking powder, baking soda, salt, and shredded coconut.

  3. Cream Butter and Sugar: In a large mixing bowl, cream the softened butter and granulated sugar until light and fluffy. Beat in the egg, lemon zest, lemon juice, vanilla extract, and coconut extract (if using).

  4. Combine Wet and Dry Ingredients: Gradually add the dry ingredients to the wet ingredients, mixing until just combined. Chill the dough for at least 30 minutes.

  5. Form and Coat: Roll the chilled dough into 1-inch balls. Roll each ball in powdered sugar until fully coated. Place the cookies on the prepared baking sheet about 2 inches apart.

  6. Bake: Bake in the preheated oven for 10-12 minutes, or until the edges are set and the tops are crinkled. The centers should remain soft.

  7. Cool and Serve: Allow the cookies to cool on the baking sheet for 5 minutes before transferring them to a wire rack to cool completely.

Pro Tips

  • Chill the Dough: Chilling the dough helps prevent the cookies from spreading too much, giving them that perfect crinkle effect.
  • Roll Generously: Be generous with the powdered sugar coating to ensure a beautiful crinkled appearance after baking.

Secret Tips

  • Extra Lemon Flavor: Add a teaspoon of lemon extract for an extra zesty kick.
  • Coconut Boost: For even more coconut flavor, toast the shredded coconut lightly before adding it to the dough.

Serving Options

  • With Tea or Lemonade: Serve these cookies with a cup of tea or a refreshing glass of lemonade for a perfect pairing.
  • With Ice Cream: Sandwich two cookies together with a scoop of vanilla or coconut ice cream for a delightful dessert.
  • Gift Idea: Package these cookies in a decorative tin or jar for a thoughtful homemade gift.

Health Benefits

  • Lemon: Rich in vitamin C, lemons offer a refreshing boost and natural flavor.
  • Coconut: Provides healthy fats and a natural sweetness without needing too much added sugar.

Variations & Customization Options

  • Lemon-Lime Crinkle Cookies: Swap half the lemon juice and zest for lime for a citrus twist.
  • Gluten-Free: Use a gluten-free flour blend to make these cookies suitable for gluten-sensitive guests.
  • Vegan: Substitute the butter with coconut oil and the egg with a flax egg for a vegan version.


These Lemon Crinkle Cookies with a Coconut Twist are the perfect blend of tangy and sweet, with a unique coconut flavor that sets them apart from the traditional recipe. Whether you're baking them for a party, a gift, or just for fun, these cookies are sure to impress!

Thursday, 18 July 2024

Sweet Potato Chocolate Chip Muffins

Welcome to a delightful twist on a classic treat with our Sweet Potato Chocolate Chip Muffins! These muffins are the perfect blend of health and indulgence, bringing together the earthy sweetness of mashed sweet potatoes and the rich decadence of chocolate chips. Ideal for breakfast, a snack, or dessert, these muffins are moist, flavorful, and sure to satisfy your sweet tooth while providing a nutritious boost. Whether you’re a seasoned baker or a kitchen novice, this recipe is easy to follow and bound to become a household favorite. Enjoy baking and savoring these deliciously unique muffins!

Origin Story: Sweet Potato Chocolate Chip Muffins

Sweet Potato Chocolate Chip Muffins are a delightful fusion of wholesome sweet potatoes and rich chocolate chips, creating a unique and flavorful treat. This recipe was inspired by the desire to combine nutritious ingredients with indulgent flavors, making it a perfect choice for breakfast, snack, or dessert. The inspiration behind these muffins came from the need to create something new, healthy, and appealing, especially for children who may be picky eaters.

Historical Roots

The sweet potato, native to Central and South America, has been a staple food for thousands of years. It was domesticated over 5,000 years ago and later introduced to Europe and Asia by explorers in the 15th and 16th centuries. Sweet potatoes are rich in vitamins, minerals, and fiber, making them a popular ingredient in many cuisines worldwide.

The concept of combining sweet potatoes with chocolate is relatively modern, reflecting the growing trend of incorporating vegetables into sweet treats. This practice not only enhances the nutritional value of desserts but also introduces new and exciting flavor combinations. The idea of sweet potato muffins likely evolved from traditional sweet potato pie and bread recipes, adapting to the convenience and portability of muffins.

Cultural Significance

Sweet Potato Chocolate Chip Muffins hold a special place in contemporary baking, reflecting the trend towards healthier and more inventive recipes. They are particularly popular among health-conscious individuals and families looking to introduce more vegetables into their diet without sacrificing taste.

These muffins represent the fusion of comfort food with a modern twist, making them a favorite for various occasions. They are often enjoyed during the fall and winter months when sweet potatoes are in season, but their appeal extends year-round. The combination of sweet potatoes and chocolate chips creates a balance of sweetness and richness, making these muffins a versatile and beloved treat.

Personal Connection

My journey with Sweet Potato Chocolate Chip Muffins began with the challenge of finding nutritious yet delicious snacks for my family, particularly my young daughter. As a parent, I wanted to ensure she enjoyed eating vegetables and received essential nutrients. Sweet potatoes, with their natural sweetness and creamy texture, seemed like the perfect ingredient to incorporate into a muffin.

Experimenting in the kitchen, I discovered that combining mashed sweet potatoes with whole wheat flour and natural sweeteners created a moist and flavorful base for muffins. Adding chocolate chips provided a touch of indulgence that made the muffins irresistible to both children and adults.

Recipe Evolution

Creating the perfect Sweet Potato Chocolate Chip Muffins involves a few key steps. Using fresh, roasted sweet potatoes ensures the best flavor and texture. The sweet potatoes should be mashed until smooth and mixed with whole wheat flour, eggs, and a touch of honey or maple syrup for sweetness.

Incorporating spices like cinnamon and nutmeg enhances the natural sweetness of the sweet potatoes and adds warmth to the muffins. The addition of dark chocolate chips provides a delightful contrast, making each bite a blend of wholesome and indulgent flavors.

Baking the muffins at the right temperature ensures they rise well and develop a golden brown crust. Allowing them to cool slightly before serving helps the flavors to meld and the muffins to set perfectly.

Sharing the Tradition

Today, Sweet Potato Chocolate Chip Muffins are a favorite in my household, especially for breakfast and snack time. They are the muffins I bake when I want to offer a nutritious and delicious treat that appeals to everyone, from picky eaters to health enthusiasts. Each bite is a celebration of creativity in the kitchen and the joy of making nutritious food fun and appealing.

Ingredients

  • 1 1/2 cups all-purpose flour
  • 1 teaspoon baking powder
  • 1/2 teaspoon baking soda
  • 1/2 teaspoon salt
  • 1 teaspoon ground cinnamon
  • 1/2 teaspoon ground nutmeg
  • 1 cup mashed sweet potatoes (cooked and cooled)
  • 1/2 cup granulated sugar
  • 1/4 cup brown sugar
  • 1/3 cup vegetable oil
  • 2 large eggs
  • 1 teaspoon vanilla extract
  • 1/2 cup milk
  • 1 cup chocolate chips

Recipe Duration

  • Preparation Time: 15 minutes
  • Cooking Time: 20-25 minutes
  • Yield: 12 muffins

Instructions

  1. Preheat and Prepare Pan: Preheat your oven to 350°F (175°C). Grease a 12-cup muffin tin or line with paper liners.

  2. Mix Dry Ingredients: In a medium bowl, whisk together the flour, baking powder, baking soda, salt, cinnamon, and nutmeg.

  3. Combine Wet Ingredients: In a large bowl, beat the mashed sweet potatoes, granulated sugar, brown sugar, and vegetable oil until well combined. Add the eggs, one at a time, beating well after each addition. Stir in the vanilla extract and milk.

  4. Combine Wet and Dry Ingredients: Gradually add the dry ingredients to the wet ingredients, mixing until just combined. Fold in the chocolate chips.

  5. Fill Muffin Cups and Bake: Divide the batter evenly among the muffin cups, filling each about two-thirds full. Bake in the preheated oven for 20-25 minutes, or until a toothpick inserted into the center comes out clean.

  6. Cool and Serve: Allow the muffins to cool in the tin for 5 minutes, then transfer to a wire rack to cool completely.

Pro Tips

  • Mashed Sweet Potatoes: Ensure the sweet potatoes are well mashed for a smooth batter.
  • Don’t Overmix: Mix until just combined to keep the muffins light and fluffy.

Serving Options

  • With Butter: Serve warm with a pat of butter.
  • With Honey: Drizzle honey over the muffins for added sweetness.
  • With Coffee: Enjoy with a hot cup of coffee for a perfect pairing.

Health Benefits

  • Sweet Potatoes: Rich in vitamins A and C, and fiber.
  • Chocolate Chips: Adds a delightful indulgence to the muffins.

Variations & Customization Options

  • Nutty Delight: Add 1/2 cup of chopped pecans or walnuts for extra crunch.
  • Cranberry Twist: Fold in 1/2 cup of dried cranberries for a tart contrast.

These Sweet Potato Chocolate Chip Muffins are a unique and delicious treat that combines the best of sweet potatoes and chocolate. Perfect for any time of day, they are sure to become a favorite in your household. Enjoy the delightful flavors and happy baking!

Tuesday, 2 July 2024

Children-Friendly Healthy Peanut Butter Chocolate Muffins

 These Peanut Butter Chocolate Muffins are a healthy and delicious treat perfect for kids. Packed with nutritious ingredients and a delightful combination of peanut butter and chocolate, these muffins are sure to be a hit with children and adults alike.

Origin Story: Peanut Butter Chocolate Muffins

Creating Children-Friendly Healthy Peanut Butter Chocolate Muffins was inspired by the need to find a nutritious and enticing treat for my three-year-old daughter, who was going through a stage of rejecting any food put in front of her. These muffins are designed to be delicious, healthy, and appealing to young children, making meal times a joy rather than a struggle.

Historical Roots

The combination of peanut butter and chocolate has been a beloved pairing for decades, celebrated for its perfect balance of sweet and salty flavors. Peanut butter, a staple in many households, is rich in protein, healthy fats, and essential vitamins. It became widely popular in the early 20th century and has since been used in a variety of recipes.

The modern concept of muffins, particularly the American-style muffin, began to take shape in the 19th century. Unlike their English counterparts, which are yeast-based and cooked on a griddle, American muffins are quick breads leavened with baking powder or baking soda and baked in individual molds. Combining the appeal of muffins with the nutritious benefits of peanut butter and the delightful taste of chocolate results in a treat that is both wholesome and irresistible to children.

Cultural Significance

Peanut Butter Chocolate Muffins hold a special place in American baking culture, often associated with comfort and nostalgia. They are popular among both adults and children, making them a versatile treat for various occasions. The addition of healthy ingredients transforms this classic dessert into a nutritious option suitable for young children.

This recipe reflects the modern trend towards healthier eating, especially for children. Parents increasingly seek out recipes that are both nutritious and appealing to their little ones, aiming to instill healthy eating habits from a young age.

Personal Connection

My journey with Children-Friendly Healthy Peanut Butter Chocolate Muffins began with my desire to create a new and exciting food option for my three-year-old daughter. Like many toddlers, she was going through a phase of rejecting most foods, making meal times challenging. I wanted to find a way to incorporate healthy ingredients into something she would find fun and delicious.

Experimenting in the kitchen, I discovered that combining her favorite flavors—peanut butter and chocolate—into a muffin form was a winning strategy. By using whole wheat flour, natural sweeteners, and adding a touch of honey, I was able to create a muffin that was not only tasty but also packed with nutrition.

Recipe Evolution

Creating the perfect Children-Friendly Healthy Peanut Butter Chocolate Muffins involves a few key steps. Using whole wheat flour or a combination of whole wheat and oat flour ensures a wholesome base. Natural sweeteners like honey or maple syrup add a touch of sweetness without the need for refined sugar.

Incorporating mashed bananas or applesauce helps to keep the muffins moist and adds natural sweetness, making them more appealing to young children. The addition of dark chocolate chips provides just enough chocolate flavor to make the muffins feel like a treat.

To enhance the nutritional profile, ingredients like ground flaxseed or chia seeds can be added for extra fiber and omega-3 fatty acids. These additions help create a balanced snack that parents can feel good about serving.

Sharing the Tradition

Today, Children-Friendly Healthy Peanut Butter Chocolate Muffins are a favorite in our household. They are the muffins I bake when I want to offer a healthy snack that my daughter will eagerly eat. Each bite is a celebration of creativity in the kitchen and the joy of making nutritious food fun and appealing for children.

Ingredients

  • 1 cup whole wheat flour
  • 1/2 cup rolled oats
  • 1 teaspoon baking powder
  • 1/2 teaspoon baking soda
  • 1/4 teaspoon salt
  • 1/2 cup natural peanut butter
  • 1/4 cup honey or maple syrup
  • 1/4 cup unsweetened applesauce
  • 1 large egg
  • 1 teaspoon vanilla extract
  • 3/4 cup milk (dairy or non-dairy)
  • 1/2 cup mini dark chocolate chips

Recipe Duration

  • Preparation: 15 minutes
  • Cooking: 18-20 minutes
  • Yield: 12 muffins

Instructions

  1. Preheat your oven to 350°F (175°C). Line a 12-cup muffin tin with paper liners.
  2. In a large bowl, whisk together the whole wheat flour, rolled oats, baking powder, baking soda, and salt.
  3. In another bowl, mix the peanut butter, honey or maple syrup, unsweetened applesauce, egg, and vanilla extract until smooth.
  4. Add the wet ingredients to the dry ingredients and mix until just combined. Gradually add the milk, stirring until the batter is smooth. Fold in the mini dark chocolate chips.
  5. Divide the batter evenly among the muffin cups, filling each about two-thirds full.
  6. Bake in the preheated oven for 18-20 minutes, or until a toothpick inserted into the center comes out clean.
  7. Allow the muffins to cool in the tin for 5 minutes, then transfer to a wire rack to cool completely.

Pro Tips

  • Don’t Overmix: Mix until just combined to keep the muffins light and fluffy.
  • Natural Sweeteners: Use honey or maple syrup as healthier alternatives to refined sugar.
  • Extra Moisture: Ensure the applesauce is unsweetened for added moisture without extra sugar.

Secret Tips

  • Boost Flavor: Add a pinch of cinnamon for an extra layer of flavor.
  • Health Boost: Incorporate a tablespoon of chia seeds or flaxseeds for added nutrition.

Serving Options

  • With Milk: Serve with a glass of milk for a wholesome snack.
  • With Fruit: Pair with fresh fruit for a balanced breakfast.
  • With Yogurt: Enjoy with a side of yogurt for added protein.

Health Benefits

  • Whole Wheat Flour: Provides fiber and nutrients.
  • Oats: High in fiber and good for heart health.
  • Peanut Butter: Adds protein and healthy fats.

Variations & Customization Options

  • Banana Peanut Butter: Add 1 mashed banana for extra sweetness and moisture.
  • Berry Delight: Fold in 1/2 cup of fresh or frozen berries.
  • Nut-Free: Use sunflower seed butter as a peanut butter alternative.


These Children-Friendly Healthy Peanut Butter Chocolate Muffins are a delightful and nutritious option for any time of day. Easy to make and loved by kids, they are sure to become a family favorite. Happy baking!

Monday, 1 July 2024

Blueberry Bundt Cake

This Blueberry Bundt Cake is a delightful and elegant dessert perfect for any occasion. It features a moist, tender crumb studded with juicy blueberries and a hint of lemon zest. Topped with a sweet lemon glaze, this cake is sure to impress your friends and family.

Origin Story: Blueberry Bundt Cake

Blueberry Bundt Cake is a delightful dessert that combines the sweetness of blueberries with the rich, moist texture of a bundt cake. This cake is perfect for special occasions, family gatherings, or simply as a treat to enjoy with a cup of coffee. The unique shape of the bundt cake, along with the vibrant burst of blueberries, makes this dessert both visually appealing and delicious.

Historical Roots

The Bundt cake, with its distinctive ring shape, has its origins in Europe, particularly Germany and Austria, where cakes baked in similar ring-shaped pans were known as "Gugelhupf." These cakes were often yeast-based and filled with nuts, fruit, and sometimes liquor.

The Bundt pan as we know it today was popularized in the United States in the 1950s and 1960s. The pan's design was patented by H. David Dalquist, the founder of Nordic Ware, who created it at the request of the Minneapolis chapter of the Hadassah Society. The pan gained immense popularity after a "Tunnel of Fudge" cake recipe won second place in the 1966 Pillsbury Bake-Off, resulting in a surge in demand for Bundt pans.

Blueberries, native to North America, have been enjoyed by indigenous peoples for centuries and became widely cultivated in the 20th century. The combination of blueberries and Bundt cake is a relatively modern invention, celebrating the freshness of blueberries within the classic structure of a Bundt cake.

Cultural Significance

Blueberry Bundt Cake holds a special place in American baking culture, particularly in regions where blueberries are abundant. It is often associated with summer, when blueberries are in season, and is a favorite for summer picnics, Fourth of July celebrations, and other warm-weather gatherings.

The Bundt cake's unique shape and ease of slicing make it ideal for serving at parties and events. The addition of blueberries adds a burst of color and flavor, making the cake not only delicious but also visually stunning.

Personal Connection

My journey with Blueberry Bundt Cake began with a desire to create a show-stopping dessert for a family reunion. I wanted something that combined the fresh, sweet flavor of blueberries with a cake that was easy to serve and enjoyed by all ages. The Bundt cake, with its beautiful shape and moist texture, seemed like the perfect choice.

Experimenting in the kitchen, I found that incorporating fresh blueberries into the batter and adding a lemon glaze elevated the cake's flavor profile. The result was a moist, tender cake with pockets of juicy blueberries and a zesty finish that delighted everyone at the reunion.

Recipe Evolution

Creating the perfect Blueberry Bundt Cake involves a few key steps. Using fresh, ripe blueberries ensures the best flavor and texture. Coating the blueberries in a bit of flour before folding them into the batter helps prevent them from sinking to the bottom of the cake.

The cake batter should be rich and moist, achieved by using a combination of butter, sugar, eggs, and buttermilk or yogurt. Adding lemon zest to the batter enhances the flavor, providing a subtle contrast to the sweetness of the blueberries.

Baking the cake in a well-greased and floured Bundt pan ensures it releases easily after baking. A lemon glaze, drizzled over the cooled cake, adds a touch of sweetness and a beautiful finish.

Sharing the Tradition

Today, Blueberry Bundt Cake is a favorite in my household, especially during blueberry season. It is the cake I bake when I want to impress guests with a beautiful and delicious dessert. Each slice is a reminder of the joy of baking and the simple pleasures of fresh, seasonal ingredients.

Ingredients

✅For the Cake:

  • 2 1/2 cups all-purpose flour
  • 2 teaspoons baking powder
  • 1/2 teaspoon baking soda
  • 1/2 teaspoon salt
  • 1 cup unsalted butter, softened
  • 1 1/2 cups granulated sugar
  • 3 large eggs
  • 1 teaspoon vanilla extract
  • Zest of 1 lemon
  • 1 cup buttermilk
  • 2 cups fresh blueberries (tossed with 1 tablespoon flour)

For the Lemon Glaze:

  • 1 cup powdered sugar
  • 2-3 tablespoons lemon juice

Recipe Duration

  • Preparation Time: 20 minutes
  • Cooking Time: 55-60 minutes
  • Yield: 12 servings

Instructions

  1. Preheat and Prepare Pan: Preheat your oven to 350°F (175°C). Grease and flour a Bundt pan.

  2. Mix Dry Ingredients: In a medium bowl, whisk together the flour, baking powder, baking soda, and salt.

  3. Cream Butter and Sugar: In a large mixing bowl, beat the butter and granulated sugar until light and fluffy. Add the eggs one at a time, beating well after each addition. Mix in the vanilla extract and lemon zest.

  4. Combine Wet and Dry Ingredients: Alternately add the flour mixture and buttermilk to the butter mixture, beginning and ending with the flour mixture. Mix until just combined. Gently fold in the blueberries.

  5. Fill Bundt Pan: Pour the batter into the prepared Bundt pan, spreading it evenly.

  6. Bake: Bake in the preheated oven for 55-60 minutes, or until a toothpick inserted into the center comes out clean. Allow the cake to cool in the pan for 10 minutes, then transfer to a wire rack to cool completely.

  7. Make the Lemon Glaze: In a small bowl, whisk together the powdered sugar and lemon juice until smooth. Adjust the consistency by adding more lemon juice if necessary.

  8. Glaze the Cake: Once the cake is completely cool, drizzle the lemon glaze over the top, allowing it to drip down the sides.

Pro Tips

  1. Toss Blueberries in Flour: Prevent blueberries from sinking by tossing them in a tablespoon of flour.
  2. Room Temperature Ingredients: Use room temperature ingredients for a smoother batter.
  3. Avoid Overmixing: Mix the batter until just combined to avoid a dense cake.
  4. Test for Doneness: Check for doneness with a toothpick; it should come out clean.
  5. Cool Completely Before Glazing: Ensure the cake is completely cool before adding the glaze to prevent it from melting.

Secret Tips

  1. Extra Moisture: Add a tablespoon of sour cream for extra moisture.
  2. Flavor Boost: Add a teaspoon of almond extract for an extra layer of flavor.
  3. Berry Variation: Use a mix of berries like raspberries and blackberries for a different twist.

Serving Options

  1. With Whipped Cream: Serve with a dollop of whipped cream.
  2. With Ice Cream: Pair with a scoop of vanilla ice cream.
  3. With Fresh Berries: Garnish with fresh blueberries and mint leaves.
  4. With Lemon Curd: Add a spoonful of lemon curd on the side.
  5. With Tea or Coffee: Enjoy with a hot cup of tea or coffee.

Health Benefits

  • Blueberries: Rich in antioxidants and vitamins.
  • Lemon: Provides vitamin C and a refreshing flavor.
  • Buttermilk: Adds a tangy flavor and moisture.

Variations & Customization Options

  1. Gluten-Free: Use gluten-free flour.
  2. Vegan: Substitute eggs with flax eggs and use dairy-free milk.
  3. Nutty Twist: Add 1/2 cup of chopped nuts to the batter.
  4. Spiced Up: Add a teaspoon of cinnamon or nutmeg for a warm spice flavor.
  5. Chocolate Lovers: Fold in 1/2 cup of chocolate chips for a sweet treat.


This Blueberry Bundt Cake is a delicious and beautiful dessert that's perfect for any occasion. With its moist crumb, juicy blueberries, and tangy lemon glaze, it's sure to be a hit with everyone. 

Happy baking!
Sam