Turning Your Wishes into Sweet Realities, One Homemade Treat at a Time. 🌟
Showing posts with label SnackSavy Series. Show all posts

Friday, 28 June 2024

SnackSavy Series | Unique Zucchini Muffins

Zucchini Muffins are a delightful and unique way to enjoy this versatile vegetable. These muffins are moist, flavorful, and perfect for breakfast, a snack, or even dessert. This recipe adds a twist with a hint of citrus and crunchy nuts, making them truly one-of-a-kind.

Origin Story: Zucchini Muffins

Zucchini Muffins are a delightful and healthy treat that bring a sense of fun and nutrition to the table. This unique recipe was inspired by the need to create wholesome and appealing food for children, particularly for my little daughter, who loves both muffins and vegetables. Combining these two elements, I crafted a recipe that balances taste and health, making it a favorite in our household.

Historical Roots

The use of zucchini in baking, particularly in breads and muffins, has become increasingly popular in recent decades. Zucchini, a summer squash, is native to Central America and was later brought to Europe by early explorers. The vegetable became widely cultivated and eventually made its way into various cuisines around the world.

In the 20th century, as health-conscious eating began to rise, bakers started incorporating vegetables into their baked goods. Zucchini, with its mild flavor and high moisture content, became an ideal addition to muffins and breads. This practice not only enhanced the nutritional value of the baked goods but also helped to keep them moist and tender.

Cultural Significance

Zucchini Muffins hold a special place in contemporary baking, reflecting a trend towards healthier and more nutritious foods. They are often enjoyed as a wholesome breakfast option, a nutritious snack, or a guilt-free dessert. The inclusion of zucchini, rich in vitamins and minerals, makes these muffins a popular choice among parents looking to incorporate more vegetables into their children's diets.

The versatility of zucchini muffins allows for endless variations, from adding different spices to incorporating other healthy ingredients like nuts and dried fruits. This adaptability makes them a beloved staple in many households, celebrated for their ability to combine health and flavor seamlessly.

Personal Connection

My journey with Zucchini Muffins began with my desire to make food fun and nutritious for my little daughter. As a parent, I wanted to ensure that she enjoyed eating vegetables and received the essential nutrients for her growth and development. The idea of hiding vegetables in her favorite treats seemed like the perfect solution.

Experimenting in the kitchen, I discovered that zucchini added a wonderful moisture and subtle sweetness to muffins, making them irresistibly delicious. By incorporating whole wheat flour, natural sweeteners like honey, and a touch of cinnamon, I created a recipe that was both healthy and tasty. My daughter loved the muffins, and they quickly became a regular part of our family meals.

Recipe Evolution

Creating the perfect Zucchini Muffins involves a few key steps. Using fresh, grated zucchini is essential for achieving the right texture and moisture. The zucchini should be grated finely and gently squeezed to remove excess moisture, ensuring the muffins are not too wet.

Combining the zucchini with whole wheat flour, eggs, natural sweeteners, and a bit of vegetable oil or butter creates a balanced batter. Adding spices like cinnamon and nutmeg enhances the flavor, making the muffins even more appealing.

For added nutrition, ingredients like chopped nuts, raisins, or dark chocolate chips can be mixed into the batter. These additions not only boost the health benefits but also add delightful texture and flavor to the muffins.

Baking the muffins at the right temperature ensures they rise well and develop a golden brown crust. Allowing them to cool slightly before serving helps the flavors to meld and the muffins to set perfectly.

Sharing the Tradition

Today, Zucchini Muffins are a favorite treat in our household. They are the muffins I bake when I want to offer a healthy snack that my daughter will love. Each bite is a celebration of the creativity and love that goes into making nutritious food for my family.

Ingredients

  • 2 cups grated zucchini
  • 2 cups all-purpose flour
  • 1 cup granulated sugar
  • 1/2 cup brown sugar
  • 1 teaspoon baking powder
  • 1/2 teaspoon baking soda
  • 1/2 teaspoon salt
  • 1 teaspoon ground cinnamon
  • 1/2 teaspoon ground nutmeg
  • 1/2 cup vegetable oil
  • 2 large eggs
  • 1 teaspoon vanilla extract
  • Zest of 1 lemon
  • 1/2 cup chopped walnuts or pecans
  • 1/2 cup raisins or dried cranberries (optional)

Recipe Duration

  • Preparation Time: 15 minutes
  • Cooking Time: 20-25 minutes
  • Yield: 12 muffins

Instructions

  1. Preheat and Prepare Pans: Preheat your oven to 350°F (175°C). Line a 12-cup muffin tin with paper liners or grease the cups.

  2. Grate Zucchini: Grate the zucchini using a box grater or food processor. Squeeze out any excess moisture using a clean kitchen towel or paper towels.

  3. Mix Dry Ingredients: In a large bowl, whisk together the flour, granulated sugar, brown sugar, baking powder, baking soda, salt, cinnamon, and nutmeg.

  4. Combine Wet Ingredients: In a separate bowl, beat the eggs, then add the vegetable oil, vanilla extract, and lemon zest. Mix well.

  5. Combine Wet and Dry Ingredients: Pour the wet ingredients into the dry ingredients and mix until just combined. Fold in the grated zucchini, chopped nuts, and raisins or dried cranberries (if using).

  6. Fill Muffin Cups: Divide the batter evenly among the muffin cups, filling each about two-thirds full.

  7. Bake: Bake in the preheated oven for 20-25 minutes, or until a toothpick inserted into the center of a muffin comes out clean.

  8. Cool: Allow the muffins to cool in the tin for 5 minutes, then transfer to a wire rack to cool completely.

Pro Tips

  1. Don’t Overmix: Mix the batter until just combined to avoid tough muffins.
  2. Extra Moisture: Ensure you squeeze out the excess moisture from the grated zucchini to prevent soggy muffins.
  3. Room Temperature Eggs: Use room temperature eggs for better incorporation.
  4. Flavor Boost: Add a teaspoon of lemon juice for extra citrus flavor.
  5. Uniform Baking: Use an ice cream scoop to evenly divide the batter among the muffin cups.

Secret Tips

  1. Spiced Up: Add a pinch of ground cloves or allspice for an extra warm spice flavor.
  2. Coconut Twist: Add 1/2 cup of shredded coconut for a tropical twist.
  3. Chocolate Lovers: Fold in 1/2 cup of chocolate chips for a sweeter treat.

Serving Options

  1. With Cream Cheese: Spread a dollop of cream cheese on each muffin.
  2. With Honey: Drizzle honey over the muffins for added sweetness.
  3. With Butter: Serve warm with a pat of butter.
  4. With Fruit: Pair with fresh fruit for a balanced breakfast.
  5. With Coffee or Tea: Enjoy with a hot cup of coffee or tea.

Health Benefits

  • Zucchini: Low in calories and rich in vitamins and minerals.
  • Nuts: Provide healthy fats and protein.
  • Citrus Zest: Adds vitamin C and a refreshing flavor.

Variations & Customization Options

  1. Carrot-Zucchini Muffins: Add 1 cup of grated carrots.
  2. Apple-Zucchini Muffins: Fold in 1 cup of grated apples.
  3. Banana-Zucchini Muffins: Add 1 mashed banana.
  4. Gluten-Free: Use gluten-free flour.
  5. Vegan: Substitute eggs with flax eggs and use a dairy-free milk.
  6. Spicy: Add a pinch of cayenne pepper for a spicy kick.
  7. Cheesy: Fold in 1/2 cup of grated cheddar cheese for a savory twist.
  8. Herbaceous: Add a tablespoon of chopped fresh herbs like rosemary or thyme.
  9. Berry Good: Fold in 1 cup of fresh or frozen berries.
  10. Protein Packed: Add 1/4 cup of protein powder.


These Zucchini Muffins are not just unique but also incredibly delicious and versatile. Whether you enjoy them plain, with a spread, or customized with your favorite add-ins, they’re sure to become a favorite. Happy baking!

Sam

Thursday, 9 May 2024

SnackSavy Series | Flaxtastic Veggie Mini Pizzas

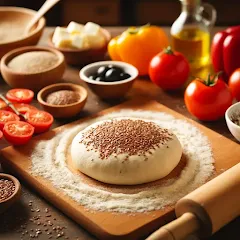
Welcome back to the SnackSavvy Series on Sam's Baking Blog! Today, we're exploring a unique and healthy twist on a classic favorite with our Veg, Gluten-Free, and Starch-Free Flaxseed Mini Pizzas. These mini pizzas feature a crust made entirely from flaxseed meal, making them not only delicious but also packed with nutritional benefits.

Ingredients:

For the crust

1 1/2 cups flaxseed meal
1 teaspoon baking powder
1/2 teaspoon salt
2 tablespoons olive oil
2 large eggs
1/4 cup water (adjust as needed for dough consistency)

✅For the toppings

1/2 cup sugar-free tomato sauce
1 cup shredded mozzarella cheese (vegan if preferred)
1 bell pepper, thinly sliced
1/2 cup cherry tomatoes, halved
1/4 cup black olives, sliced
Fresh basil leaves for garnish

Prep Time: 20 minutes
Cook Time: 15 minutes
Yield: 12 mini pizzas

Instructions:

  1. Preheat your oven to 375°F (190°C). Line a baking sheet with parchment paper.
  2. In a large mixing bowl, combine the flaxseed meal, baking powder, and salt. Mix well.
  3. Add olive oil and eggs to the dry ingredients. Gradually add water, mixing until a firm, pliable dough forms.
  4. Divide the dough into 12 equal portions. Press each portion into a small disk on the prepared baking sheet.
  5. Pre-bake the crusts for about 8 minutes, or until they begin to firm up.

  6. Remove the crusts from the oven and spread each with tomato sauce. Top with mozzarella, bell peppers, cherry tomatoes, and olives.
  7. Return the mini pizzas to the oven and bake for an additional 7 minutes, or until the cheese is melted and bubbly.
  8. Garnish with fresh basil leaves before serving.

Pro Tips:

  • The moisture content in flaxseed meal can vary, so start with less water and add gradually until the desired dough consistency is achieved.
  • Flaxseed meal can burn quickly; keep a close eye on the pizzas during the final minutes of baking.

Secret Tips:

For an extra crispy crust, pre-bake the crusts until they are just golden before adding the toppings.

Serving Options:

These mini pizzas are perfect for any occasion, whether as a nutritious snack, a fun appetizer, or a light meal. Serve them fresh from the oven for the best taste and texture.

Health Benefits:

Flaxseed is a superfood known for its high fiber content, omega-3 fatty acids, and lignans, which provide excellent health benefits including heart health and digestive wellness.

Variations & Customization Options:

  • Try adding different spices to the crust, such as Italian seasoning or garlic powder, for an extra layer of flavor.
  • Experiment with various toppings like spinach, artichokes, or different types of cheese to cater to different dietary preferences or to just mix things up.


TheseVeg, Gluten-Free, and Starch-Free Flaxseed Mini Pizzas offer a wholesome and delightful alternative to traditional pizza. They are easy to make, incredibly nutritious, and wonderfully versatile, making them a perfect fit for healthy eaters and food enthusiasts alike. Dive into this recipe and enjoy a guilt-free version of everyone's favorite dish!

Happy Baking!
Sam

SnackSavy Series | Red Lentil Garlic & Thyme Salty Crackers

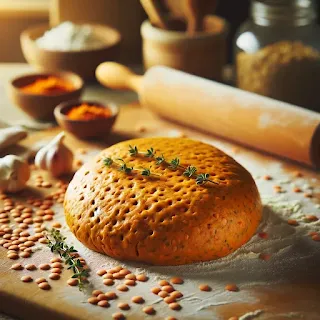
Welcome back to the SnackSavvy Series on Sam's Baking Blog! Dive into the delightful world of homemade crackers with our Red Lentil Garlic & Thyme Salty Crackers. These crackers are starch-free, made entirely with red lentil flour for a healthier snacking option that doesn't compromise on flavor. They're perfect for your health-conscious lifestyle!

Ingredients:

1 1/2 cups red lentil flour
1 teaspoon salt
1/2 teaspoon garlic powder
1 tablespoon fresh thyme leaves, finely chopped
1/3 cup olive oil
Up to 1/2 cup water, as needed to form dough

Prep Time: 15 minutes
Cook Time: 20-25 minutes
Yield: About 40 crackers

Instructions:

  1. Preheat your oven to 375°F (190°C). Line a baking sheet with parchment paper.
  2. In a large mixing bowl, combine red lentil flour, salt, garlic powder, and chopped thyme. Whisk together to distribute the ingredients evenly.
  3. Gradually mix in the olive oil. Add water slowly, stirring until a cohesive dough forms. The dough should be firm but pliable.
  4. Place the dough between two sheets of parchment paper and roll out to about 1/16 inch thickness for crispier crackers.
  5. Remove the top layer of parchment paper. Using a pizza cutter or sharp knife, cut the dough into small squares or rectangles.
  6. Transfer the parchment with the cut dough onto the baking sheet. Prick each cracker with a fork to prevent puffing during baking.
  7. Bake in the preheated oven for 20-25 minutes, or until the edges are golden brown and the crackers are crisp.
  8. Let the crackers cool on the baking sheet for 10 minutes before moving them to a wire rack to cool completely.


Pro Tips:

  • Rolling the dough thinly will ensure crisp crackers.
  • Watch the crackers closely as they bake to prevent over-browning, especially since oven temperatures can vary.

Secret Tips:

Sprinkle a little flaked sea salt on top just before baking to enhance the flavor.

Serving Options:

  • These crackers are perfect with a variety of spreads, from classic hummus to a rich, creamy cheese spread.
  • For a full meal, pair them with a hearty bowl of soup or a fresh salad.

Health Benefits:

Red lentil flour is rich in protein and fiber, making these crackers both nutritious and filling. They're a great gluten-free, starch-free option that supports a balanced diet.

Variations & Customization Options:

  • Experiment with different herbs like rosemary or dill for varied flavors.
  • For a kick of heat, add a sprinkle of cayenne pepper or crushed red pepper flakes to the dough.


These Red Lentil Garlic & Thyme Salty Crackers are an excellent choice for anyone looking for a healthy, homemade snack. Easy to make and wonderfully versatile, they offer a fantastic way to enjoy the benefits of lentils in a deliciously crisp form. Give them a try and discover just how tasty healthy eating can be!

Happy Baking!
Sam

Wednesday, 8 May 2024

SnackSavy Series | Savory Parmesan Rosemary Shortbread

Welcome back to the SnackSavvy Series on Sam's Baking Blog! Today, we're shaking things up with a savory twist on a classic favorite - Savory Parmesan Rosemary Shortbread. These buttery, cheesy shortbread cookies are infused with the aromatic flavor of rosemary, making them the perfect sophisticated snack for any occasion.

Ingredients:

1 1/4 cups all-purpose flour
1/2 cup grated Parmesan cheese
2 tablespoons fresh rosemary, finely chopped
1/2 teaspoon salt
1/2 teaspoon black pepper
1/2 cup unsalted butter, softened
1 tablespoon water (if needed)

Prep Time: 15 minutes + chilling
Cook Time: 15-20 minutes
Yield: 24-30 cookies

Instructions:

  1. In a medium bowl, whisk together the flour, Parmesan cheese, rosemary, salt, and pepper.
  2. In a separate bowl, beat the butter until smooth. Gradually add the flour mixture to the butter, mixing until a dough forms. If the dough is too crumbly, add a tablespoon of water to help it come together.
  3. Turn the dough out onto a piece of plastic wrap and shape it into a log about 2 inches in diameter. Wrap the dough tightly and refrigerate for at least 30 minutes, or until firm.
  4. Preheat the oven to 350°F (175°C). Line a baking sheet with parchment paper.
  5. Unwrap the dough and slice it into 1/4-inch thick rounds. Place the rounds on the prepared baking sheet, spacing them about 1 inch apart.
  6. Bake for 15-20 minutes, or until the edges are lightly golden. Let the cookies cool on the baking sheet for a few minutes before transferring them to a wire rack to cool completely.

Pro Tips:

  • Use good quality Parmesan cheese for the best flavor.
  • Be sure to chill the dough thoroughly before slicing to ensure clean, even cuts.

Secret Tips:

For an extra burst of flavor, sprinkle a little flaky sea salt on top of the cookies before baking.

Serving Options:

Serve these savory shortbread cookies as an elegant appetizer at your next dinner party or enjoy them as a sophisticated snack with a glass of hot tea.

These Savory Parmesan Rosemary Shortbread cookies are a delightful departure from the ordinary, offering a unique and sophisticated flavor that's sure to impress. Whether you're entertaining guests or simply indulging in a savory treat, these cookies are a perfect addition to your SnackSavvy repertoire. Enjoy them with your favorite  beverage for a refined snacking experience.

Saturday, 23 March 2024

SnackSavy Series | Samah's Cheesy Breadsticks

Today is a special day on Sam's Baking Blog as we celebrate the birthday of my beloved sister, Samah. In honor of her love for cheese and warm spirit, I present to you Samah's Birthday Cheese Breadsticks. These breadsticks are not just a snack; they're a tribute to the joy and warmth Samah brings into our lives.

Origin Story: Cheesy Breadsticks

Cheesy breadsticks are a popular appetizer and snack, loved for their gooey, cheesy goodness and crispy edges. These delightful breadsticks can be enjoyed on their own or paired with a variety of dips, making them a versatile addition to any meal.

Historical Roots

The concept of breadsticks, also known as "grissini," originated in Italy, specifically in the region of Piedmont, around the 17th century. These thin, crunchy breadsticks were created to aid the digestion of the Duke of Savoy, who had digestive issues. Over time, breadsticks became a staple in Italian cuisine and spread throughout Europe and the rest of the world.

The addition of cheese to breadsticks is a more recent evolution, likely influenced by the popularity of cheesy bread in American and Italian-American cuisine. Combining the simplicity of breadsticks with the richness of cheese creates a comforting and satisfying snack that appeals to a wide audience.

Cultural Significance

Cheesy breadsticks hold a special place in American cuisine, particularly as a popular item in Italian-American restaurants and pizzerias. They are often served as an appetizer or a side dish, accompanied by marinara sauce, garlic butter, or ranch dressing for dipping. The combination of warm, melty cheese and crispy bread makes them a favorite for gatherings, parties, and casual meals.

In addition to their presence in restaurants, cheesy breadsticks have become a popular homemade snack. They are relatively easy to prepare and can be customized with different types of cheese and seasonings to suit personal preferences.

Personal Connection

My connection to cheesy breadsticks began during my college years. They were a favorite late-night snack, often shared with friends during study sessions or game nights. The aroma of freshly baked bread and melting cheese was always comforting and inviting, making them a go-to choice for casual get-togethers.

Inspired by those memories, I decided to create my own version of cheesy breadsticks at home. The key was to find the perfect balance between the crispy exterior and the gooey, cheesy interior. After experimenting with various recipes and techniques, I found that using a blend of mozzarella and parmesan provided the best flavor and texture.

Recipe Evolution

Creating the perfect cheesy breadsticks involves a few key steps. The dough should be soft and slightly elastic, which helps achieve a light and airy texture. Adding a touch of garlic powder and Italian seasoning to the dough enhances the flavor, making each bite more savory and delicious.

The cheese mixture is crucial for achieving the desired gooeyness. A combination of mozzarella for meltiness and parmesan for flavor works best. Sprinkling additional cheese on top before baking creates a crispy, golden crust that adds to the overall appeal.

Baking the breadsticks at a high temperature ensures they cook quickly and develop a beautiful golden color. Serving them with a side of marinara sauce or garlic butter for dipping adds an extra layer of flavor and makes them even more irresistible.

Sharing the Tradition

Today, cheesy breadsticks are a staple in my home, especially for movie nights and casual gatherings. They are the snack I make when I want to share a taste of comfort and nostalgia with friends and family. Each batch is a reminder of the joy of sharing good food with loved ones.

Ingredients:

✅For the Dough:

2 cups all-purpose flour
1 tablespoon sugar
1 teaspoon salt
1 tablespoon instant yeast
3/4 cup warm water
2 tablespoons olive oil

✅For the Topping:

2 tablespoons unsalted butter, melted
1/2 teaspoon garlic powder
1/2 teaspoon dried oregano
1 1/2 cups shredded mozzarella cheese (extra cheesy for Samah)
1/4 cup grated Parmesan cheese
Marinara sauce for dipping (optional)

Prep Time: 20 minutes (plus 1 hour for dough rising)
Cook Time: 15 minutes
Yield: 12-15 breadsticks

Instructions:

✅Make the Dough:

  1. In a large bowl, mix together the flour, sugar, salt, and yeast. Add the warm water and olive oil, and stir until a soft dough forms.
  2. Turn the dough out onto a floured surface and knead for about 5 minutes, until smooth and elastic.
  3. Place the dough in a greased bowl, cover with a damp cloth, and let it rise in a warm place for about 1 hour, or until doubled in size.

✅Preheat & Prepare:

  1. Preheat the oven to 425°F (220°C). Line a baking sheet with parchment paper or a silicone baking mat.
  2. Punch down the risen dough and roll it out on a lightly floured surface to a rectangle about 1/4 inch thick. Transfer the dough to the prepared baking sheet.
  3. Mix together the melted butter, garlic powder, and oregano. Brush the mixture evenly over the surface of the dough.
  4. Sprinkle the extra cheesy mozzarella and grated Parmesan evenly over the dough.
  5. Using a pizza cutter or a sharp knife, cut the dough into strips about 1 inch wide.
  6. Bake in the preheated oven for 15 minutes, or until the cheese is melted and bubbly and the edges are golden brown.
  7. Allow the breadsticks to cool for a few minutes before separating them. Serve warm with marinara sauce for dipping, if desired.

Pro Tips:

  • Ensure the water is warm (about 110°F) to activate the yeast properly.
  • You can let the dough rise in a slightly warm oven (turned off) with the light on to provide a gentle warmth.

Secret Tips:

For an extra golden and crispy crust, brush the breadsticks with a little more melted butter right before baking.

Serving Options

These homemade cheese breadsticks are perfect as an appetizer or a side dish with your favorite pasta or soup.

Health Benefits:

Opt for whole wheat flour instead of all-purpose flour for a healthier version with more fiber.

Variations & Customization Options:

  • Add some chopped fresh herbs like basil or rosemary to the dough for a flavorful twist.
  • Experiment with different cheeses like cheddar or gouda for a new taste experience.

These Homemade Cheese Breadsticks are a testament to the joy of baking from scratch. With their warm, cheesy goodness, they're sure to become a favorite for any occasion. Enjoy the process and the delicious results!

Happy Birthday Samoha!
Sam

Saturday, 10 February 2024

SnackSavy Series | Wholesome Bites for Every Craving: Spinach-Infused Potato Hash Browns

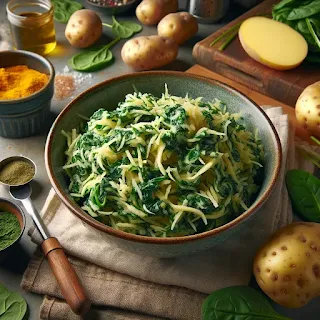
Welcome back to SnackSavvy, where I elevate your snacking game with innovative and delicious recipes! Today, I'm putting a nutritious twist on a classic favorite with my Spinach Hash Browns. Packed with the goodness of crispy potatoes and vibrant spinach, these hash browns are a satisfying and flavorful snack that's perfect for any time of day.

Ingredients

2 large potatoes, peeled and grated
1 cup fresh spinach, finely chopped
1/4 cup onion, finely diced
1 garlic clove, minced
2 tablespoons olive oil
Salt and pepper to taste

Preparation Time: 15 minutes
Cooking Time: 10 minutes
Yield: Approximately 8 Spinach Hash Browns


Instructions

  1. Place the grated potatoes in a clean kitchen towel and squeeze out excess moisture.
  2. In a large mixing bowl, combine the squeezed potatoes, chopped spinach, diced onion, minced garlic, salt, and pepper. Mix well to ensure even distribution of ingredients.
  3. Heat olive oil in a skillet over medium heat.
  4. Form the potato mixture into patties and carefully place them in the skillet.
  5. Cook the hash browns for 4-5 minutes on each side, or until golden brown and crispy.
  6. Once cooked, transfer the hash browns to a paper towel-lined plate to drain any excess oil.

Pro Tips

  • Squeeze Out Moisture: Removing excess moisture from the grated potatoes ensures crispier hash browns.
  • Uniform Patties: Use a measuring cup or cookie cutter to shape the hash brown patties for consistent size and cooking.

Secret Tips

  • Seasoning: Experiment with your favorite herbs and spices to enhance the flavor of the hash browns. Try adding paprika, thyme, or cayenne pepper for an extra kick.

Serving Options

  • Enjoy the Spinach Hash Browns on their own as a delicious snack.
  • Serve them alongside eggs and toast for a hearty breakfast.
  • Pair them with a side salad or soup for a light lunch or dinner option.

Health Benefits

  • Spinach is rich in vitamins A, C, and K, as well as folate, iron, and antioxidants, promoting overall health and well-being.
  • Potatoes provide a good source of energy, fiber, and essential nutrients like potassium and vitamin C.

Variations & Customization Options

  1. Cheesy Spinach Hash Browns: Add grated cheese to the potato mixture for extra flavor and richness.
  2. Spicy Spinach Hash Browns: Incorporate diced jalapeños or a pinch of cayenne pepper for a spicy kick.
  3. Sweet Potato Spinach Hash Browns: Substitute sweet potatoes for regular potatoes for a sweeter twist.

Indulge in the wholesome goodness of our Spinach Hash Browns, a delightful blend of crispy potatoes and nutritious spinach. Whether enjoyed as a snack or part of a meal, these hash browns are sure to tantalize your taste buds and leave you craving more. Stay tuned for more SnackSavvy recipes coming your way!

Happy Snacking!
Sam

Thursday, 8 February 2024

SnackSavy Series | Wholesome Bites for Every Craving: Crunchy Cabbage and Carrot Patties

Welcome back to SnackSavvy, where I'm constantly innovating in the kitchen to bring you delicious and nutritious snack options! Today, I'm excited to introduce my latest creation: Crunchy Cabbage and Carrot Patties. Packed with wholesome ingredients like cabbage, carrots, oats, cheese, and peanuts, these patties are a flavorful and satisfying snack that's perfect for any time of day.

Here's what you need (Ingredients)

2 cups shredded cabbage
1 cup grated carrots
1/2 cup rolled oats
1/4 cup grated cheese (cheddar or any preferred cheese)
1/4 cup crushed peanuts
1/4 cup finely chopped onion
1 garlic clove, minced
1/4 teaspoon salt
1/4 teaspoon black pepper
2 eggs, beaten


Preparation Time: 15 minutes
Cooking Time: 10 minutes per batch
Yield: Approximately 12 Cabbage and Carrot Patties


Now let's make (Instructions):

  1. In a large mixing bowl, combine shredded cabbage, grated carrots, rolled oats, grated cheese, crushed peanuts, chopped onion, minced garlic, salt, and black pepper.
  2. Add beaten eggs to the mixture and stir until well combined.
  3. Heat a non-stick skillet over medium heat and lightly grease it with oil.
  4. Form the mixture into patties of desired size and thickness.
  5. Place the patties onto the skillet and cook for 4-5 minutes on each side, or until golden brown and cooked through.
  6. Once cooked, remove the patties from the skillet and drain on a paper towel-lined plate.

Pro Tips

  • Even Cooking: Ensure all ingredients are evenly mixed to promote consistent cooking and flavor throughout each patty.
  • Compact Patties: Press the mixture firmly when forming the patties to prevent them from falling apart during cooking.

Secret Tips

  • Enhance Flavor: Add a dash of your favorite herbs or spices to the mixture for an extra burst of flavor. Consider options like paprika, cumin, or Italian seasoning.

Serving Options

  • Serve the Crunchy Cabbage and Carrot Patties hot as a standalone snack or appetizer.
  • Pair them with a side of yogurt-based dipping sauce or a tangy salsa for added flavor.

Variations & Customization Options

  • Spicy Twist: Add diced jalapeños or a pinch of cayenne pepper for a spicy kick.
  • Asian Fusion: Incorporate soy sauce, ginger, and sesame seeds for an Asian-inspired flavor profile.
  • Vegetarian Option: Omit the eggs and use a flaxseed meal-water mixture as a binding agent for a vegan-friendly version.

Nutritional Benefits

  • Cabbage and carrots provide essential vitamins and minerals, including vitamin C, vitamin K, and beta-carotene.
  • Rolled oats offer fiber for digestive health and slow-release energy.
  • Cheese contributes protein and calcium for bone health.
  • Peanuts provide healthy fats, protein, and essential nutrients like vitamin E and magnesium.


I hope you enjoy these Crunchy Cabbage and Carrot Patties as much as I do! With their crunchy texture, flavorful ingredients, and versatile serving options, they're sure to become a favorite snack in your household. Stay tuned for more SnackSavvy recipes coming your way!

Happy Snacking!
Sam

SnackSavy Series | Wholesome Bites for Every Craving: Spinach and Oatmeal Bites

Welcome to the SnackSavvy Series, where I'm redefining snack time with wholesome and delicious bites! My inaugural recipe, Spinach and Oatmeal Bites, combines the goodness of fresh spinach and hearty oats into irresistible bite-sized treats. Packed with nutrients and flavor, these savory bites are perfect for satisfying cravings while keeping you energized throughout the day.

Here's what you need (Ingredients):

1 cup rolled oats
1 cup fresh spinach, finely chopped
1/2 cup grated cheese (cheddar or mozzarella)
1/4 cup finely chopped onion
1 garlic clove, minced
1/4 teaspoon salt
1/4 teaspoon black pepper
2 large eggs, beaten

Preparation Time: 10 minutes
Cooking Time: 12-15 minutes
Yield: Approximately 24 Spinach and Oatmeal Bites

Now Let's Make (Instructions)

  1. Preheat your oven to 375°F (190°C). Grease a mini muffin tin or line it with paper liners.
  2. In a large mixing bowl, combine rolled oats, chopped spinach, grated cheese, chopped onion, minced garlic, salt, and black pepper.
  3. Add beaten eggs to the mixture and stir until well combined.
  4. Spoon the mixture into the prepared mini muffin tin, filling each cup about 3/4 full.
  5. Bake in the preheated oven for 12-15 minutes or until the bites are set and golden brown on top.
  6. Allow the bites to cool slightly before removing them from the muffin tin. Serve warm or at room temperature.

Pro Tips

  • Versatile Ingredients: Feel free to customize these bites with your favorite herbs or spices for extra flavor.
  • Make Ahead: These bites can be made ahead of time and stored in an airtight container in the refrigerator for up to 3 days. Simply reheat them in the oven or microwave before serving.

Secret Tips

  • Squeeze Out Moisture: If using frozen spinach, be sure to thaw it completely and squeeze out any excess moisture before adding it to the mixture. This prevents the bites from becoming too wet during baking.
  • Freezing: To extend the shelf life further, you can freeze the Spinach and Oatmeal Bites. Place them in a single layer on a baking sheet and freeze until solid. Once frozen, transfer the bites to a freezer-safe bag or container, removing as much air as possible before sealing. They can be kept frozen for up to 1-2 months.
  1. Health Benefits

    Spinach is a nutritional powerhouse, packed with vitamins A, C, and K, as well as folate, iron, and antioxidants. Its high fiber content supports digestion and helps keep you feeling full and satisfied. Oats are another nutritious ingredient, providing a good source of complex carbohydrates, fiber, and protein. Together, spinach and oats make a winning combination for a healthy snack that nourishes your body and supports overall well-being.

  1. Serving Options

  • Dipping Sauces: Serve the Spinach and Oatmeal Bites with a variety of dipping sauces to enhance their flavor. Options include marinara sauce, tzatziki, hummus, ranch dressing, or a simple yogurt-based dip flavored with herbs and spices.
  • Fresh Vegetable Crudité: Create a colorful and nutritious snack platter by serving the Spinach and Oatmeal Bites alongside an assortment of fresh vegetable crudité such as carrot sticks, cucumber slices, cherry tomatoes, and bell pepper strips. This adds crunch and freshness to balance the savory bites.
  • Mixed Green Salad: Pair the Spinach and Oatmeal Bites with a simple mixed green salad dressed with a light vinaigrette. The combination of textures and flavors makes for a satisfying and well-rounded meal or snack option.
  • Fruit Platter: Balance out the savory flavors of the Spinach and Oatmeal Bites with a refreshing fruit platter featuring seasonal fruits such as grapes, berries, melon slices, and citrus segments. The natural sweetness of the fruit complements the savory bites perfectly.
  • Soup or Salad: Serve the Spinach and Oatmeal Bites as a side dish alongside a bowl of hearty soup or a crisp green salad. This creates a balanced and satisfying meal that's perfect for lunch or dinner.
  • Brunch Spread: Include the Spinach and Oatmeal Bites as part of a brunch spread alongside other breakfast favorites such as scrambled eggs, bacon or sausage, fresh fruit, and pastries. They're also great for brunch gatherings or potluck parties.
  1. Variations & Customization Options

  • Cheesy Spinach and Oatmeal Bites: Increase the amount of grated cheese or try different varieties such as feta, Parmesan, or goat cheese for added flavor.
  • Spicy Spinach and Oatmeal Bites: Add a kick of heat by incorporating diced jalapeños, crushed red pepper flakes, or a pinch of cayenne pepper to the mixture.
  • Herb-infused Spinach and Oatmeal Bites: Enhance the flavor profile with the addition of fresh or dried herbs such as parsley, basil, thyme, or oregano. Experiment with different herb combinations to suit your taste preferences.
  • Mediterranean Spinach and Oatmeal Bites: Mix in chopped sun-dried tomatoes, black olives, and crumbled feta cheese for a Mediterranean-inspired twist.
  • Protein-packed Spinach and Oatmeal Bites: Boost the protein content by adding cooked quinoa, diced cooked chicken, or canned chickpeas to the mixture. This variation is perfect for those looking to add more protein to their diet.
  • Veggie-loaded Spinach and Oatmeal Bites: Mix in finely diced vegetables such as bell peppers, carrots, zucchini, or mushrooms for an extra dose of nutrients and flavor.
  • Sweet and Savory Spinach and Oatmeal Bites: Incorporate a touch of sweetness by adding dried cranberries or raisins to the mixture. The combination of sweet and savory flavors creates a unique and delicious snack option.
  1. Indulge in the goodness of wholesome snacking with our Spinach and Oatmeal Bites. Whether you're enjoying them on-the-go or as a satisfying afternoon pick-me-up, these bites are sure to delight your taste buds and nourish your body. Stay tuned for more SnackSavvy recipes coming your way!


    1. Happy Snacking! Sam