Turning Your Wishes into Sweet Realities, One Homemade Treat at a Time. 🌟
Showing posts with label Home Made. Show all posts

Sunday, 12 May 2024

Moist Upside-Down Peach Cake

Welcome back to Sam's Baking Blog! Today, we're baking a summer favorite with a twist — a Moist Upside-Down Peach Cake. This cake combines juicy peaches with a moist, buttery sponge, making it a perfect dessert for warm evenings or a cozy treat with afternoon tea.

Origin Story: Upside-Down Peach Cake

Upside-down cakes are a delightful dessert with a unique presentation, and the Upside-Down Peach Cake is no exception. This cake combines the sweetness of ripe peaches with a buttery cake batter, creating a beautiful and delicious treat that’s perfect for any occasion.

Historical Roots

The concept of upside-down cakes dates back to medieval times when people cooked cakes in cast-iron skillets over an open fire. Fruit and sugar were placed at the bottom of the skillet, and the batter was poured on top. When the cake was done, it was flipped over, revealing a caramelized fruit topping.

The upside-down cake became particularly popular in America during the early 20th century, especially with the introduction of canned pineapple. The pineapple upside-down cake, featuring pineapple rings, maraschino cherries, and a brown sugar glaze, became an iconic dessert. The idea of using other fruits, such as peaches, naturally followed, allowing for seasonal variations and new flavor combinations.

Cultural Significance

Upside-down cakes hold a special place in American dessert culture, often associated with home baking and family gatherings. Their easy preparation and striking appearance make them a favorite for potlucks, picnics, and festive occasions. The use of fresh, seasonal fruits like peaches adds a touch of summer to the dessert, making it a popular choice during the warmer months.

Peaches themselves have a rich history in American agriculture, particularly in the southern states, where they are celebrated for their juicy sweetness. Incorporating peaches into an upside-down cake highlights the fruit’s natural flavors and creates a dessert that is both visually appealing and delicious.

Personal Connection

My first experience with upside-down peach cake was at a summer barbecue hosted by a close family friend. The cake was served warm, with a scoop of vanilla ice cream melting over the caramelized peach topping. The combination of flavors and textures was unforgettable, and I was inspired to recreate the dessert in my own kitchen.

Using fresh peaches from a local farmer’s market, I experimented with different recipes until I found the perfect balance of sweetness and texture. The key was to caramelize the peaches just enough to enhance their natural sweetness without making them too soft. A hint of cinnamon and nutmeg added warmth to the flavor, complementing the peaches beautifully.

Recipe Evolution

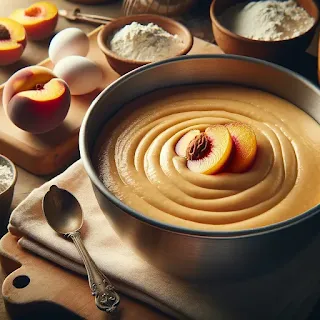
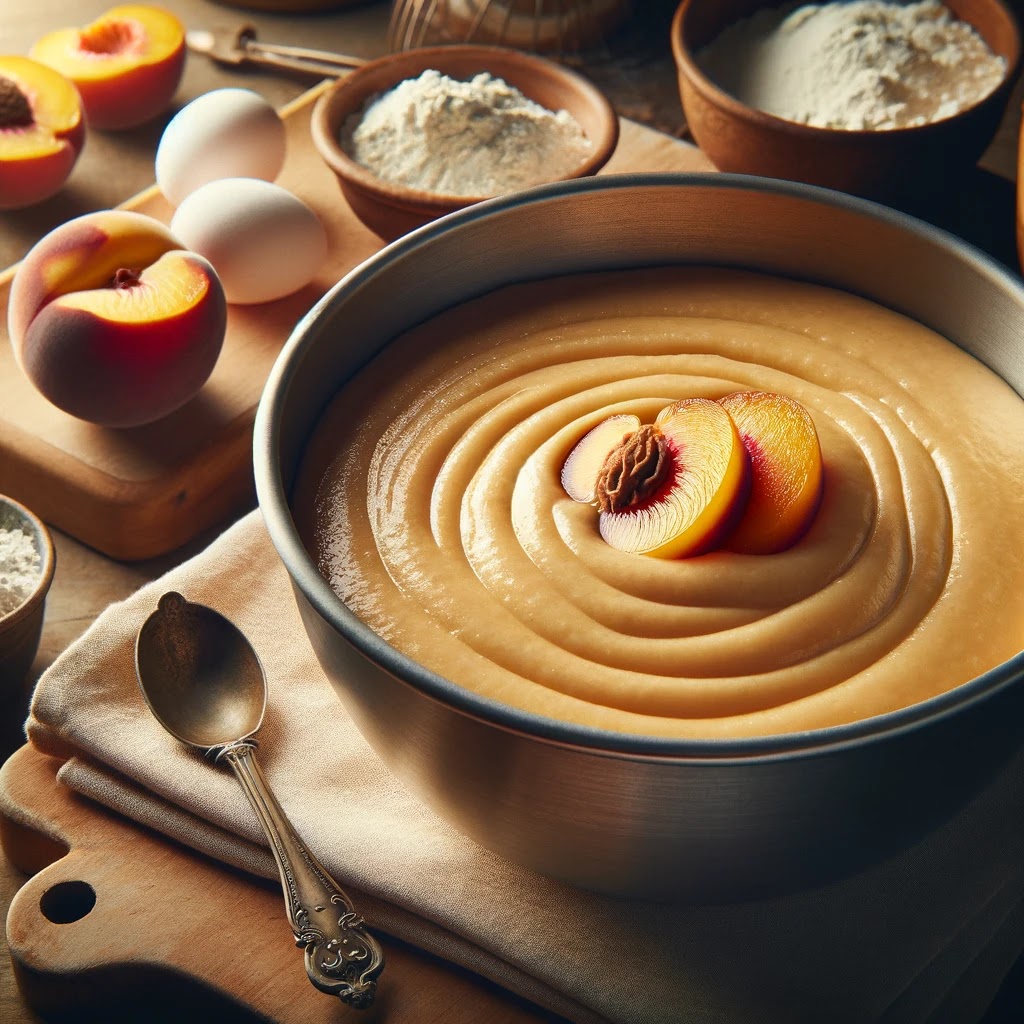
Creating the perfect Upside-Down Peach Cake involves several steps. First, the peaches are sliced and arranged in a skillet or baking pan with a mixture of melted butter and brown sugar. This creates the caramelized topping that will crown the cake when it is flipped over. The cake batter, often flavored with vanilla and spices, is then poured over the peaches and baked until golden and fragrant.

The choice of peaches is crucial for the best results. Fresh, ripe peaches are ideal, but canned or frozen peaches can also be used when fresh ones are not in season. Adjusting the amount of sugar in the caramel and the cake batter can help balance the sweetness, depending on the ripeness of the fruit.

Sharing the Tradition

Today, Upside-Down Peach Cake is a favorite in my family, particularly during the summer when peaches are at their peak. It’s the dessert I bring to gatherings and potlucks, always greeted with smiles and requests for the recipe. Each bite is a reminder of warm summer days and the joy of sharing good food with loved ones.

Ingredients:

✅For the Topping:

4 tablespoons unsalted butter
1/2 cup brown sugar
4-5 fresh peaches, sliced (or canned peaches, drained)

✅For the Cake:

1 1/2 cups all-purpose flour
1 teaspoon baking powder
1/4 teaspoon salt
1/2 cup unsalted butter, softened
1 cup granulated sugar
2 large eggs
1 teaspoon vanilla extract
1/2 cup milk

Prep Time: 20 minutes
Cook Time: 35-40 minutes
Yield: 1 (9-inch) cake

Instructions:

🍥Prepare the Topping:

  1. Preheat the oven to 350°F (175°C).
  2. Melt butter in a 9-inch round baking pan in the oven. Remove and sprinkle brown sugar evenly over the melted butter. 
  3. Arrange peach slices in a circular pattern over the brown sugar. Set aside.

🍥Make the Cake Batter:

  1. In a medium bowl, sift together flour, baking powder, and salt. Set aside.
  2. In a large bowl, cream the softened butter and granulated sugar until light and fluffy. 
  3. Beat in the eggs one at a time, then stir in the vanilla extract.
  4. Gradually mix in the dry ingredients, alternating with the milk, beginning and ending with the flour mixture. Mix until just combined.

🍥Assemble and Bake:

  1. Carefully pour the cake batter over the peach layer in the pan, spreading evenly.
  2. Bake in the preheated oven for 35-40 minutes, or until a toothpick inserted into the center comes out clean.
  3. Let the cake cool in the pan for about 10 minutes, then invert onto a serving plate to reveal the peach topping.

Pro Tips:

  • Ensure the peaches are not too ripe, which can make them mushy during baking.
  • Allow the cake to cool slightly before inverting to prevent it from breaking apart.

Secret Tips:

Add a pinch of cinnamon or nutmeg to the brown sugar topping for a warm, spicy note.

Serving Options:

Serve warm with a scoop of vanilla ice cream or a dollop of whipped cream.

This Moist Upside-Down Peach Cake is a delightful treat that brings the flavors of summer into your home. It's simple to make but impressive enough for special occasions. The caramelized peaches on top add a beautiful finish that's as delicious as it looks. Enjoy this sweet end to any meal!

Happy Baking!
Sam

Saturday, 23 March 2024

Twisted Temptation Marble Cake

Welcome back to Sam's Baking Blog! Today, we're diving into the world of classic bakes with a Simple Marble Cake. This cake combines the best of both worlds with its beautiful swirls of vanilla and chocolate, making it a treat for both the eyes and the taste buds.

Origin Story: Marble Cake

Marble cake is a dessert that captivates both the eyes and the palate with its beautiful swirls of chocolate and vanilla. This cake has a storied history that reflects the blending of culinary traditions across continents and centuries.

Historical Roots

The concept of marble cake is believed to have originated in Germany in the 19th century, where it was known as "Marmor Kuchen." The cake was named for its resemblance to marble stone, created by swirling light and dark batters together. This technique was brought to America by German immigrants, where it quickly became popular.

In the United States, marble cake evolved into a beloved classic, often featured in cookbooks from the 1800s. The American version typically used chocolate and vanilla batters, creating a harmonious blend of flavors that appealed to a wide audience. The visual appeal of the marbled effect, combined with the delicious taste, made it a staple for celebrations and gatherings.

Cultural Significance

Marble cake holds a special place in various cultures due to its aesthetic and taste. In Germany, it is traditionally enjoyed with afternoon coffee, embodying the cozy, convivial spirit of "Kaffee und Kuchen" (coffee and cake). In America, marble cake became a popular choice for birthdays, holidays, and other special occasions, symbolizing a blend of classic flavors and family traditions.

The cake's versatility allows for numerous variations. Some recipes incorporate spices like cinnamon or nutmeg, while others use different types of chocolate or flavorings to create unique twists on the classic marble cake.

Personal Connection

My fascination with marble cake began during a trip to a small bakery in a picturesque German village. The baker explained the history of the cake and demonstrated how to create the perfect marble effect by carefully swirling the batters. Watching the transformation from simple ingredients to a beautiful, marbled cake was mesmerizing and inspired me to recreate it at home.

Determined to perfect my own version, I experimented with different recipes and techniques. I found that using high-quality cocoa powder and real vanilla extract made a significant difference in both the taste and appearance of the cake. The challenge was to achieve a balanced swirl, ensuring that each slice had an enticing mix of chocolate and vanilla.

Recipe Evolution

Creating the perfect marble cake involves a few key steps. The batters for the chocolate and vanilla layers should be mixed separately to ensure distinct flavors. The chocolate batter is typically enhanced with cocoa powder and sometimes melted chocolate, while the vanilla batter is flavored with vanilla extract.

To create the marble effect, spoonfuls of each batter are alternately placed in the baking pan. A knife or skewer is then used to gently swirl the batters together, creating the signature marbled pattern. Care must be taken not to overmix, as this can cause the batters to blend too much and lose the distinct marbling.

Baking the cake at a moderate temperature ensures it cooks evenly and develops a beautiful golden crust. The result is a cake that is both visually stunning and delicious, with a perfect balance of chocolate and vanilla flavors.

Sharing the Tradition

Today, marble cake remains a favorite in my home. It is the cake I bake when I want to share a taste of nostalgia and creativity with friends and family. Each slice is a reminder of the rich history and the joy of creating something beautiful and delicious.

Ingredients:

1/2 cup unsalted butter, softened
1 cup granulated sugar
3 large eggs
2 teaspoons vanilla extract
1 3/4 cups all-purpose flour
2 teaspoons baking powder
1/2 teaspoon salt
1/2 cup milk
2 tablespoons cocoa powder


Prep Time: 20 minutes
Cook Time: 35-40 minutes
Yield: 1 (9x5-inch) loaf

Instructions:

  1. Preheat the oven to 350°F (175°C). Grease and flour a 9x5-inch loaf pan.
  2. In a large bowl, cream together the butter and sugar until light and fluffy. Add the eggs one at a time, beating well after each addition. Stir in the vanilla extract.
  3. In a separate bowl, whisk together the flour, baking powder, and salt. Gradually add the dry ingredients to the wet ingredients, alternating with the milk, starting and ending with the dry ingredients. Mix until just combined.
  4. Divide the batter in half. Stir the cocoa powder into one half of the batter.
  5. Spoon the vanilla and chocolate batters alternately into the prepared pan. Use a knife to swirl the batters together gently.
  6. Bake for 35-40 minutes, or until a toothpick inserted into the center comes out clean.
  7. Let the cake cool in the pan for 10 minutes, then transfer to a wire rack to cool completely.

Pro Tips:

  • Ensure all ingredients are at room temperature for a smoother batter.
  • Don't overmix the batter to keep the cake tender.

Secret Tips:

Add a tablespoon of strong brewed coffee to the chocolate batter to enhance the chocolate flavor.

Serving Options:

Dust with powdered sugar or drizzle with a simple glaze for added sweetness.

Health Benefits:

For a healthier version, use whole wheat flour instead of all-purpose flour and reduce the sugar to 3/4 cup.

Variations & Customization Options:

  • For a festive twist, add a teaspoon of orange zest to the vanilla batter.
  • Mix in some chopped nuts or chocolate chips into the batter for added texture.

This Simple Marble Cake is a timeless classic that's perfect for any occasion. Whether you're enjoying a slice with your afternoon tea or serving it as a dessert at a gathering, it's sure to be a hit. 

Happy baking!

Sam

Tuesday, 30 January 2024

Pecan Chocolate Chip Coconut Cookies Recipe

Simplicity meets indulgence in this Pecan Chocolate Chip Coconut Cookies recipe. With just a handful of ingredients and the addition of chopped pecans, these cookies are transformed into a delightful blend of flavors and textures.

Origin Story: Pecan Chocolate Chip Coconut Cookies

The creation of my Pecan Chocolate Chip Coconut Cookies is a story of culinary curiosity and a love for blending flavors and textures. The idea to combine pecans, chocolate chips, and coconut came from a desire to create a cookie that was both decadent and uniquely satisfying.

The inspiration began during a holiday season when I was baking a variety of treats for friends and family. I wanted to make a cookie that captured the essence of warmth and indulgence, something that would stand out on the cookie platter. I had always loved the rich, buttery flavor of pecans, the sweetness of chocolate chips, and the tropical hint of coconut, so I decided to experiment by bringing them together in one delightful cookie.

My first attempt was during a cold winter afternoon. I started with a classic chocolate chip cookie dough base, adding toasted pecans and shredded coconut to the mix. The result was promising but needed a bit of tweaking. Over several batches, I adjusted the proportions to ensure that each bite had a perfect balance of crunchy pecans, melty chocolate chips, and chewy coconut.
The kitchen was filled with the irresistible aroma of toasting nuts and baking cookies. Each batch brought smiles and compliments from those who tasted them, encouraging me to perfect the recipe further. The final version of the cookie was exactly what I envisioned: a harmonious blend of flavors and textures that brought together the best elements of traditional and tropical treats.

These cookies have since become a favorite in my household and among my blog readers. They are not just a treat but a reminder of the joy of experimentation and the satisfaction of creating something special. Every time I bake them, I’m reminded of that winter of trial and error and the happiness that comes from sharing something delicious with loved ones.

Ingredients:

1 cup semi-sweet chocolate chips
1/2 cup sweetened condensed milk
1 1/2 cups desiccated coconut powder
1/2 cup chopped pecans (for added crunch and nutty flavor)
1 teaspoon vanilla extract (for a hint of aromatic sweetness)
A pinch of sea salt (for the perfect sweet-salty balance)
1 egg (optional)

Preparation Time: 15 minutes
Baking Time: 10-12 minutes
Cooling Time: 5 minutes on the baking sheet, then until completely cool on a wire rack
Yield: This recipe yields approximately 24 delightful Pecan Chocolate Chip Coconut Cookies.

Instructions:

  1. Preheat your oven to 350°F (175°C). Line a baking sheet with parchment paper.
  2. In a mixing bowl, combine the semi-sweet chocolate chips, sweetened condensed milk, desiccated coconut powder, chopped pecans, vanilla extract, and a pinch of sea salt.
  3. Stir the ingredients together until well combined.
  4. Using a spoon or your hands, scoop out small portions of the mixture and roll them into balls.
  5. Place the cookie balls onto the prepared baking sheet, leaving some space between them.
  6. Gently flatten each cookie ball with the back of a fork to create a crisscross pattern on top.
  7. Bake in the preheated oven for about 10-12 minutes or until the edges are golden brown.
  8. Remove from the oven and let the cookies cool on the baking sheet for a few minutes before transferring them to a wire rack to cool completely.

Pro Tips:

  1. Room Temperature Ingredients: Ensure that your sweetened condensed milk and egg (if you're using one) are at room temperature. This helps with better mixing and cookie texture.
  2. Chill the Dough: If the dough is too sticky, you can refrigerate it for about 30 minutes before shaping the cookies. This makes handling the dough easier.
  3. Customize Your Mix-Ins: Feel free to get creative with your mix-ins. Add a handful of dried cranberries, white chocolate chips, or even a dash of cinnamon for unique flavor variations.
  4. Baking Time: Keep a close eye on the cookies as they bake. They can go from perfectly golden to overdone quickly. Remove them from the oven when the edges are golden brown, and they will continue to firm up as they cool.

Why these cookies are special:

These cookies are the embodiment of simplicity at its finest, now with the delightful crunch of pecans. They require minimal effort and just a few key ingredients, yet they deliver maximum flavor and satisfaction. The sweetened condensed milk provides a rich, creamy sweetness, while the coconut powder adds a tropical twist, and the pecans contribute a delightful nutty crunch.

How to enjoy them:

These cookies are perfect for satisfying your sweet cravings with an added nutty twist. Whip up a batch for an impromptu gathering, a cozy movie night, or simply as a quick treat to indulge in. Their irresistible combination of sweetness, nuttiness, and chewiness will leave everyone asking for seconds.

Let’s get baking:

With just a handful of ingredients and a little bit of time, you'll have a batch of these delectable Pecan Chocolate Chip Coconut Cookies ready to enjoy. So, preheat your oven, gather your ingredients, and let’s bake up a delightful trio of flavors that are sure to become a favorite in your kitchen.

Happy baking!
Sam Salih

Monday, 29 January 2024

Chocolate Chip Cookies Recipe

Today, I’m thrilled to share with you a recipe that’s close to my heart – the classic chocolate chip cookie. These aren’t just any cookies; they are little rounds of joy, a recipe that has seen me through my very first baking triumphs to countless moments of comfort and celebration.

Each cookie, with its golden edges and gooey chocolate center, is a tale of homely love. As you bite into the rich, buttery goodness and the chocolate melts in your mouth, you'll understand why this recipe is more than just a treat; it’s a warm hug, a sweet whisper of encouragement, and a celebration of every small victory in life.

Whether you’re a baking novice or a seasoned pro, these cookies are about coming together, sharing stories, and making memories. So, tie on your apron, preheat your oven, and let’s bake some happiness together!

Origin Story: Chocolate Chip Cookies

In the heart of my cozy kitchen, where the aroma of freshly baked goods fills the air, the story of my Chocolate Chip Cookies began. This classic treat, beloved by many, carries a rich history and a touch of personal nostalgia that makes it truly special.

The journey of the chocolate chip cookie dates back to the 1930s when Ruth Wakefield, at the Toll House Inn in Whitman, Massachusetts, accidentally invented it. She was making her famous Butter Drop Do cookies and decided to add chunks of semi-sweet Nestlé chocolate, expecting them to melt and create chocolate cookies. To her surprise, the chunks retained their shape, giving birth to what we now know as chocolate chip cookies.

Inspired by this historical accident, I wanted to recreate the magic in my kitchen, adding my own twist to make it unique. Using high-quality ingredients, my recipe balances the perfect ratio of butter, sugar, and chocolate chips, creating cookies that are crispy on the edges yet chewy in the center.

The process of developing the perfect recipe wasn't instant. I experimented with various types of flour, different ratios of brown and white sugar, and various baking techniques to achieve the perfect texture and flavor. Each batch brought me closer to perfection, and I fondly remember the countless evenings spent with my family, taste-testing and offering feedback.

These cookies are more than just a sweet treat; they symbolize moments of joy and togetherness. Whether it's for a cozy evening with a cup of milk, a treat to share with friends, or comfort food during challenging times, my Chocolate Chip Cookies have become a staple in my kitchen and a favorite among my blog readers.

Ingredients:

1 cup (2 sticks) unsalted butter, softened
3/4 cup granulated sugar
3/4 cup packed brown sugar
1 teaspoon vanilla extract
2 large eggs
2 1/4 cups all-purpose flour
1 teaspoon baking soda
1/2 teaspoon salt
2 cups (about 12 oz.) semi-sweet chocolate chips
Optional: 1 cup chopped nuts (like walnuts or pecans)


Preparation Time15 minutes
Baking Time9-11 minutes per batch
Cooling Time: 5 minutes on the baking sheet, then until completely cool on a wire rack
Yield: This recipe makes about 4 dozen cookies, depending on the size.

Instructions:

  1. Preheat your oven to 375°F (190°C). Line a baking sheet with parchment paper or a silicone baking mat.
  2. In a large bowl, cream together the softened butter, granulated sugar, brown sugar, and vanilla extract until the mixture is light and fluffy.
  3. Beat in the eggs one at a time, ensuring they are fully incorporated after each addition.
  4. In a separate bowl, whisk together the flour, baking soda, and salt. Gradually beat the dry ingredients into the butter mixture until well blended.
  5. Stir in the chocolate chips and nuts (if using) by hand until evenly distributed.
  6. Drop rounded tablespoons of the dough onto the prepared baking sheets, leaving about 2 inches of space between each cookie.
  7. Bake in the preheated oven for 9 to 11 minutes or until the edges are golden brown.
  8. Remove from the oven and let the cookies cool on the baking sheet for 5 minutes, then transfer to the wire racks to cool completely.

Secret Tips:

  1. For best results, use room-temperature butter and eggs.
  2. If you prefer a chewier cookie, use more brown sugar than white sugar.
  3. For a crispier cookie, flatten the dough balls slightly before baking.
  4. Always preheat your oven for at least 10 minutes to ensure it's at the right temperature.
  5. Don't overcrowd your baking sheet; cookies need room to spread.
  6. If you’re not a fan of semi-sweet chocolate, feel free to use milk chocolate or dark chocolate chips instead.
  7. To keep cookies fresh, store them in an airtight container at room temperature.

Thats it, 6 Minutes to make, 9 minutes to bake 😉😜