Turning Your Wishes into Sweet Realities, One Homemade Treat at a Time. ๐ŸŒŸ
Showing posts with label Baking Essentials Unveiled. Show all posts

Thursday, 7 November 2024

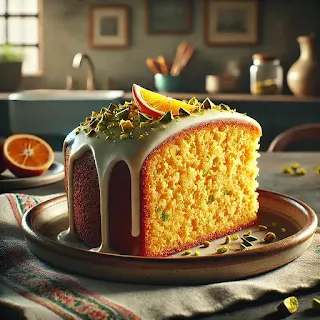
Spiced Orange & Olive Oil Cake with Pistachio Glaze

Say hello to the Zesty Orange & Olive Oil Cake with Pistachio Glaze – a bright, vibrant dessert that’ll make your taste buds dance! With the tangy pop of orange zest, the warm embrace of olive oil, and a nutty pistachio drizzle, this cake is a fun twist on classic flavors. Let’s bake some happiness and spread the joy! ๐ŸŒž๐ŸŒฟ

Origin Story: Orange & Olive Oil Cake with Pistachio Glaze

The Zesty Orange & Olive Oil Cake with Pistachio Glaze is more than just a dessert; it’s a celebration of sunshine, Mediterranean flavors, and the joy of reinventing the classics. This recipe has roots in Mediterranean baking traditions, where olive oil and citrus are cherished ingredients, valued for their freshness, warmth, and unique ability to bring simple ingredients to life.

A Recipe Inspired by the Mediterranean

The inspiration for this cake comes from the sun-drenched hills of southern Europe, where olive groves and citrus orchards flourish under clear blue skies. Olive oil cakes are common in Italian, Greek, and Spanish kitchens, where home bakers use this golden liquid to add moisture and richness to their creations. Adding orange zest and juice gives the cake a zesty, fresh twist, reminiscent of an orange tree in full bloom.

The pistachio glaze is a nod to Middle Eastern influences, where pistachios are prized for their nutty, slightly sweet flavor. The combination of vibrant green pistachios, the rich aroma of olive oil, and the bright tang of oranges creates a cake that’s both earthy and refreshing, indulgent yet light.

A Story of Accidental Brilliance

Legend has it that this cake came to be when a baker, originally planning to make a simple orange cake, accidentally reached for olive oil instead of butter. Realizing the mistake only after mixing, the baker decided to carry on with the recipe, hoping the olive oil’s mild fruitiness would complement the orange. To their surprise, the olive oil not only enhanced the orange flavor but also gave the cake a beautiful texture—moist, tender, and just a bit more sophisticated.

As a finishing touch, the baker whipped up a glaze using leftover pistachios, and the cake was transformed. The glaze added just the right amount of crunch and earthiness, balancing the sweetness and tying together the Mediterranean flavors in one glorious bite.

Personal Connection

For me, baking this cake is like bringing a piece of the Mediterranean sunshine into my kitchen. It’s the cake I make when I want to surprise friends or family with something that’s familiar yet unexpected. The process of rubbing orange zest into sugar, watching the olive oil blend smoothly into the batter, and drizzling the pistachio glaze over the top feels almost like creating a piece of art.

Every time I bake this, I think of winding coastal roads, sun-dappled olive groves, and the simple beauty of fresh, natural ingredients. It’s a recipe that reminds me that baking can be adventurous and comforting all at once.

A Cake for All Seasons

The Zesty Orange & Olive Oil Cake with Pistachio Glaze is a dessert that can be enjoyed all year round. In the cooler months, it brings a pop of brightness and warmth, and in summer, it’s the perfect light dessert for an afternoon gathering. The flavors are sophisticated but not intimidating, making it a cake that’s as much about the experience as it is about taste.

Whether you’re serving it with coffee in the morning, tea in the afternoon, or a glass of wine in the evening, this cake adapts beautifully. Each slice is a reminder of the magic that can happen when you bring together flavors from different parts of the world.

Ingredients ๐Ÿ›’

✅Cake:

  • 1 1/2 cups all-purpose flour ๐ŸŒพ
  • 1 teaspoon baking powder ๐ŸŒŸ
  • 1/2 teaspoon baking soda ๐Ÿง‚
  • 1/4 teaspoon salt
  • 1 teaspoon cinnamon ๐ŸŒฐ
  • 1/2 teaspoon cardamom ๐Ÿƒ
  • 1/4 teaspoon nutmeg
  • 3/4 cup granulated sugar ๐Ÿš
  • Zest of 2 oranges ๐ŸŠ๐ŸŠ
  • 1/2 cup olive oil ๐Ÿซ’
  • 2 large eggs ๐Ÿฅš๐Ÿฅš
  • 1/2 cup freshly squeezed orange juice ๐Ÿน
  • 1/2 cup Greek yogurt or sour cream ๐Ÿถ
  • 1 teaspoon vanilla extract ๐Ÿฆ

✅Pistachio Glaze:

  • 1/2 cup powdered sugar ๐Ÿฅ
  • 1-2 tablespoons milk or orange juice ๐ŸŠ
  • 2 tablespoons finely chopped pistachios ๐ŸŒฟ (plus extra for garnish)

Recipe Details ๐Ÿ“

  • Prep Time: 15 mins
  • Bake Time: 35-40 mins
  • Cool Time: 15 mins
  • Yield: 8-10 servings

Instructions

  1. Let’s Start the Party! ๐ŸŽ‰
    Preheat your oven to 350°F (175°C) and get your 9-inch round cake pan ready with a little grease and flour love.

  2. Mixing the Magic ๐Ÿช„
    In a medium bowl, whisk together flour, baking powder, baking soda, salt, cinnamon, cardamom, and nutmeg – think of it as a warm spice hug! ๐Ÿงก

  3. Infuse the Citrus Love ๐ŸŠ✨
    In a large bowl, use your fingers to rub the orange zest into the sugar until it smells heavenly. (Trust me, this step is magical!) ๐Ÿ’ซ

  4. Add the Good Stuff ๐Ÿ‘ฉ‍๐Ÿณ
    Stir in the olive oil, eggs, orange juice, Greek yogurt, and vanilla until you have a smooth, sunny batter. ๐ŸŒž

  5. Blend It All ๐ŸŒˆ
    Add your dry ingredients to the wet, stirring just until combined. Don’t overmix – we want this cake to stay light and airy! ๐ŸŽˆ

  6. Bake to Perfection ๐Ÿž
    Pour the batter into your prepared pan and bake for 35-40 minutes, or until a toothpick comes out clean. The golden brown top will tell you it’s ready to shine! ๐ŸŒŸ

  7. Cool & Make the Glaze ๐Ÿฏ
    While the cake cools, whip up the glaze! Mix powdered sugar, milk (or OJ for extra orange oomph), and chopped pistachios until smooth.

  8. Drizzle & Dazzle
    Drizzle the glaze over your cooled cake, letting it drip down for that rustic charm. Top with extra pistachios because...why not? ๐ŸŒฟ

Pro Tips ๐ŸŽ“

  • Rub the Zest! ๐Ÿ‘‰ Infusing the zest into the sugar releases the orange’s oils for an extra citrusy punch.
  • Olive Oil Choice: Use a mild olive oil for a hint of flavor or fruity olive oil for a bolder taste.

Serving Vibes
☕๐Ÿฐ

  • Pair with Tea or Coffee: ๐Ÿต๐Ÿ‚ This cake and a warm drink? Match made in heaven.
  • A Dollop of Whipped Cream: ๐Ÿฆ Add a little fluff on top for extra decadence.

Health Perks ๐Ÿ’ช๐ŸŒฑ

  • Olive Oil: Healthy fats that keep the cake moist and delightful.
  • Oranges: Vitamin C boost that adds both taste and nutrition!

Twist it Up! ๐ŸŽ‰

  • Nut-Free: Swap out pistachios for a nut-free experience.
  • Herby Delight: Try a teaspoon of rosemary in the glaze for a surprise twist ๐ŸŒฟ
  • Chocolate Drizzle: Drizzle with melted chocolate instead of glaze – orange + chocolate = love! ๐Ÿซ๐Ÿ’–


This Zesty Orange & Olive Oil Cake with Pistachio Glaze is all about celebrating flavors in a new, fun way. With its spiced, citrusy essence and glossy pistachio finish, it’s a showstopper dessert you’ll make time and time again. Enjoy every slice, and let this cake bring a splash of sunshine to your table! ๐ŸŒž๐Ÿฐ

Happy Baking!

Sam

Wednesday, 3 July 2024

Adventurous Salted Caramel Brownies

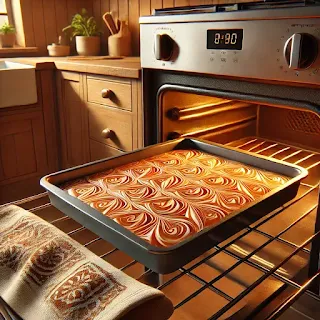
 These Salted Caramel Brownies are a decadent and adventurous twist on a classic treat. Combining rich chocolate with gooey caramel and a hint of sea salt, these brownies are the perfect balance of sweet and salty. Ideal for any occasion, they are sure to satisfy your sweet tooth and impress your friends and family.

Origin Story: Salted Caramel Brownies

Salted Caramel Brownies are a decadent fusion of rich, fudgy chocolate and smooth, salted caramel, creating a perfect balance of sweet and salty flavors. This indulgent treat was inspired by the desire to elevate the classic brownie with an additional layer of luxurious caramel, offering a sophisticated twist on a beloved dessert.

Historical Roots

The history of brownies dates back to the late 19th century in the United States. The first recorded brownie recipes appeared in the early 20th century, with the Palmer House Hotel in Chicago often credited for popularizing the dessert with their version made for the 1893 World’s Columbian Exposition.

Caramel, on the other hand, has a much older history, originating in the Arab world where sugarcane was first cultivated. By the 17th century, caramel had spread to Europe and was commonly used in confectionery. The combination of caramel and salt, while seeming modern, has roots in traditional French cooking where salted butter caramels from Brittany became famous.

Cultural Significance

Salted Caramel Brownies hold a special place in contemporary dessert culture, representing the modern trend of combining classic flavors with a touch of gourmet sophistication. The contrast of the rich chocolate brownie with the smooth, salted caramel creates a multi-dimensional flavor experience that appeals to a wide range of tastes.

The appeal of these brownies lies in their ability to offer both comfort and indulgence. They are often featured in upscale bakeries and gourmet dessert menus, yet they remain accessible enough for home bakers to create and enjoy. This versatility has made Salted Caramel Brownies a favorite for special occasions, casual gatherings, and everything in between.

Personal Connection

My journey with Salted Caramel Brownies began with a desire to create an unforgettable dessert for a family celebration. I wanted something that combined the familiar comfort of brownies with an elegant twist. The idea of adding a layer of salted caramel seemed like the perfect way to achieve this.

Experimenting in the kitchen, I found that making a homemade caramel sauce with a hint of sea salt provided the best flavor. The challenge was to create a brownie that was both rich and fudgy, capable of holding up to the caramel layer without becoming overly sweet.

Recipe Evolution

Creating the perfect Salted Caramel Brownies involves several key steps. The brownie base should be dense and fudgy, achieved by using high-quality dark chocolate and a combination of granulated and brown sugar. Adding a touch of espresso powder enhances the chocolate flavor without overpowering the caramel.

The salted caramel layer is made by cooking sugar until it reaches a deep amber color, then adding butter, cream, and sea salt. This mixture is poured over the partially baked brownie base and allowed to set before adding the final layer of brownie batter.

Baking the brownies until they are just set ensures a moist, fudgy texture. Allowing them to cool completely before cutting helps the caramel layer to firm up, making the brownies easier to slice and serve.

Sharing the Tradition

Today, Salted Caramel Brownies are a favorite in my household, especially for special occasions and gatherings. They are the brownies I bake when I want to impress guests with a luxurious and delicious dessert. Each bite is a celebration of the rich history and timeless appeal of combining chocolate and caramel.

Ingredients

✅For the Brownies:

  • 1 cup unsalted butter
  • 8 oz semi-sweet chocolate, chopped
  • 1 1/2 cups granulated sugar
  • 1/2 cup brown sugar, packed
  • 4 large eggs
  • 1 teaspoon vanilla extract
  • 1 cup all-purpose flour
  • 1/2 cup unsweetened cocoa powder
  • 1/2 teaspoon salt

For the Salted Caramel:

  • 1 cup granulated sugar
  • 6 tablespoons unsalted butter, cubed
  • 1/2 cup heavy cream
  • 1 teaspoon sea salt

Recipe Duration

  • Preparation: 20 minutes
  • Cooking: 35-40 minutes
  • Yield: 16 brownies

Instructions

  1. Preheat and Prepare Pan: Preheat your oven to 350°F (175°C). Grease and line a 9x9-inch baking pan with parchment paper.

  2. Make the Brownies: In a medium saucepan, melt the butter and chopped chocolate over low heat, stirring constantly until smooth. Remove from heat and let cool slightly. In a large bowl, whisk together the granulated sugar, brown sugar, eggs, and vanilla extract until combined. Gradually add the melted chocolate mixture, stirring until smooth. Sift in the flour, cocoa powder, and salt, and fold until just combined. Pour half of the brownie batter into the prepared pan and spread evenly.

  3. Prepare the Salted Caramel: In a medium saucepan, heat the granulated sugar over medium heat, stirring constantly until it melts into a thick amber-colored liquid. Add the cubed butter and stir until melted and combined. Slowly pour in the heavy cream while stirring continuously. Let the mixture boil for 1 minute, then remove from heat and stir in the sea salt. Allow to cool slightly.

  4. Assemble the Brownies: Drizzle half of the salted caramel over the brownie batter in the pan. Pour the remaining brownie batter on top and spread evenly. Drizzle the remaining salted caramel over the top and use a knife to swirl it into the batter.

  5. Bake: Bake in the preheated oven for 35-40 minutes, or until a toothpick inserted into the center comes out with a few moist crumbs. Allow the brownies to cool completely in the pan before cutting into squares.

Pro Tips

  • Don’t Overbake: Check for doneness with a toothpick; it should come out with a few moist crumbs.
  • Room Temperature Eggs: Use room temperature eggs for a smoother batter.
  • Swirling Caramel: Use a knife to create a beautiful swirl pattern with the caramel.

Secret Tips

  • Extra Chocolate: Add 1/2 cup of chocolate chips to the brownie batter for extra gooeyness.
  • Flavor Boost: Add a teaspoon of instant espresso powder to the batter to enhance the chocolate flavor.

Serving Options

  • With Ice Cream: Serve warm brownies with a scoop of vanilla ice cream.
  • With Whipped Cream: Top with a dollop of whipped cream for added indulgence.
  • With Coffee: Enjoy with a hot cup of coffee for a perfect pairing.

Health Benefits

  • Dark Chocolate: Contains antioxidants and can improve heart health.
  • Moderate Sugar: Use dark chocolate with a higher cocoa content for a less sweet treat.

Variations & Customization Options

  • Nutty Caramel Brownies: Add 1/2 cup of chopped nuts to the caramel layer.
  • Gluten-Free: Use a gluten-free flour blend for the brownie batter.
  • Vegan: Substitute butter with vegan butter, eggs with flax eggs, and heavy cream with coconut cream.


These Adventurous Salted Caramel Brownies are a luxurious and flavorful dessert that combines the richness of chocolate with the decadence of salted caramel. Perfect for any gathering or a special treat at home, they are sure to become a favorite. 

Happy baking!

Sam

Cozy Apple Crumble Delight Bars

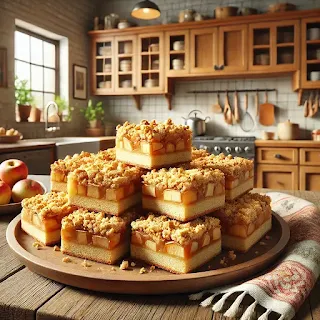
Apple Crumble Bars are a delightful treat that combines the comforting flavors of apple pie with the convenience of a bar. These bars are perfect for an adventurous twist on a classic dessert, featuring a rich apple filling and a crumbly, buttery topping. Perfect for snacks, desserts, or even breakfast!

Origin Story: Apple Crumble Bars

Apple Crumble Bars are a delightful fusion of the classic apple pie and the beloved crumble dessert, transformed into an easy-to-eat bar form. This unique recipe was inspired by a desire to create an adventurous yet comforting treat that combines the rich flavors of apples and cinnamon with a buttery crumble topping. These bars are perfect for any occasion, from family gatherings to casual snacks.

Historical Roots

The origins of apple desserts trace back to ancient times when apples were first cultivated in Central Asia. The cultivation and consumption of apples spread to Europe and later to North America, where apple pies and crumbles became popular. Apple pie, often considered an American classic, was brought to America by English settlers and has been a staple dessert for centuries.

Crumble, also known as crisp, is a British dessert that gained popularity during World War II due to rationing. The simple mixture of flour, butter, and sugar made it an economical and delicious way to use up fruits. Combining these two beloved desserts into a bar form creates a portable and versatile treat that maintains the flavors and textures of both.

Cultural Significance

Apple Crumble Bars hold a special place in contemporary baking, reflecting a trend towards combining traditional flavors with modern, convenient forms. They are a popular choice for potlucks, picnics, and holiday gatherings, embodying the comforting essence of homemade apple desserts. The versatility of these bars allows for endless variations, making them a favorite among bakers and dessert lovers alike.

The appeal of Apple Crumble Bars lies in their ability to offer the familiar taste of apple pie and crumble in a more accessible and easy-to-serve format. This adaptation makes them suitable for a wide range of occasions, from breakfast to dessert.

Personal Connection

My journey with Apple Crumble Bars began with a desire to create a new and exciting dessert that would capture the essence of my favorite apple desserts while being easy to share and enjoy. The idea of combining the rich, spiced apple filling with a buttery crumble topping in a bar form was both innovative and nostalgic.

Experimenting in the kitchen, I found that using a combination of tart and sweet apples provided the best flavor balance. Adding a touch of lemon juice to the apple filling enhanced the natural sweetness and provided a fresh, tangy contrast to the buttery crumble. The addition of oats to the crumble topping added texture and a wholesome touch.

Recipe Evolution

Creating the perfect Apple Crumble Bars involves several key steps. The crust and crumble topping are made from the same mixture, which simplifies the preparation process. Using cold butter and cutting it into the flour and oats mixture creates a crumbly texture that is both tender and crisp.

The apple filling is made by tossing sliced apples with sugar, cinnamon, nutmeg, and a bit of lemon juice. This mixture is spread over the crust and then topped with the remaining crumble mixture. Baking the bars until the top is golden and the filling is bubbly ensures that the flavors meld together beautifully.

Sharing the Tradition

Today, Apple Crumble Bars are a favorite in my household, especially during the fall when apples are in season. They are the bars I bake when I want to share a taste of comfort and adventure with friends and family. Each bite is a celebration of the rich history and timeless appeal of apple desserts.

Ingredients

✅For the Crust and Crumble Topping:

  • 2 cups all-purpose flour
  • 1/2 cup granulated sugar
  • 1/2 cup brown sugar, packed
  • 1 teaspoon baking powder
  • 1/2 teaspoon salt
  • 1/4 teaspoon ground cinnamon
  • 1 cup unsalted butter, cold and cubed
  • 1 large egg

For the Apple Filling:

  • 4 cups apples, peeled, cored, and diced
  • 2 tablespoons lemon juice
  • 1/2 cup granulated sugar
  • 1/4 cup brown sugar, packed
  • 1 teaspoon ground cinnamon
  • 1/4 teaspoon ground nutmeg
  • 2 tablespoons all-purpose flour

Recipe Duration

  • Preparation: 20 minutes
  • Cooking: 45-50 minutes
  • Yield: 16 bars

Instructions

  1. Preheat and Prepare Pan: Preheat your oven to 350°F (175°C). Grease a 9x13-inch baking pan or line it with parchment paper.

  2. Make the Crust and Crumble Topping: In a large bowl, whisk together the flour, granulated sugar, brown sugar, baking powder, salt, and ground cinnamon. Cut in the cold, cubed butter using a pastry cutter or two forks until the mixture resembles coarse crumbs. Add the egg and mix until combined. Press half of the mixture firmly into the bottom of the prepared pan to form the crust.

  3. Prepare the Apple Filling: In a medium bowl, toss the diced apples with lemon juice. Add the granulated sugar, brown sugar, ground cinnamon, ground nutmeg, and flour. Mix until the apples are evenly coated.

  4. Assemble the Bars: Spread the apple mixture evenly over the crust. Sprinkle the remaining crumb mixture over the apples, pressing lightly.

  5. Bake: Bake in the preheated oven for 45-50 minutes, or until the top is golden brown and the apples are tender. Allow the bars to cool completely in the pan before cutting into squares.

Pro Tips

  • Apples: Use a mix of tart and sweet apples for a balanced flavor.
  • Cold Butter: Ensure the butter is cold to achieve a flaky crust.
  • Extra Crunch: Add chopped nuts to the crumble topping for added texture.

Secret Tips

  • Spice It Up: Add a pinch of ground cloves or allspice for extra warmth.
  • Caramel Drizzle: Drizzle caramel sauce over the cooled bars for an extra layer of flavor.

Serving Options

  • With Ice Cream: Serve warm bars with a scoop of vanilla ice cream.
  • With Whipped Cream: Top with a dollop of whipped cream for added indulgence.
  • With Coffee: Enjoy as a delightful treat with a hot cup of coffee or tea.

Health Benefits

  • Apples: Rich in fiber and vitamins.
  • Moderate Sugar: Controlled sugar content for a balanced treat.

Variations & Customization Options

  • Berry Apple Bars: Mix in 1 cup of fresh or frozen berries with the apple filling.
  • Gluten-Free: Use a gluten-free flour blend for the crust and topping.
  • Vegan: Substitute butter with a vegan butter alternative and use a flax egg.


These Adventurous Unique Apple Crumble Bars are a delicious and versatile treat that combines the best of apple pie and crumble in a convenient bar form. Perfect for any occasion, they are sure to become a favorite. 

Happy baking!

Sam

Monday, 1 July 2024

Blueberry Bundt Cake

This Blueberry Bundt Cake is a delightful and elegant dessert perfect for any occasion. It features a moist, tender crumb studded with juicy blueberries and a hint of lemon zest. Topped with a sweet lemon glaze, this cake is sure to impress your friends and family.

Origin Story: Blueberry Bundt Cake

Blueberry Bundt Cake is a delightful dessert that combines the sweetness of blueberries with the rich, moist texture of a bundt cake. This cake is perfect for special occasions, family gatherings, or simply as a treat to enjoy with a cup of coffee. The unique shape of the bundt cake, along with the vibrant burst of blueberries, makes this dessert both visually appealing and delicious.

Historical Roots

The Bundt cake, with its distinctive ring shape, has its origins in Europe, particularly Germany and Austria, where cakes baked in similar ring-shaped pans were known as "Gugelhupf." These cakes were often yeast-based and filled with nuts, fruit, and sometimes liquor.

The Bundt pan as we know it today was popularized in the United States in the 1950s and 1960s. The pan's design was patented by H. David Dalquist, the founder of Nordic Ware, who created it at the request of the Minneapolis chapter of the Hadassah Society. The pan gained immense popularity after a "Tunnel of Fudge" cake recipe won second place in the 1966 Pillsbury Bake-Off, resulting in a surge in demand for Bundt pans.

Blueberries, native to North America, have been enjoyed by indigenous peoples for centuries and became widely cultivated in the 20th century. The combination of blueberries and Bundt cake is a relatively modern invention, celebrating the freshness of blueberries within the classic structure of a Bundt cake.

Cultural Significance

Blueberry Bundt Cake holds a special place in American baking culture, particularly in regions where blueberries are abundant. It is often associated with summer, when blueberries are in season, and is a favorite for summer picnics, Fourth of July celebrations, and other warm-weather gatherings.

The Bundt cake's unique shape and ease of slicing make it ideal for serving at parties and events. The addition of blueberries adds a burst of color and flavor, making the cake not only delicious but also visually stunning.

Personal Connection

My journey with Blueberry Bundt Cake began with a desire to create a show-stopping dessert for a family reunion. I wanted something that combined the fresh, sweet flavor of blueberries with a cake that was easy to serve and enjoyed by all ages. The Bundt cake, with its beautiful shape and moist texture, seemed like the perfect choice.

Experimenting in the kitchen, I found that incorporating fresh blueberries into the batter and adding a lemon glaze elevated the cake's flavor profile. The result was a moist, tender cake with pockets of juicy blueberries and a zesty finish that delighted everyone at the reunion.

Recipe Evolution

Creating the perfect Blueberry Bundt Cake involves a few key steps. Using fresh, ripe blueberries ensures the best flavor and texture. Coating the blueberries in a bit of flour before folding them into the batter helps prevent them from sinking to the bottom of the cake.

The cake batter should be rich and moist, achieved by using a combination of butter, sugar, eggs, and buttermilk or yogurt. Adding lemon zest to the batter enhances the flavor, providing a subtle contrast to the sweetness of the blueberries.

Baking the cake in a well-greased and floured Bundt pan ensures it releases easily after baking. A lemon glaze, drizzled over the cooled cake, adds a touch of sweetness and a beautiful finish.

Sharing the Tradition

Today, Blueberry Bundt Cake is a favorite in my household, especially during blueberry season. It is the cake I bake when I want to impress guests with a beautiful and delicious dessert. Each slice is a reminder of the joy of baking and the simple pleasures of fresh, seasonal ingredients.

Ingredients

✅For the Cake:

  • 2 1/2 cups all-purpose flour
  • 2 teaspoons baking powder
  • 1/2 teaspoon baking soda
  • 1/2 teaspoon salt
  • 1 cup unsalted butter, softened
  • 1 1/2 cups granulated sugar
  • 3 large eggs
  • 1 teaspoon vanilla extract
  • Zest of 1 lemon
  • 1 cup buttermilk
  • 2 cups fresh blueberries (tossed with 1 tablespoon flour)

For the Lemon Glaze:

  • 1 cup powdered sugar
  • 2-3 tablespoons lemon juice

Recipe Duration

  • Preparation Time: 20 minutes
  • Cooking Time: 55-60 minutes
  • Yield: 12 servings

Instructions

  1. Preheat and Prepare Pan: Preheat your oven to 350°F (175°C). Grease and flour a Bundt pan.

  2. Mix Dry Ingredients: In a medium bowl, whisk together the flour, baking powder, baking soda, and salt.

  3. Cream Butter and Sugar: In a large mixing bowl, beat the butter and granulated sugar until light and fluffy. Add the eggs one at a time, beating well after each addition. Mix in the vanilla extract and lemon zest.

  4. Combine Wet and Dry Ingredients: Alternately add the flour mixture and buttermilk to the butter mixture, beginning and ending with the flour mixture. Mix until just combined. Gently fold in the blueberries.

  5. Fill Bundt Pan: Pour the batter into the prepared Bundt pan, spreading it evenly.

  6. Bake: Bake in the preheated oven for 55-60 minutes, or until a toothpick inserted into the center comes out clean. Allow the cake to cool in the pan for 10 minutes, then transfer to a wire rack to cool completely.

  7. Make the Lemon Glaze: In a small bowl, whisk together the powdered sugar and lemon juice until smooth. Adjust the consistency by adding more lemon juice if necessary.

  8. Glaze the Cake: Once the cake is completely cool, drizzle the lemon glaze over the top, allowing it to drip down the sides.

Pro Tips

  1. Toss Blueberries in Flour: Prevent blueberries from sinking by tossing them in a tablespoon of flour.
  2. Room Temperature Ingredients: Use room temperature ingredients for a smoother batter.
  3. Avoid Overmixing: Mix the batter until just combined to avoid a dense cake.
  4. Test for Doneness: Check for doneness with a toothpick; it should come out clean.
  5. Cool Completely Before Glazing: Ensure the cake is completely cool before adding the glaze to prevent it from melting.

Secret Tips

  1. Extra Moisture: Add a tablespoon of sour cream for extra moisture.
  2. Flavor Boost: Add a teaspoon of almond extract for an extra layer of flavor.
  3. Berry Variation: Use a mix of berries like raspberries and blackberries for a different twist.

Serving Options

  1. With Whipped Cream: Serve with a dollop of whipped cream.
  2. With Ice Cream: Pair with a scoop of vanilla ice cream.
  3. With Fresh Berries: Garnish with fresh blueberries and mint leaves.
  4. With Lemon Curd: Add a spoonful of lemon curd on the side.
  5. With Tea or Coffee: Enjoy with a hot cup of tea or coffee.

Health Benefits

  • Blueberries: Rich in antioxidants and vitamins.
  • Lemon: Provides vitamin C and a refreshing flavor.
  • Buttermilk: Adds a tangy flavor and moisture.

Variations & Customization Options

  1. Gluten-Free: Use gluten-free flour.
  2. Vegan: Substitute eggs with flax eggs and use dairy-free milk.
  3. Nutty Twist: Add 1/2 cup of chopped nuts to the batter.
  4. Spiced Up: Add a teaspoon of cinnamon or nutmeg for a warm spice flavor.
  5. Chocolate Lovers: Fold in 1/2 cup of chocolate chips for a sweet treat.


This Blueberry Bundt Cake is a delicious and beautiful dessert that's perfect for any occasion. With its moist crumb, juicy blueberries, and tangy lemon glaze, it's sure to be a hit with everyone. 

Happy baking!
Sam

Monday, 1 April 2024

A Chocoholic's Dream - Double Chocolate Muffins

Welcome back to Sam's Baking Blog! Today, we're indulging in a chocolate lover's dream with these Double Chocolate Muffins. Packed with rich cocoa and gooey chocolate chips, these muffins are the epitome of moist, yummy, and juicy. Perfect for a decadent breakfast treat or a satisfying dessert, these muffins are sure to delight your taste buds.

Origin Story: Double Chocolate Muffins

Double Chocolate Muffins are a decadent treat that combines rich cocoa with chunks of chocolate, creating a dessert that is both intensely chocolatey and wonderfully moist. These muffins are a favorite among chocolate lovers and are perfect for breakfast, dessert, or a sweet snack any time of the day.

Historical Roots

The history of chocolate in baking can be traced back to the ancient civilizations of Central and South America. The Aztecs and Mayans were among the first to cultivate cocoa beans and use them to create beverages and other culinary delights. However, it wasn't until the 18th century that chocolate began to be used in solid form in desserts and baked goods.

The development of chocolate muffins likely evolved from the broader category of chocolate cakes and quick breads. The muffin itself is a product of 19th-century American baking, where the use of chemical leavening agents like baking powder and baking soda allowed for the quick and easy preparation of small, individual cakes. The addition of chocolate to muffins became a natural progression as the popularity of chocolate grew.

Cultural Significance

Double Chocolate Muffins hold a special place in the world of baking, particularly in Western cultures. They are often found in coffee shops, bakeries, and home kitchens, celebrated for their rich flavor and moist texture. These muffins are a favorite treat for chocolate lovers and are often associated with indulgence and comfort.

In American culture, muffins are a popular breakfast item, and the double chocolate version adds a dessert-like twist to this morning staple. They are perfect for brunches, celebrations, or simply as a treat to enjoy with a cup of coffee or a glass of milk.

Personal Connection

My passion for Double Chocolate Muffins began during my college years. I used to visit a local coffee shop that served the most decadent double chocolate muffins. They were my go-to treat during late-night study sessions and became a comforting routine amid the chaos of college life.

Inspired by those memories, I set out to create my own version of Double Chocolate Muffins. The key was to achieve the perfect balance of moistness and rich chocolate flavor. After experimenting with various recipes and techniques, I found that using both cocoa powder and chunks of dark chocolate provided the intense chocolate experience I was looking for.

Recipe Evolution

Creating the perfect Double Chocolate Muffin involves a few key steps. The batter must be rich and moist, which can be achieved by using high-quality cocoa powder and a generous amount of chocolate chunks or chips. Adding sour cream or yogurt to the batter can enhance the moisture and tenderness of the muffins.

The use of both baking powder and baking soda ensures that the muffins rise well and have a light, airy texture. Mixing the batter just until combined helps avoid overworking the gluten in the flour, which can result in dense muffins.

For an extra touch of decadence, I sometimes sprinkle additional chocolate chips on top of the muffins before baking. This creates a deliciously gooey chocolate layer on top, making the muffins even more irresistible.

Sharing the Tradition

Today, Double Chocolate Muffins are a favorite treat in my household. They are the muffins I bake when I want to indulge in something sweet and chocolatey or when I want to share a delicious treat with friends and family. Each bite is a reminder of those college days and the joy of discovering the perfect chocolate muffin.

Ingredients:

2 cups all-purpose flour
3/4 cup unsweetened cocoa powder
1 tablespoon baking powder
1/2 teaspoon baking soda
1/2 teaspoon salt
1 cup granulated sugar
2 large eggs
1 cup buttermilk
1/2 cup vegetable oil
1 teaspoon vanilla extract
1 1/2 cups semisweet chocolate chips

Prep Time: 15 minutes
Cook Time: 20-25 minutes
Yield: 12 muffins

Instructions:

  1. Preheat the oven to 375°F (190°C). Line a muffin tin with paper liners or grease the cups.
  2. In a large bowl, whisk together the flour, cocoa powder, baking powder, baking soda, salt, and sugar.
  3. In a separate bowl, beat the eggs, then mix in the buttermilk, vegetable oil, and vanilla extract.
  4. Add the wet ingredients to the dry ingredients and stir until just combined. Fold in the chocolate chips, reserving a few to sprinkle on top.
  5. Divide the batter evenly among the muffin cups, filling each about 3/4 full. Sprinkle the reserved chocolate chips on top.
  6. Bake for 20-25 minutes, or until a toothpick inserted into the center of a muffin comes out clean.
  7. Let the muffins cool in the tin for 5 minutes, then transfer to a wire rack to cool completely.

Pro Tips:

  • Use high-quality cocoa powder and chocolate chips for the best flavor.
  • Don't overmix the batter to ensure the muffins stay moist and tender.

Secret Tips:

Add a tablespoon of brewed coffee to the batter to enhance the chocolate flavor.

Serving Options:

Serve these double chocolate muffins warm with a glass of cold milk or a cup of coffee for a truly indulgent experience.

These Double Chocolate Muffins are a chocolate lover's paradise, combining rich cocoa and melty chocolate chips for a truly decadent treat. Whether you're enjoying them for breakfast or dessert, they're sure to satisfy your chocolate cravings.

Happy Baking!
Sam

Monday, 5 February 2024

Frosty Pumpkin Spice Delight Muffins

 Embrace the spirit of winter with my'Winter Wonderland Pumpkin Muffins.' As the air turns crisp and the world outside is adorned in a blanket of cold, these muffins are your ticket to warmth and comfort. Crafted with the vibrant essence of freshly harvested pumpkins, they capture the magic of the season. Each bite is like a cozy hug from a crackling fireplace, a delightful blend of healthiness and pure indulgence that'll keep you snug and satisfied throughout the winter

Origin Story: Pumpkin Spice Muffins

Pumpkin Spice Delight Muffins are a seasonal favorite that capture the essence of autumn with their warm spices and rich pumpkin flavor. These muffins are perfect for cozy mornings, holiday brunches, or as a sweet snack. Their creation and evolution reflect the growing popularity of pumpkin spice and its cultural significance.

Historical Roots

The use of pumpkin in baking dates back to early American colonial times. Native Americans introduced pumpkins to the Pilgrims, who quickly adopted them into their diet. Pumpkin pies and breads became staples during the fall harvest season.

Pumpkin spice, a blend of cinnamon, nutmeg, ginger, and cloves, became popular in the mid-20th century as a convenient way to season pumpkin pie. The term "pumpkin spice" gained widespread recognition with the introduction of the Pumpkin Spice Latte by Starbucks in 2003, which sparked a cultural phenomenon. Since then, pumpkin spice has become synonymous with autumn, appearing in a wide range of products, including baked goods like muffins.

Cultural Significance

Pumpkin Spice Delight Muffins embody the comforting and nostalgic flavors of fall. They are often enjoyed during the cooler months, from late September through November, and are a staple at Halloween and Thanksgiving gatherings. The blend of spices not only enhances the natural sweetness of pumpkin but also evokes feelings of warmth and coziness.

The popularity of pumpkin spice has transcended its humble beginnings, becoming a cultural icon. Products featuring pumpkin spice are eagerly anticipated each year, and the flavor has a dedicated following. Pumpkin Spice Delight Muffins are a delicious way to indulge in this seasonal trend.

Personal Connection

My love for Pumpkin Spice Delight Muffins began during a fall trip to a local pumpkin patch. After a day of pumpkin picking, I visited the farm's bakery and tried their freshly baked pumpkin spice muffins. The aroma of spices and the moist, flavorful muffins left a lasting impression, inspiring me to recreate the experience at home.

Experimenting with different recipes, I found that using fresh pumpkin puree and a generous amount of spices resulted in the most flavorful muffins. Adding a streusel topping provided a delightful crunch that complemented the soft, moist interior.

Recipe Evolution

Creating the perfect Pumpkin Spice Delight Muffins involves a few key steps. Using fresh or canned pumpkin puree gives the muffins their rich, moist texture. The pumpkin spice blend should be well-balanced to enhance the flavor without overpowering it.

The batter is typically made with a combination of flour, sugar, eggs, oil, and spices. Mixing the dry and wet ingredients separately before combining them ensures a smooth batter. Adding mix-ins like chopped nuts or chocolate chips can add texture and extra flavor.

For a special touch, a streusel topping made from butter, sugar, and flour can be sprinkled on top before baking. This adds a crunchy, sweet layer that contrasts beautifully with the soft muffins.

Sharing the Tradition

Today, Pumpkin Spice Delight Muffins are a favorite in my household. They are the muffins I bake when I want to celebrate the arrival of fall or share a seasonal treat with friends and family. Each bite is a reminder of the cozy, comforting flavors of autumn.

Ingredients
:

1 1/2 cups fresh pumpkin puree (made from roasted or steamed pumpkin)
1/2 cup unsweetened applesauce
1/3 cup honey or maple syrup
2 large eggs
1 teaspoon pure vanilla extract
1 3/4 cups whole wheat flour
1 teaspoon baking soda
1/2 teaspoon baking powder
1/2 teaspoon ground cinnamon
1/4 teaspoon ground nutmeg
1/4 teaspoon ground cloves
1/4 teaspoon salt
1/2 cup chopped nuts or seeds (optional)
1/2 cup raisins or dried cranberries (optional)
  • Preparation Time: 15 minutes
    Baking Time: 20-25 minutes
    Yield: This recipe yields approximately 12 Pumpkin Muffins.

Instructions
:

  1. ๐ŸฅThe Fresh Pumpkin Puree:

  2. Preheat your oven to 375°F (190°C). Cut a small pumpkin in half, scoop out the seeds, and place it cut-side down on a baking sheet. Roast for about 45 minutes or until the flesh is soft. 
  3. Scoop out the pumpkin flesh and puree it in a blender or food processor until smooth.

  4. ๐ŸฅThe Muffin Batter:

  5. In a large mixing bowl, combine fresh pumpkin puree, unsweetened applesauce, honey (or maple syrup), eggs, and vanilla extract. Mix until well combined.
  6. In a separate bowl, whisk together whole wheat flour, baking soda, baking powder, ground cinnamon, ground nutmeg, ground cloves, and salt.
  7. Gradually add the dry ingredients to the wet ingredients and stir until just combined. If desired, fold in chopped nuts or seeds and raisins or dried cranberries.
  8. Preheat your oven to 350°F (175°C). Line a muffin tin with paper liners or grease it lightly. Fill each muffin cup about 3/4 full with the muffin batter.
  9. Bake for 20-25 minutes or until a toothpick inserted into the center of a muffin comes out clean.
  10. Cool the muffins in the tin for a few minutes, then transfer them to a wire rack to cool completely.

Pro Tips

  1. Fresh Pumpkin: Use freshly roasted or steamed pumpkin for the best flavor and nutrition. Canned pumpkin can be a convenient alternative.
  2. Customize Toppings: Feel free to top your muffins with a sprinkle of oats, chopped nuts, or a drizzle of honey before baking.

Secret Tips:

  1. Moisture Lock: Store your pumpkin muffins in an airtight container to keep them moist and fresh.


These Healthy Fresh Pumpkin Muffins bring the comfort and goodness of Winter to your table. With real pumpkin, whole wheat goodness, and a burst of spices, they're a wholesome treat for your taste buds and a nutritious choice for your well-being. Enjoy the flavors of the season in every bite!

Happy Baking!
Sam