Turning Your Wishes into Sweet Realities, One Homemade Treat at a Time. 🌟
Showing posts with label Easy Baking. Show all posts

Tuesday, 31 December 2024

Chai-Spiced Blondies

Indulge in the warm, aromatic flavors of chai tea baked into chewy, buttery blondies. These Chai-Spiced Blondies are perfect for cozy evenings or sharing with loved ones. Let’s bake something extraordinary! 💛

Origin Story: Chai-Spiced Blondies 

There’s a certain magic to chai—a blend of spices that warms the soul and carries whispers of tradition, comfort, and indulgence. The idea for Chai-Spiced Blondies was born in the kitchen of a baker who adored the cozy flavors of chai but wanted to transform it into something unexpected, blending the richness of blondies with the aromatic allure of chai tea.

Inspired by the Spice Trails

The story begins centuries ago along the spice routes of South Asia, where traders carried precious cargo like cinnamon, cardamom, ginger, and cloves. These spices were prized for their ability to transform simple ingredients into something extraordinary. Chai, a spiced tea that emerged from these traditions, became a symbol of hospitality and warmth, served to guests as a gesture of welcome and care.

Fast forward to a chilly autumn afternoon in a modern kitchen, where a baker—let’s call her Priya—was sipping her favorite cup of chai and pondering her next dessert creation. She loved the way blondies offered a buttery, chewy canvas for flavors but felt they could use a touch of spice to make them extraordinary. That’s when inspiration struck: What if the rich, aromatic spices of chai could be baked into blondies?

A Cozy Experiment

Priya set to work, crafting a chai spice blend that balanced warmth, sweetness, and depth. She melted butter, whisked in sugars, and infused the batter with cinnamon, cardamom, ginger, nutmeg, and cloves, creating a batter that smelt like a cozy hug. For texture, she added a handful of chopped nuts and white chocolate chips, imagining how the creamy sweetness would complement the spices.

As the blondies baked, the kitchen filled with the intoxicating aroma of chai spices mingling with butter and sugar. The anticipation was almost too much to bear, but when the timer dinged, Priya knew she had created something special.

The first bite was everything she’d hoped for: buttery richness, chewy texture, and the warmth of chai spices in every bite. It was like a cup of chai, but in dessert form—a treat that felt both familiar and new.

A Recipe That Brings People Together

The Chai-Spiced Blondies quickly became a favorite among Priya’s family and friends. They were perfect for cozy evenings by the fire, paired with a steaming cup of tea, and even better when shared at gatherings. Everyone loved how the spices elevated the humble blondie into a dessert that felt both comforting and elegant.

Word spread, and soon these blondies found their way to bake sales, brunch tables, and even café menus. Each batch carried the warmth of chai and the joy of sharing something special with loved ones.

Personal Connection

For me, these Chai-Spiced Blondies are more than a dessert—they’re a celebration of the little moments. Baking them fills my home with the warm, nostalgic scent of spices, and each bite is like a small escape to a cozy café on a rainy day.

They’re also incredibly versatile. Whether I’m making them as a quick treat for myself or a thoughtful gift for a friend, these blondies never fail to bring a smile. And the best part? They’re as easy to make as they are delightful to eat.

A Blondie for Every Occasion

Chai-Spiced Blondies are the perfect blend of tradition and creativity, combining the beloved flavors of chai with the classic appeal of blondies. They’re a treat for any season but especially wonderful during fall and winter, when their warm spices feel like a hug in dessert form.

Ingredients
🛒

✅For the Blondies:

  • 1 cup unsalted butter, melted 🧈
  • 1 1/4 cups brown sugar 🍬
  • 1/2 cup granulated sugar
  • 2 large eggs 🥚
  • 1 teaspoon vanilla extract 🍦
  • 2 cups all-purpose flour 🌾
  • 1 teaspoon baking powder
  • 1/2 teaspoon salt 🧂

Chai Spice Mix:

  • 1 teaspoon ground cinnamon 🌿
  • 1/2 teaspoon ground cardamom
  • 1/4 teaspoon ground ginger
  • 1/4 teaspoon ground cloves
  • 1/4 teaspoon ground nutmeg

Optional Add-Ins:

  • 1/2 cup white chocolate chips 🍫
  • 1/2 cup chopped nuts (pecans or walnuts) 🌰

Recipe Details 📏

  • Prep Time: 15 mins
  • Bake Time: 25-30 mins
  • Cooling Time: 20 mins
  • Yield: 12 blondies

Instructions

  1. Preheat the Oven 🔥
    Preheat your oven to 350°F (175°C) and line an 8x8-inch baking pan with parchment paper.

  2. Mix the Wet Ingredients 🥣
    In a large bowl, whisk together the melted butter, brown sugar, and granulated sugar until smooth. Add the eggs one at a time, mixing well after each addition. Stir in the vanilla extract.

  3. Combine Dry Ingredients 🌾
    In a separate bowl, whisk together the flour, baking powder, salt, and the chai spice mix (cinnamon, cardamom, ginger, cloves, and nutmeg).

  4. Make the Batter 🍂
    Gradually fold the dry ingredients into the wet ingredients until just combined. If desired, fold in white chocolate chips or chopped nuts.

  5. Bake the Blondies 🎂
    Pour the batter into the prepared pan, spreading it evenly. Bake for 25-30 minutes, or until a toothpick inserted into the center comes out clean.

  6. Cool & Slice
    Let the blondies cool in the pan for 15 minutes before transferring them to a wire rack. Once cooled, slice into squares or rectangles.

Pro Tips 🎓

  • For a stronger chai flavor, double the chai spice mix.
  • Avoid overmixing the batter to keep the blondies chewy.
  • Store in an airtight container for up to 5 days or freeze for longer freshness.

These Chai-Spiced Blondies are a cozy and flavorful twist on a classic dessert. The combination of buttery richness and warm spices makes them irresistible. Whether you enjoy them with a cup of tea or share them with friends, they’re sure to be a hit! ☕✨

Happy New Year!

Sam

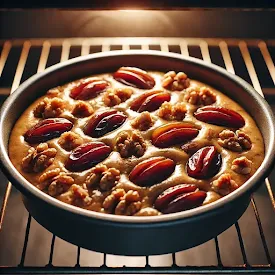
Heavenly Date & Walnut Cake

Rich, moist, and full of natural sweetness, this Date & Walnut Cake is a perfect dessert or snack. Packed with the goodness of dates and the crunch of walnuts, it’s a comforting treat that feels like a warm hug for your taste buds. Plus, it’s simple to make and uses wholesome ingredients. 🥰

Origin Story: Date & Walnut Cake

In a small village nestled in the heart of the Middle East, where date palms lined the streets and walnuts were harvested from ancient groves, a humble baker sought to create a dessert that embodied the essence of their homeland. Combining two of the region’s most treasured ingredients—dates, a symbol of hospitality, and walnuts, a sign of abundance—the Heavenly Date & Walnut Cake was born.

This cake wasn’t just a treat; it was a story baked into every slice—a tale of tradition, community, and the simple joy of sharing food with loved ones.

The Ancient Roots of a Modern Classic

The idea of baking with dates is as old as the date palm itself, which has been cultivated for over 5,000 years. Dates, with their natural sweetness and rich caramel flavor, have long been a staple in Middle Eastern and Mediterranean cuisines. From date-filled pastries to sticky confections, they symbolize nourishment and prosperity, making them a beloved ingredient in both humble kitchens and royal feasts.

Walnuts, on the other hand, have their own rich history. They’ve been prized for their nutritional value and versatility, often paired with honey and fruits in traditional desserts. Together, dates and walnuts became the perfect match—soft and sweet meeting crunchy and earthy.

The Accidental Discovery

Legend has it that the first Date & Walnut Cake was created quite by accident. A farmer’s wife, eager to use up an abundance of ripe dates and freshly shelled walnuts, decided to experiment with a simple cake recipe. She soaked the dates in warm water to soften them and tossed the walnuts into the batter for added texture.

When the cake came out of the oven, its rich aroma filled the house, drawing curious neighbors to her doorstep. The first bite revealed a cake that was moist and tender, with bursts of caramel sweetness from the dates and the satisfying crunch of walnuts.

Word spread quickly, and soon, this cake became a staple at village gatherings, served at everything from weddings to casual tea times. The drizzle of honey or date syrup on top, along with a sprinkle of crushed walnuts, added an extra layer of indulgence that made it truly unforgettable.

A Cake That Travels Through Time

As the recipe traveled beyond the borders of its origin, it took on new flavors and variations. In Europe, a hint of cinnamon was added for warmth. In North America, pecans were swapped in for walnuts. Yet, no matter where it was baked, the heart of the recipe remained the same: a celebration of the natural flavors of dates and walnuts, and the joy of sharing a slice with loved ones.

Personal Connection

For me, this cake is a taste of home. I remember my grandmother making it in her small kitchen, her hands expertly chopping dates and cracking walnuts. The house would fill with the cozy scent of baking, and we’d all gather around the table, eager for the first slice.

Whenever I bake this cake, it feels like I’m bringing a piece of that tradition into my own home. The simple act of soaking dates, creaming butter and sugar, and folding in walnuts is a reminder of the power of food to connect us to our past and to each other.

A Cake for Every Occasion

The Heavenly Date & Walnut Cake is more than a dessert—it’s a gift of flavor, history, and love. Whether served warm with a cup of tea, drizzled with honey for a special occasion, or shared as a thoughtful homemade gift, this cake is a timeless treat that never fails to delight.

Ingredients
🛒

✅For the Cake:

  • 1 1/2 cups pitted dates, finely chopped 🌴
  • 1 cup boiling water 💧
  • 1 teaspoon baking soda 🌟
  • 1/2 cup unsalted butter, softened 🧈
  • 3/4 cup granulated sugar 🍬
  • 2 large eggs 🥚🥚
  • 1 teaspoon vanilla extract 🍦
  • 1 1/2 cups all-purpose flour 🌾
  • 1 teaspoon baking powder
  • 1/4 teaspoon salt 🧂
  • 1 cup chopped walnuts 🌰

✅For the Topping (Optional):

  • 1/4 cup honey or date syrup 🍯
  • 1/4 cup finely chopped walnuts 🌰

Recipe Details
📏

  • Prep Time: 15 mins
  • Bake Time: 40-45 mins
  • Cooling Time: 20 mins
  • Yield: 10 servings

Instructions

  1. Prepare the Date Mixture 🌴
    Place the chopped dates in a bowl and pour the boiling water over them. Stir in the baking soda and let the mixture sit for 10 minutes.

  2. Cream the Butter & Sugar 🧈🍬
    In a large bowl, cream together the softened butter and sugar until light and fluffy. Add the eggs one at a time, beating well after each addition. Stir in the vanilla extract.

  3. Combine Dry Ingredients 🌾
    In a separate bowl, whisk together the flour, baking powder, and salt.

  4. Mix It All Together 🥣
    Gradually add the dry ingredients to the butter mixture, alternating with the soaked date mixture. Fold in the chopped walnuts gently.

  5. Bake the Cake 🔥
    Pour the batter into a greased and floured 9-inch round or square baking pan. Smooth the top and bake in a preheated oven at 350°F (175°C) for 40-45 minutes, or until a toothpick inserted into the center comes out clean.

  6. Add the Topping (Optional)
    While the cake is still warm, drizzle with honey or date syrup and sprinkle with finely chopped walnuts for extra flavor and a beautiful finish.

  7. Cool & Serve 🧁
    Let the cake cool in the pan for 10 minutes before transferring it to a wire rack. Slice and serve warm or at room temperature.

Pro Tips
🎓

  • Soaking the dates makes them soft and enhances the cake’s moisture.
  • Substitute pecans for walnuts if you prefer.
  • For extra spice, add 1/2 teaspoon cinnamon or cardamom to the batter.


This Heavenly Date & Walnut Cake is a celebration of natural flavors, with every bite showcasing the sweetness of dates and the nutty richness of walnuts. Perfect for tea time, a special dessert, or even as a gift! 🍂🌰

Happy New Year!

Sam

Tuesday, 5 November 2024

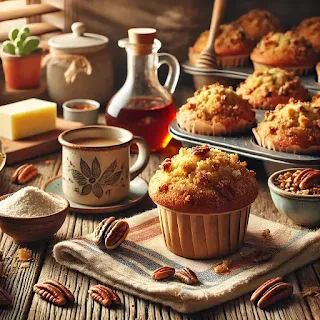
Maple Pecan Streusel Muffins

These Maple Pecan Streusel Muffins are a delightful way to bring cozy flavors to your kitchen. With warm maple undertones, a hint of cinnamon, and crunchy pecan streusel, each bite offers a comforting taste of home. Perfect with a cup of coffee or tea, they’re a lovely treat for any time of day.

Origin Story: Maple Pecan Streusel Muffins

Maple Pecan Streusel Muffins are like a cozy sweater for your taste buds—warm, comforting, and just the right amount of sweet. These muffins bring together the flavors of rich maple syrup, buttery pecans, and a crumbly streusel topping, making them perfect for chilly mornings or lazy afternoons with a hot drink in hand. The story behind these muffins is as charming as the muffins themselves, capturing the essence of a simple treat that feels like a big, warm hug.

A Muffin Born from a Sweet Accident

Legend has it that the idea for Maple Pecan Streusel Muffins came about one frosty morning in Vermont, where a young baker found herself in a bit of a breakfast crisis. She had promised her family fresh muffins, but her pantry was nearly bare. She managed to dig up some basic ingredients but was missing her usual sweeteners. The only thing left? A bottle of pure maple syrup, a local favorite.

Determined not to give up, she decided to try maple syrup as her sweetener, thinking it would add a unique twist. Just as she was mixing it in, her little brother—whose “help” often meant making a bit of a mess—accidentally tipped a bag of chopped pecans into the batter. She sighed, but, instead of removing them, she shrugged and stirred them in. The pecans would, after all, add some crunch.

To top it all off, she sprinkled a quick streusel mixture on top for a little extra flair, hoping it would make the muffins look more “intentional.” As the muffins baked, the kitchen filled with the cozy aroma of maple, butter, and toasted nuts, and she knew she was onto something special.

The Maple Pecan Craze

When her family bit into the warm, crumbly muffins, they were instantly hooked. The combination of maple’s natural sweetness, the nuttiness of pecans, and the crispy streusel topping was the stuff of breakfast legend. Word quickly spread around town, and soon everyone was asking for “those maple pecan muffins with the crumbly top.”

Before long, the recipe became a local hit, and the baker found herself making batch after batch for friends, neighbors, and eventually the town bakery. The Maple Pecan Streusel Muffins became a go-to treat for chilly days and autumn gatherings, celebrated for their comforting flavor and rustic charm.

Personal Connection

For me, these Cozy Maple Pecan Streusel Muffins aren’t just a breakfast pastry—they’re a reminder of the warmth that simple ingredients can bring. The way the maple syrup caramelizes slightly during baking, the buttery pecans adding a satisfying crunch, and that streusel… well, it’s just the cherry on top (or, in this case, the crumble on top).

Whenever I bake these muffins, I’m reminded of the magic that happens when you embrace imperfections and make the best of what you have. They’re the kind of muffin that doesn’t need a fancy occasion—just a cool morning, a hot drink, and maybe someone special to share them with.

Ingredients

✅Muffins:

  • 1 3/4 cups all-purpose flour
  • 1/2 cup granulated sugar
  • 1/4 cup brown sugar
  • 1 teaspoon baking powder
  • 1/2 teaspoon baking soda
  • 1/4 teaspoon salt
  • 1/2 teaspoon cinnamon
  • 1/2 cup unsalted butter, melted
  • 1/2 cup maple syrup
  • 2 large eggs
  • 1 teaspoon vanilla extract
  • 1/2 cup whole milk

✅Streusel Topping:

  • 1/4 cup all-purpose flour
  • 1/4 cup brown sugar
  • 1/2 teaspoon cinnamon
  • 1/4 cup chopped pecans
  • 2 tablespoons cold butter, cut into small pieces

Recipe Details

  • Preparation Time: 15 minutes
  • Baking Time: 18-20 minutes
  • Yield: 12 muffins

Instructions

  1. Preheat Oven and Prepare Muffin Tin: Preheat your oven to 375°F (190°C) and line a 12-cup muffin tin with paper liners.

  2. Prepare Streusel: In a small bowl, combine the flour, brown sugar, cinnamon, and pecans. Add the cold butter and mix until crumbly. Set aside.

  3. Mix Dry Ingredients: In a large bowl, whisk together flour, granulated sugar, brown sugar, baking powder, baking soda, salt, and cinnamon.

  4. Combine Wet Ingredients: In a separate bowl, whisk the melted butter, maple syrup, eggs, vanilla extract, and milk until smooth.

  5. Combine Wet and Dry Mixtures: Pour the wet ingredients into the dry ingredients, stirring until just combined. Be careful not to overmix.

  6. Fill Muffin Cups: Divide the batter evenly among the muffin cups, filling each about two-thirds full. Sprinkle the streusel topping over each muffin.

  7. Bake: Bake in the preheated oven for 18-20 minutes or until a toothpick inserted in the center comes out clean.

  8. Cool and Serve: Allow the muffins to cool in the pan for a few minutes, then transfer to a wire rack. Enjoy warm or at room temperature!

Pro Tips

  • Room Temperature Ingredients: Ensure ingredients like eggs and milk are at room temperature for the best texture.
  • Double the Streusel: Love a lot of topping? Double the streusel recipe for extra crunch.

Serving Options

  • With Butter: Serve with a light spread of butter for extra richness.
  • Maple Glaze: Drizzle with a simple maple glaze for extra sweetness.

Health Benefits

  • Pecans: A great source of healthy fats and antioxidants.
  • Maple Syrup: A natural sweetener, rich in minerals and antioxidants.

Variations

  • Nut-Free: Substitute pecans with rolled oats for a crunchy oat topping.
  • Gluten-Free: Use a gluten-free flour blend for the muffin base.
These Maple Pecan Streusel Muffins are a true embodiment of cozy baking, combining the natural sweetness of maple syrup with the satisfying crunch of pecan streusel. With their warm flavors and inviting aroma, they’re perfect for any occasion, whether it’s a relaxed morning with family or a treat to share with friends. Each bite offers a balance of soft, moist cake and a crumbly topping that makes these muffins irresistibly comforting. So, gather your ingredients, warm up the oven, and let these muffins bring a touch of joy and warmth to your day. Enjoy every bite, and don’t forget to share the love!

Happy Baking!
Sam

Thursday, 3 October 2024

Homestyle Raspberry Swirl Delight Cake

This Homestyle Raspberry Swirl Delight Cake is the perfect combination of a soft, buttery cake base swirled with tangy raspberry goodness. The visual appeal of the vibrant raspberry swirls makes each slice a feast for the eyes, while the moist and tender cake provides the ultimate comfort. Whether you’re baking for a special family gathering or just want a cozy dessert for your kitchen table, this cake will add that special homemade touch.

Origin Story: Raspberry Swirl Cake

Some recipes carry more than just flavors—they carry stories, memories, and the comforting essence of home. That’s exactly what the Home Style Raspberry Swirl Cake does. It’s a cake that doesn’t just sit on the table but tells a story with every beautiful swirl. The inspiration for this cake came from my desire to combine simplicity with beauty, turning an everyday bake into something that feels like a warm hug from home.

A Slice of Home in Every Bite

Growing up, the kitchen was always the heart of our home. The rhythmic sound of the mixer, the clatter of bowls, and the sweet smell of something baking in the oven made everything feel right. When I was young, there was one cake that stood out from the rest—my grandmother’s raspberry swirl cake. It was the cake we baked when we celebrated something special or needed to bring some joy to an ordinary day.

I remember standing on tiptoes, watching her swirl the ruby-red raspberry preserves into the vanilla batter with the grace of an artist, knowing that each swirl held a unique promise of sweetness in every bite. To me, that swirl wasn’t just about the flavor—it was a symbol of the unpredictability of life. No two slices were the same, yet each was perfect in its own way.

The Power of a Simple Cake

The magic of the Home Style Raspberry Swirl Cake lies in its simplicity. There are no fancy tricks, no elaborate ingredients—just flour, sugar, butter, and a few spoonfuls of sweet raspberry preserves. But simplicity doesn’t mean boring. What makes this cake so special is the feeling it brings. It’s the kind of cake you make for a cozy afternoon with friends or when you want to bake something that reminds you of home.

As I grew older, this cake became more than just a nostalgic memory—it became a way for me to connect with the people I love. I’d bake it for Sunday brunches, housewarming gifts, or simply when I needed a taste of home after a long week. The moment the first slice is cut, the beautiful raspberry swirls come to life, and it always brings a smile to everyone’s face.

Recipe Evolution: A Fresh Take on Tradition

While my grandmother’s original recipe was perfect in its simplicity, I’ve made a few small tweaks to make it my own. A hint of lemon zest adds a bright, fresh contrast to the sweetness of the raspberries, while the buttery vanilla cake brings a melt-in-your-mouth tenderness that makes it hard to stop at just one slice.

I’ve also experimented with fresh raspberries when they’re in season, reducing them down into a simple, homemade jam. There’s something special about using fresh fruit—knowing that it’s been hand-picked, bringing nature’s best flavors right into the heart of your cake.

And then, there’s the swirl. It’s an art that doesn’t require perfection, just a little patience and care. I always say that the swirl should feel like painting—gentle, free, and never rushed. It’s what gives this cake its soul, transforming it from a simple loaf into something that feels handcrafted and one-of-a-kind.

Why It Matters

The Home Style Raspberry Swirl Cake is more than just a dessert—it’s a story you can taste. It’s the story of family, of tradition, and of the simple joy that comes from baking something with love. Whether you’re sharing it with loved ones or savoring it on your own, this cake has a way of making you feel at home, no matter where you are.

Ingredients

  • 1 3/4 cups all-purpose flour
  • 1 teaspoon baking powder
  • 1/2 teaspoon baking soda
  • 1/4 teaspoon salt
  • 1/2 cup unsalted butter, softened
  • 3/4 cup granulated sugar
  • 2 large eggs
  • 1 teaspoon vanilla extract
  • 1/2 cup whole milk
  • 1/3 cup sour cream
  • 1/2 cup raspberry jam (or fresh raspberries)
  • 1/2 cup powdered sugar (for dusting)

Recipe Details

  • Preparation Time: 20 minutes
  • Cooking Time: 50-55 minutes
  • Cooling Time: 15 minutes
  • Yield: 10-12 servings

Instructions

  1. Preheat and Prepare: Preheat your oven to 350°F (175°C). Grease and flour a 9-inch round cake pan or a loaf pan.

  2. Mix Dry Ingredients: In a medium bowl, whisk together the flour, baking powder, baking soda, and salt.

  3. Cream Butter and Sugar: In a large mixing bowl, cream together the softened butter and granulated sugar until light and fluffy. Add the eggs one at a time, mixing well after each addition. Stir in the vanilla extract.

  4. Combine Wet and Dry Ingredients: Add the dry ingredients to the butter mixture alternately with the milk and sour cream, starting and ending with the dry ingredients. Mix until just combined, being careful not to overmix.

  5. Create the Swirl: Pour half the batter into the prepared pan. Drop spoonfuls of the raspberry jam or fresh raspberries on top of the batter, then pour the remaining batter over it. Use a butter knife to gently swirl the jam into the batter, creating a marbled effect.

  6. Bake: Bake for 50-55 minutes or until a toothpick inserted into the center of the cake comes out clean. The cake should be golden and slightly firm to the touch.

  7. Cool and Dust: Let the cake cool in the pan for 10 minutes before transferring to a wire rack to cool completely. Once cooled, dust with powdered sugar for a lovely finish.

Pro Tips

  • Avoid Overmixing: To keep the cake tender, make sure to mix only until the ingredients are just combined.
  • Swirling Technique: Be gentle when swirling the jam to keep the marbled effect and prevent it from sinking.

Secret Tips

  • Extra Flavor: Add a teaspoon of lemon zest to the batter for a refreshing citrus twist.
  • Flavor Variety: Substitute the raspberry jam with strawberry, blueberry, or blackberry jam for different flavors.

Serving Options

  • With Whipped Cream: Serve with a dollop of whipped cream or a scoop of vanilla ice cream for an extra treat.
  • For Breakfast or Dessert: This cake is versatile enough to be enjoyed as a light breakfast or a delicious dessert.

Health Benefits

  • Raspberries: Full of antioxidants, vitamins, and fiber, raspberries add a healthy touch to this indulgent cake.

Variations & Customization Options

  • Nutty Delight: Add 1/4 cup of finely chopped almonds or walnuts for a bit of crunch.
  • Gluten-Free: Substitute the flour with a gluten-free blend for a gluten-free version.
  • Vegan: Replace the butter with vegan butter and the eggs with flax eggs to make the cake vegan-friendly.


This Homestyle Raspberry Swirl Delight Cake is the ultimate comfort dessert, combining a moist, buttery cake with the tangy sweetness of raspberry swirls. It’s easy to make and perfect for sharing with loved ones, offering a little taste of homemade warmth with every bite.

Happy Baking!

Sam

Monday, 30 September 2024

Unique Lemon Crinkle Cookies with a Coconut Twist

 Lemon Crinkle Cookies are a zesty and refreshing treat, but we’re taking them to the next level by adding a coconut twist! These cookies combine the tangy flavor of lemon with the subtle sweetness of coconut, creating a soft, chewy cookie with a crinkled, powdered sugar exterior. Perfect for any occasion, these cookies are sure to become a favorite with their unique blend of flavors.

Origin Story: Lemon Crinkle Cookies

Lemon Crinkle Cookies are a burst of sunshine in every bite, combining the brightness of fresh lemon zest with a soft, chewy texture. These cookies are not only a delightful treat but also carry a story of inspiration, family, and the joy of creating something special from the simplest ingredients. What makes them truly captivating is their unique crinkled appearance, achieved by rolling the dough in powdered sugar before baking, allowing cracks to form as the cookies puff up in the oven.

Historical Roots

Though citrus fruits have been cultivated for thousands of years, lemons became particularly popular in European and American kitchens in the 18th and 19th centuries. Their tangy flavor added a refreshing contrast to sweet desserts, and their zest and juice were often used to balance the richness of butter, cream, and sugar. Cookies, a relatively simple and affordable dessert, became the perfect canvas for experimenting with these bright flavors.

The crinkle effect in baking originated as a simple way to add texture and visual appeal to soft cookies. This technique became popular in recipes like chocolate crinkle cookies, where the powdered sugar highlights the cracks on the cookie’s surface. Applying this technique to lemon-flavored cookies resulted in the delightful Lemon Crinkle Cookie—a blend of tartness and sweetness wrapped in a visually striking appearance.

Cultural Significance

Lemon Crinkle Cookies have found their place in modern baking culture, particularly during the spring and summer months when citrus flavors are at their peak. They are often associated with family gatherings, garden parties, and holiday celebrations, where their refreshing flavor provides a light, uplifting dessert option.

These cookies symbolize a balance between tradition and innovation. Their method, rooted in old-world baking techniques, combines with the fresh, zesty flavor of lemon, making them a favorite for those who seek both comfort and adventure in their baking. The crinkle effect, while simple, adds an artisanal touch, making each cookie feel like a small work of art.

Personal Connection

My personal connection to Lemon Crinkle Cookies began on a warm spring day when I was searching for a dessert that would capture the fresh, bright feeling of the season. I had a bowl of lemons on my kitchen counter, their vibrant yellow skin catching the sunlight, and I knew I wanted to create something that would embody the happiness and renewal that spring brings.

Experimenting in the kitchen, I decided to adapt a family recipe for chocolate crinkle cookies, substituting the rich cocoa with the refreshing flavor of lemon. As I rolled the dough in powdered sugar and watched the cookies bake, I was mesmerized by the way the crinkles formed, giving the cookies a beautiful, rustic appearance.

The moment I tasted the first cookie, I knew I had created something special. The tangy lemon flavor, combined with the soft, chewy texture and the delicate sweetness of the powdered sugar, was a perfect balance. From that day forward, Lemon Crinkle Cookies became a go-to recipe for family gatherings, especially when I wanted to share something bright, fresh, and full of love.

Recipe Evolution

The success of Lemon Crinkle Cookies lies in their simplicity and the quality of their ingredients. Fresh lemon zest and juice are essential for achieving the bold citrus flavor that makes these cookies stand out. The dough should be soft and pliable, made with a combination of flour, butter, sugar, and eggs, creating the ideal base for the crinkles to form during baking.

The key to achieving the crinkle effect is rolling the dough balls generously in powdered sugar before placing them on the baking sheet. As the cookies bake, the dough expands, and cracks naturally form on the surface, revealing the bright yellow dough underneath.

For an extra touch of sophistication, some bakers add a hint of vanilla or almond extract to the dough, complementing the lemon flavor. The cookies are baked until just set, resulting in a soft, chewy texture with a light, crisp exterior.

Sharing the Tradition

Today, Lemon Crinkle Cookies are a beloved treat in my household, especially during the spring and summer months. They are the cookies I bake when I want to brighten someone’s day with a fresh, homemade treat. Each bite is a reminder of the simple joys of baking and the happiness that comes from sharing something special with those we care about.

Ingredients

  • 1 3/4 cups all-purpose flour
  • 1/2 teaspoon baking powder
  • 1/4 teaspoon baking soda
  • 1/4 teaspoon salt
  • 1/2 cup unsweetened shredded coconut
  • 1/2 cup unsalted butter, softened
  • 1 cup granulated sugar
  • 1 large egg
  • 1 tablespoon lemon zest
  • 1 tablespoon freshly squeezed lemon juice
  • 1/2 teaspoon vanilla extract
  • 1/2 teaspoon coconut extract (optional)
  • 1/2 cup powdered sugar (for rolling)

Recipe Details

  • Preparation Time: 15 minutes
  • Chilling Time: 30 minutes
  • Cooking Time: 10-12 minutes
  • Yield: 24 cookies

Instructions

  1. Preheat and Prepare: Preheat your oven to 350°F (175°C). Line a baking sheet with parchment paper.

  2. Mix Dry Ingredients: In a medium bowl, whisk together the flour, baking powder, baking soda, salt, and shredded coconut.

  3. Cream Butter and Sugar: In a large mixing bowl, cream the softened butter and granulated sugar until light and fluffy. Beat in the egg, lemon zest, lemon juice, vanilla extract, and coconut extract (if using).

  4. Combine Wet and Dry Ingredients: Gradually add the dry ingredients to the wet ingredients, mixing until just combined. Chill the dough for at least 30 minutes.

  5. Form and Coat: Roll the chilled dough into 1-inch balls. Roll each ball in powdered sugar until fully coated. Place the cookies on the prepared baking sheet about 2 inches apart.

  6. Bake: Bake in the preheated oven for 10-12 minutes, or until the edges are set and the tops are crinkled. The centers should remain soft.

  7. Cool and Serve: Allow the cookies to cool on the baking sheet for 5 minutes before transferring them to a wire rack to cool completely.

Pro Tips

  • Chill the Dough: Chilling the dough helps prevent the cookies from spreading too much, giving them that perfect crinkle effect.
  • Roll Generously: Be generous with the powdered sugar coating to ensure a beautiful crinkled appearance after baking.

Secret Tips

  • Extra Lemon Flavor: Add a teaspoon of lemon extract for an extra zesty kick.
  • Coconut Boost: For even more coconut flavor, toast the shredded coconut lightly before adding it to the dough.

Serving Options

  • With Tea or Lemonade: Serve these cookies with a cup of tea or a refreshing glass of lemonade for a perfect pairing.
  • With Ice Cream: Sandwich two cookies together with a scoop of vanilla or coconut ice cream for a delightful dessert.
  • Gift Idea: Package these cookies in a decorative tin or jar for a thoughtful homemade gift.

Health Benefits

  • Lemon: Rich in vitamin C, lemons offer a refreshing boost and natural flavor.
  • Coconut: Provides healthy fats and a natural sweetness without needing too much added sugar.

Variations & Customization Options

  • Lemon-Lime Crinkle Cookies: Swap half the lemon juice and zest for lime for a citrus twist.
  • Gluten-Free: Use a gluten-free flour blend to make these cookies suitable for gluten-sensitive guests.
  • Vegan: Substitute the butter with coconut oil and the egg with a flax egg for a vegan version.


These Lemon Crinkle Cookies with a Coconut Twist are the perfect blend of tangy and sweet, with a unique coconut flavor that sets them apart from the traditional recipe. Whether you're baking them for a party, a gift, or just for fun, these cookies are sure to impress!

Thursday, 18 July 2024

Lemon Lavender Shortbread Cookies

 Experience a burst of refreshing lemon and a hint of floral lavender in these delightful shortbread cookies. Perfect for tea time or as a sophisticated treat, these cookies are sure to impress with their unique flavor combination.

Origin Story: Lemon Lavender Shortbread Cookies

Lemon Lavender Shortbread Cookies are a delightful and elegant treat that combines the zesty brightness of lemon with the subtle floral notes of lavender. This unique recipe was inspired by a desire to create a sophisticated yet simple cookie that can be enjoyed on special occasions or as a refined everyday treat. These cookies are perfect for afternoon tea, bridal showers, or any event that calls for a touch of elegance.

Historical Roots

Shortbread cookies have their origins in Scotland, where they have been a beloved treat since at least the 16th century. Traditionally made with just three ingredients—flour, butter, and sugar—shortbread is known for its rich, buttery flavor and crumbly texture. The simplicity of shortbread has made it a versatile base for various flavor additions over the centuries.

Lavender, native to the Mediterranean region, has been used for culinary purposes for thousands of years. Its aromatic and floral qualities make it a popular addition to both sweet and savory dishes. The use of lavender in baking has gained popularity in recent years, especially in recipes that aim to provide a unique and sophisticated flavor profile.

Lemon has long been a staple in baking, celebrated for its bright and refreshing taste. The combination of lemon and lavender in a shortbread cookie creates a harmonious blend of flavors, offering a balance of sweet, tart, and floral notes.

Cultural Significance

Lemon Lavender Shortbread Cookies hold a special place in modern baking culture, reflecting the trend towards incorporating floral flavors into traditional recipes. These cookies are often associated with sophistication and elegance, making them a popular choice for high tea, garden parties, and other refined gatherings.

The appeal of these cookies lies in their delicate balance of flavors and their visual appeal. The addition of lavender not only enhances the taste but also adds a touch of color, making the cookies as beautiful as they are delicious.

Personal Connection

My journey with Lemon Lavender Shortbread Cookies began with a desire to create a unique and memorable treat for a special event. I wanted to combine the timeless appeal of shortbread with fresh and intriguing flavors. The idea of pairing lemon with lavender came from my love of gardening and using fresh herbs and citrus in my cooking.

Experimenting in the kitchen, I discovered that using culinary-grade lavender provided the best flavor without being overpowering. Adding lemon zest and a touch of lemon juice to the dough enhanced the brightness of the cookies, creating a perfect balance with the floral notes of lavender.

Recipe Evolution

Creating the perfect Lemon Lavender Shortbread Cookies involves a few key steps. Using high-quality butter is essential for achieving the rich and buttery texture that shortbread is known for. The dough should be mixed just until it comes together to avoid overworking the gluten in the flour, which can make the cookies tough.

The addition of lemon zest and a small amount of lemon juice to the dough provides a fresh and vibrant flavor. Culinary-grade lavender buds should be finely ground to distribute the flavor evenly throughout the dough without creating an overpowering taste.

Rolling the dough to an even thickness and chilling it before baking helps the cookies maintain their shape and ensures a tender texture. Baking the cookies until they are just beginning to turn golden around the edges results in a perfect shortbread texture.

Sharing the Tradition

Today, Lemon Lavender Shortbread Cookies are a favorite in my household, especially for special occasions and afternoon tea. They are the cookies I bake when I want to offer a sophisticated and delightful treat to friends and family. Each bite is a celebration of the creativity and joy that comes from combining classic and modern flavors.

Ingredients

  • 1 cup unsalted butter, softened
  • 1/2 cup granulated sugar
  • 1 tablespoon lemon zest
  • 1 teaspoon vanilla extract
  • 2 cups all-purpose flour
  • 2 tablespoons dried culinary lavender, finely chopped
  • 1/4 teaspoon salt

Recipe Duration

  • Preparation Time: 15 minutes
  • Chilling Time: 30 minutes
  • Cooking Time: 12-15 minutes
  • Yield: 24 cookies

Instructions

  1. Cream Butter and Sugar: In a large mixing bowl, cream together the softened butter and granulated sugar until light and fluffy.

  2. Add Flavorings: Mix in the lemon zest and vanilla extract until well combined.

  3. Combine Dry Ingredients: In a separate bowl, whisk together the all-purpose flour, finely chopped dried lavender, and salt.

  4. Form the Dough: Gradually add the dry ingredients to the butter mixture, mixing until the dough comes together.

  5. Chill the Dough: Shape the dough into a disk, wrap in plastic wrap, and refrigerate for at least 30 minutes.

  6. Preheat and Prepare: Preheat your oven to 325°F (165°C). Line a baking sheet with parchment paper.

  7. Roll Out and Cut Cookies: On a lightly floured surface, roll out the chilled dough to about 1/4 inch thick. Use a cookie cutter to cut out desired shapes and place them on the prepared baking sheet.

  8. Bake: Bake in the preheated oven for 12-15 minutes, or until the edges are lightly golden. Allow the cookies to cool on the baking sheet for 5 minutes, then transfer to a wire rack to cool completely.

Pro Tips

  • Fine Chopping: Ensure the lavender is finely chopped to evenly distribute the flavor.
  • Zest Wisely: Use a microplane zester for finely grated lemon zest.

Secret Tips

  • Extra Lemon Flavor: Add a few drops of lemon extract for an extra burst of lemon flavor.
  • Decorative Touch: Sprinkle a bit of granulated sugar on top before baking for a sweet, decorative touch.

Serving Options

  • With Tea: Perfectly paired with a cup of Earl Grey or chamomile tea.
  • Gift Idea: Package in a decorative tin for a beautiful homemade gift.
  • With Lemon Glaze: Drizzle with a simple lemon glaze made of powdered sugar and lemon juice.

Health Benefits

  • Lavender: Known for its calming properties and delightful aroma.
  • Lemon: Rich in vitamin C and adds a refreshing taste.

Variations & Customization Options

  • Herb Substitution: Substitute lavender with fresh rosemary or thyme for a different herbal twist.
  • Chocolate Dip: Dip half of each cookie in melted white or dark chocolate for an indulgent treat.
  • Nut Addition: Add finely chopped almonds or pistachios to the dough for added texture and flavor.


These Lemon Lavender Shortbread Cookies are a unique and sophisticated treat that will delight your taste buds and impress your guests. Enjoy the refreshing lemon flavor combined with the subtle floral notes of lavender in every bite. 

Happy baking!

Sam