Turning Your Wishes into Sweet Realities, One Homemade Treat at a Time. 🌟
Showing posts with label Chocolate Indulgence. Show all posts

Monday, 1 April 2024

A Chocoholic's Dream - Double Chocolate Muffins

Welcome back to Sam's Baking Blog! Today, we're indulging in a chocolate lover's dream with these Double Chocolate Muffins. Packed with rich cocoa and gooey chocolate chips, these muffins are the epitome of moist, yummy, and juicy. Perfect for a decadent breakfast treat or a satisfying dessert, these muffins are sure to delight your taste buds.

Origin Story: Double Chocolate Muffins

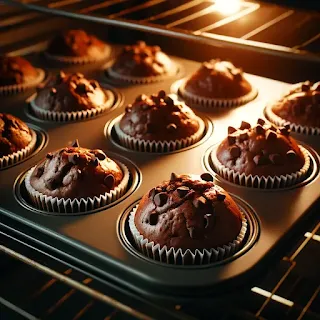
Double Chocolate Muffins are a decadent treat that combines rich cocoa with chunks of chocolate, creating a dessert that is both intensely chocolatey and wonderfully moist. These muffins are a favorite among chocolate lovers and are perfect for breakfast, dessert, or a sweet snack any time of the day.

Historical Roots

The history of chocolate in baking can be traced back to the ancient civilizations of Central and South America. The Aztecs and Mayans were among the first to cultivate cocoa beans and use them to create beverages and other culinary delights. However, it wasn't until the 18th century that chocolate began to be used in solid form in desserts and baked goods.

The development of chocolate muffins likely evolved from the broader category of chocolate cakes and quick breads. The muffin itself is a product of 19th-century American baking, where the use of chemical leavening agents like baking powder and baking soda allowed for the quick and easy preparation of small, individual cakes. The addition of chocolate to muffins became a natural progression as the popularity of chocolate grew.

Cultural Significance

Double Chocolate Muffins hold a special place in the world of baking, particularly in Western cultures. They are often found in coffee shops, bakeries, and home kitchens, celebrated for their rich flavor and moist texture. These muffins are a favorite treat for chocolate lovers and are often associated with indulgence and comfort.

In American culture, muffins are a popular breakfast item, and the double chocolate version adds a dessert-like twist to this morning staple. They are perfect for brunches, celebrations, or simply as a treat to enjoy with a cup of coffee or a glass of milk.

Personal Connection

My passion for Double Chocolate Muffins began during my college years. I used to visit a local coffee shop that served the most decadent double chocolate muffins. They were my go-to treat during late-night study sessions and became a comforting routine amid the chaos of college life.

Inspired by those memories, I set out to create my own version of Double Chocolate Muffins. The key was to achieve the perfect balance of moistness and rich chocolate flavor. After experimenting with various recipes and techniques, I found that using both cocoa powder and chunks of dark chocolate provided the intense chocolate experience I was looking for.

Recipe Evolution

Creating the perfect Double Chocolate Muffin involves a few key steps. The batter must be rich and moist, which can be achieved by using high-quality cocoa powder and a generous amount of chocolate chunks or chips. Adding sour cream or yogurt to the batter can enhance the moisture and tenderness of the muffins.

The use of both baking powder and baking soda ensures that the muffins rise well and have a light, airy texture. Mixing the batter just until combined helps avoid overworking the gluten in the flour, which can result in dense muffins.

For an extra touch of decadence, I sometimes sprinkle additional chocolate chips on top of the muffins before baking. This creates a deliciously gooey chocolate layer on top, making the muffins even more irresistible.

Sharing the Tradition

Today, Double Chocolate Muffins are a favorite treat in my household. They are the muffins I bake when I want to indulge in something sweet and chocolatey or when I want to share a delicious treat with friends and family. Each bite is a reminder of those college days and the joy of discovering the perfect chocolate muffin.

Ingredients:

2 cups all-purpose flour
3/4 cup unsweetened cocoa powder
1 tablespoon baking powder
1/2 teaspoon baking soda
1/2 teaspoon salt
1 cup granulated sugar
2 large eggs
1 cup buttermilk
1/2 cup vegetable oil
1 teaspoon vanilla extract
1 1/2 cups semisweet chocolate chips

Prep Time: 15 minutes
Cook Time: 20-25 minutes
Yield: 12 muffins

Instructions:

  1. Preheat the oven to 375°F (190°C). Line a muffin tin with paper liners or grease the cups.
  2. In a large bowl, whisk together the flour, cocoa powder, baking powder, baking soda, salt, and sugar.
  3. In a separate bowl, beat the eggs, then mix in the buttermilk, vegetable oil, and vanilla extract.
  4. Add the wet ingredients to the dry ingredients and stir until just combined. Fold in the chocolate chips, reserving a few to sprinkle on top.
  5. Divide the batter evenly among the muffin cups, filling each about 3/4 full. Sprinkle the reserved chocolate chips on top.
  6. Bake for 20-25 minutes, or until a toothpick inserted into the center of a muffin comes out clean.
  7. Let the muffins cool in the tin for 5 minutes, then transfer to a wire rack to cool completely.

Pro Tips:

  • Use high-quality cocoa powder and chocolate chips for the best flavor.
  • Don't overmix the batter to ensure the muffins stay moist and tender.

Secret Tips:

Add a tablespoon of brewed coffee to the batter to enhance the chocolate flavor.

Serving Options:

Serve these double chocolate muffins warm with a glass of cold milk or a cup of coffee for a truly indulgent experience.

These Double Chocolate Muffins are a chocolate lover's paradise, combining rich cocoa and melty chocolate chips for a truly decadent treat. Whether you're enjoying them for breakfast or dessert, they're sure to satisfy your chocolate cravings.

Happy Baking!
Sam

Wednesday, 14 February 2024

Valentine's Day Chocolate Lava Cake

Impress your Valentine with this irresistible Valentine's Day Chocolate Lava Cake. With its rich, gooey center and decadent chocolatey flavor, this indulgent dessert is sure to set hearts aflutter.

Origin Story: Chocolate Lava Cake

Chocolate Lava Cake, also known as Molten Chocolate Cake, is a rich, decadent dessert featuring a delicate chocolate cake exterior with a warm, gooey chocolate center. This indulgent treat has become a favorite in fine dining and home kitchens alike, celebrated for its irresistible combination of textures and flavors.

Historical Roots

The origin of Chocolate Lava Cake is attributed to two renowned chefs who claim to have invented it independently around the same time in the 1980s. Jean-Georges Vongerichten, a French chef based in New York, is often credited with popularizing the dessert in the United States. According to his story, the dessert was accidentally created when he pulled a chocolate sponge cake out of the oven too early, discovering that while the outside was set, the inside remained molten.

Meanwhile, Jacques Torres, another celebrated French pastry chef, also lays claim to the invention of Chocolate Lava Cake. He contends that the dessert was a deliberate creation designed to showcase the richness of high-quality chocolate.

Regardless of its exact origin, the dessert quickly gained popularity in upscale restaurants and became a staple of contemporary dessert menus.

Cultural Significance

Chocolate Lava Cake holds a special place in modern culinary culture. It is often associated with luxury and indulgence, making it a popular choice for special occasions and romantic dinners. The dramatic presentation of the cake, with its molten center flowing out upon cutting, adds a touch of theater to the dining experience.

The dessert's simplicity and elegance have also made it a favorite among home bakers. With just a few ingredients and minimal preparation, Chocolate Lava Cake offers an impressive and delicious end to any meal.

Personal Connection

My first experience with Chocolate Lava Cake was at a fine dining restaurant, where the server dramatically cut into the cake, releasing the molten chocolate center. The combination of the warm, flowing chocolate with a scoop of cold vanilla ice cream was unforgettable. Inspired by this experience, I decided to recreate the dessert at home.

Experimenting with different recipes, I found that the key to a perfect Chocolate Lava Cake lies in the timing. Baking the cakes just long enough to set the edges while keeping the center molten requires careful attention. Using high-quality chocolate is also essential to achieve a rich and flavorful molten center.

Recipe Evolution

Creating the perfect Chocolate Lava Cake involves a few key steps. The batter typically consists of a combination of chocolate, butter, eggs, sugar, and a small amount of flour. Melting the chocolate and butter together creates a smooth, rich base. Whisking the eggs and sugar until light and fluffy helps incorporate air, giving the cake a light texture.

The batter is poured into individual ramekins or molds, which are then baked at a high temperature for a short time. This ensures that the outer edges set while the center remains molten. Careful attention to the baking time is crucial, as even an extra minute in the oven can cause the center to set completely.

For an added touch of decadence, the cakes can be served with a dusting of powdered sugar, a dollop of whipped cream, or a scoop of ice cream. Fresh berries or a drizzle of raspberry sauce can also complement the rich chocolate flavor.

Sharing the Tradition

Today, Chocolate Lava Cake is a favorite dessert in my household, especially for celebrations and special dinners. It is the dessert I make when I want to impress guests with a simple yet sophisticated treat. Each bite is a reminder of the magic of combining rich chocolate with careful baking techniques.

Ingredients

1/2 cup high-quality dark chocolate, chopped
1/2 cup (115g) unsalted butter
1/2 cup (100g) granulated sugar
2 large eggs
2 large egg yolks
1 teaspoon vanilla extract
1/4 cup (30g) all-purpose flour
Pinch of salt
Optional: Cocoa powder or powdered sugar for dusting, fresh berries for garnish

Preparation Time: 15 minutes
Baking Time: 12-14 minutes
Yield: 4 servings

Instructions

  1. Preheat your oven to 425°F (220°C). Grease four ramekins or oven-safe mugs with butter and dust with cocoa powder or powdered sugar, tapping out any excess.
  2. In a heatproof bowl set over a pot of simmering water (double boiler), melt the chopped chocolate and butter together, stirring until smooth. Remove from heat and let cool slightly.
  3. In a separate mixing bowl, whisk together the granulated sugar, eggs, egg yolks, and vanilla extract until well combined.
  4. Slowly pour the melted chocolate mixture into the egg mixture, whisking constantly until smooth.
  5. Sift the flour and salt into the chocolate mixture and gently fold until just combined. Be careful not to overmix.
  6. Divide the batter evenly among the prepared ramekins or mugs, filling each about 3/4 full.
  7. Place the filled ramekins or mugs on a baking sheet and bake in the preheated oven for 12-14 minutes, or until the edges are set but the centers are still soft and slightly jiggly.
  8. Remove the lava cakes from the oven and let them cool for 1-2 minutes. Carefully run a knife around the edges of each cake to loosen them from the ramekins or mugs.
  9. Invert each lava cake onto a serving plate and gently lift off the ramekin or mug. The lava cakes should release easily.
  10. Serve the Valentine's Day Chocolate Lava Cakes immediately, garnished with fresh berries if desired. Enjoy them warm and gooey!

Pro Tips

  • For the best results, use high-quality dark chocolate with at least 60% cocoa content for a rich and intense chocolate flavor.
  • Be sure not to overbake the lava cakes, as the centers should remain molten and gooey. The edges should be set, but the centers should still jiggle slightly when gently shaken.

Secret Tips

For an extra touch of indulgence, serve the chocolate lava cakes with a scoop of vanilla ice cream or a dollop of whipped cream on top.

Serving Options

These Valentine's Day Chocolate Lava Cakes are perfect for a romantic dinner at home. Pair them with a glass of red wine or champagne for a truly decadent experience.

Health Benefits

While these chocolate lava cakes are undeniably indulgent, they can be enjoyed as an occasional treat to celebrate special occasions like Valentine's Day.

Variations & Customization Options

  • Experiment with different types of chocolate, such as milk or white chocolate, to create variations of this classic dessert.
  • Add a teaspoon of instant espresso powder to the batter for a hint of coffee flavor that complements the chocolate beautifully.
Treat yourself and your loved one to the ultimate indulgence with these Valentine's Day Chocolate Lava Cakes. With their molten centers and rich chocolatey flavor, they're sure to make hearts melt and create unforgettable memories on this special day of love.

Bake with Love!
Sam

Valentine's Day Chocolate Covered Strawberries

Indulge in the sweetness of Valentine's Day with these delectable homemade chocolate-covered strawberries. Whether you're celebrating with a special someone or treating yourself, these delightful treats are sure to add a touch of romance to your day.

Ingredients

  • Fresh strawberries
  • Dark, milk, or white chocolate chips
  • Optional toppings: crushed nuts, shredded coconut, sprinkles
Preparation Time: 15 minutes
Chilling Time: 30 minutes
Yield: Varies based on the number of strawberries


Instructions

  1. Wash and thoroughly dry the strawberries, leaving the stems intact.
  2. In a microwave-safe bowl, melt the chocolate chips in 30-second intervals, stirring in between, until smooth and fully melted.
  3. Dip each strawberry into the melted chocolate, coating it halfway or fully as desired.
  4. Allow any excess chocolate to drip off, then place the dipped strawberries onto a parchment-lined baking sheet.
  5. If desired, sprinkle the dipped strawberries with toppings of your choice while the chocolate is still wet.
  6. Place the baking sheet in the refrigerator for about 30 minutes, or until the chocolate has hardened.
  7. Once hardened, remove the chocolate-covered strawberries from the refrigerator and serve immediately, or store them in an airtight container in the refrigerator until ready to enjoy.

Pro Tips

  1. Ensure the strawberries are completely dry before dipping them in chocolate to prevent the chocolate from seizing.
  2. Use high-quality chocolate for best results, and feel free to mix and match different types of chocolate for a variety of flavors.
  3. Get creative with toppings! Crushed nuts, shredded coconut, and colorful sprinkles are popular choices, but you can also try drizzling melted white chocolate over dark chocolate-covered strawberries for an elegant touch.

Secret Tips

For an extra touch of indulgence, consider adding a splash of liqueur, such as Grand Marnier or Chambord, to the melted chocolate for a boozy twist.

Serving Options

Serve the chocolate-covered strawberries as a romantic dessert for two, or package them in a decorative box for a thoughtful homemade gift.

Health Benefits

    While these chocolate-covered strawberries are certainly a treat, they also offer the health benefits of fresh fruit, including vitamins, minerals, and antioxidants
  • .

Variations & Customization Options

  1. Experiment with different types of chocolate and toppings to create your own unique flavor combinations.
  2. For a healthier option, you can also try dipping strawberries in Greek yogurt instead of chocolate for a tangy twist.

Celebrate love in its sweetest form this Valentine's Day with these irresistible chocolate-covered strawberries. Whether enjoyed with your significant other, shared with friends, or savored solo, these homemade treats are sure to make your heart flutter. Wishing you a day filled with love, joy, and delicious indulgence!

Prepare with Love!
Sam

Sunday, 4 February 2024

The Ultimate Brownie Recipe: A Chocolate Lover's Dream

Welcome to the sweetest corner of my blog, where chocolate dreams come alive, and the aroma of freshly baked goods fills the air. Today, we're diving into a recipe that's close to my heart and sure to win yours – the Ultimate Brownie Recipe. This isn't just any brownie recipe; it's a chocolatey journey to the peak of decadence, where every bite is a blend of gooey goodness and crisp, crackly top. Perfect for cozy nights in, impressive dessert tables, or just because every day deserves that sprinkle of chocolate magic.

Origin Story: Chocolate Brownies

Chocolate brownies are a beloved dessert, cherished for their rich, fudgy texture and intense chocolate flavor. They have a fascinating history that spans over a century, evolving from a simple treat to a staple in American baking.

Historical Roots

The exact origin of brownies is somewhat disputed, but most sources agree that they were first created in the United States in the late 19th or early 20th century. One popular story suggests that brownies were invented by a housewife in Bangor, Maine, who forgot to add baking powder to her chocolate cake, resulting in a dense, fudgy confection. Another theory credits the Palmer House Hotel in Chicago, which claims to have created the first brownie for the 1893 Columbian Exposition.

The earliest published recipes for brownies appeared in the early 20th century, with Fannie Farmer’s 1906 edition of the "Boston Cooking-School Cook Book" featuring one of the first brownie recipes. These early brownies were made with simple ingredients like butter, sugar, eggs, chocolate, and flour, and they quickly became popular for their ease of preparation and delicious taste.

Cultural Significance

Brownies hold a special place in American culture, often associated with comfort and nostalgia. They are a favorite treat for bake sales, potlucks, and family gatherings, loved by both children and adults. Their versatility allows for endless variations, from the classic fudgy and chewy brownies to those enriched with nuts, caramel, or flavored with peppermint.

The popularity of brownies has spread worldwide, and they are now enjoyed in many countries. Despite regional variations and adaptations, the essential qualities of rich chocolate flavor and a satisfying texture remain central to the appeal of brownies.

Personal Connection

My connection to chocolate brownies began with my search for the perfect dessert to share with friends and family. I wanted something simple to prepare but universally loved. Experimenting with different recipes and ingredients, I found that the key to the perfect brownie lies in using high-quality chocolate and balancing the right amount of sugar, butter, and eggs to achieve the desired texture.

I discovered that the secret to a fudgy brownie is to slightly underbake them, ensuring a gooey center that sets as the brownies cool. Adding a touch of espresso powder enhanced the chocolate flavor, making each bite even more decadent.

Recipe Evolution

Creating the perfect chocolate brownies involves a few key steps. Using high-quality dark chocolate and unsweetened cocoa powder provides a deep, rich flavor. The combination of butter and sugar is essential for a moist and chewy texture, while eggs contribute to the structure and fudginess.

Mixing the dry and wet ingredients separately before combining them helps ensure a smooth batter. Folding in chocolate chips or nuts can add texture and extra chocolatey goodness. Baking the brownies until just set, then allowing them to cool completely before cutting, helps achieve the perfect consistency.

Sharing the Tradition

Today, chocolate brownies are a favorite in my household, especially for special occasions and casual gatherings. They are the dessert I bake when I want to offer something indulgent and comforting. Each batch is a reminder of the simple pleasures of baking and the joy of sharing delicious treats with loved ones.

Ingredients:

1 cup (225g) unsalted butter
2 cups (400g) granulated sugar.
1 cup (90g) high-quality cocoa powder
1 teaspoon salt
1 teaspoon baking powder
1 tablespoon vanilla extract
4 large eggs, room temperature
1 and 1/2 cups (190g) all-purpose flour
1 cup (175g) chocolate chips or chunks (dark, milk, or a mix)
Optional: 1 cup (100g) chopped walnuts or pecans

Preparation Time: 15 minutes
Baking Time: 25-30 minutes
Yield: This Recipe will produce 24 brownies medium size cookies depending on the scooping
 

Instructions:

  1. Preheat your oven to 350°F (175°C) and line a 9x13-inch baking pan with parchment paper for easy removal.
  2. Melt the butter in a medium saucepan over low heat, then stir in the sugar and cocoa powder until the mixture is smooth. Allow it to cool slightly.
  3. In a separate bowl, whisk together the salt, baking powder, and flour.
  4. Blend vanilla into the cooled chocolate mixture. Add eggs one at a time, fully incorporating each before adding the next, ensuring the mixture is smooth and glossy.
  5. Fold the dry ingredients into the wet ingredients until just combined, being careful not to overmix.
  6. Stir in the chocolate chips and, if desired, nuts until evenly distributed throughout the batter.
  7. Pour the batter into the prepared pan, using a spatula to smooth the top.
  8. Bake for 25-30 minutes, or until a toothpick inserted into the center comes out with a few moist crumbs. Be careful not to overbake to maintain the brownies' fudgy texture.
  9. Allow the brownies to cool in the pan on a wire rack to room temperature before using the parchment paper to lift them out and cut them into squares.

Pro Tips:

  • Quality Matters: Use the best quality cocoa powder and chocolate you can find. The richness of your brownies depends on the quality of chocolate used.
  • Don't Overbake: Keep an eye on the baking time. Overbaked brownies lose their gooey center. Aim for that slightly underbaked texture for the perfect fudginess.
  • Cool Completely: Patience is key. Allow the brownies to cool completely before slicing. This wait ensures clean cuts and a professional presentation.
  • Dust & Decorate: For an extra touch of elegance, dust your brownies with a fine layer of powdered sugar or drizzle with melted chocolate before serving.

Secret Tips

  1. Use High-Quality Chocolate: The quality of chocolate plays a crucial role in the texture and appearance of your brownies. opt for high-quality chocolate or cocoa powder for a richer taste and smoother texture.
  2. Whisk Vigorously: After adding the eggs, whisk vigorously until the mixture is thick and glossy. This process incorporates air into the batter, contributing to a shiny, crackly top as it bakes.
  3. Sugar Ratio: The type and amount of sugar you use can affect the crust. Using granulated sugar helps create a shiny, crackly top due to the sugar melting and then solidifying as a thin, glossy layer.
  4. Preheat the Pan: For an extra-flaky crust, try preheating your baking pan in the oven before pouring in the batter. A hot pan starts cooking the bottom layer of the batter immediately, creating a temperature difference that helps achieve the desired texture on top.
  5. Underbake Slightly: Removing the brownies from the oven just before they're fully done (when a toothpick comes out with a few moist crumbs) not only ensures a fudgy interior but also helps in forming a better crust on top as the brownies settle and cool.
  6. Layer with Chocolate Chips: Sprinkle a layer of chocolate chips or chunks on top of the batter before baking. As they melt, they contribute to the shiny, crackly crust.
  7. Use a Water Bath: Placing your baking pan in a larger pan filled with a small amount of water can help the brownies bake more evenly, contributing to the texture of the top layer. Be cautious to prevent water from seeping into the batter.
  8. Cool in the Oven: Turn off the oven a few minutes before the brownies are done and let them sit in the residual heat with the door slightly ajar. This slower cooling process can help achieve a smoother top.


With this recipe, you're not just baking brownies; you're crafting memories, one chocolatey square at a time. So, tie your apron, and let's bake magic into every bite with the Ultimate Brownie Recipe – where every day deserves a moment of chocolate delight. 

Happy baking!
Sam

Top of Form