Turning Your Wishes into Sweet Realities, One Homemade Treat at a Time. 🌟
Showing posts with label Baking Adventures. Show all posts

Tuesday, 31 December 2024

Chai-Spiced Blondies

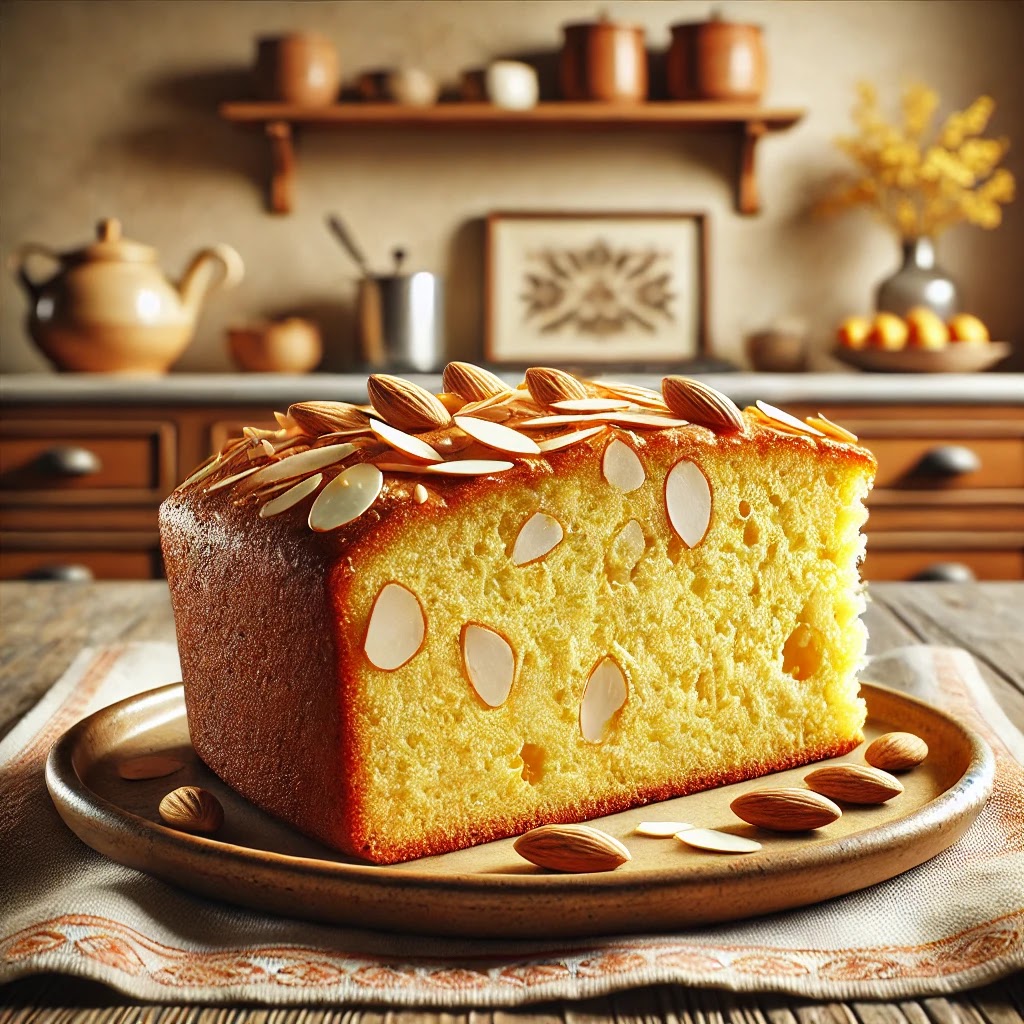
Indulge in the warm, aromatic flavors of chai tea baked into chewy, buttery blondies. These Chai-Spiced Blondies are perfect for cozy evenings or sharing with loved ones. Let’s bake something extraordinary! 💛

Origin Story: Chai-Spiced Blondies 

There’s a certain magic to chai—a blend of spices that warms the soul and carries whispers of tradition, comfort, and indulgence. The idea for Chai-Spiced Blondies was born in the kitchen of a baker who adored the cozy flavors of chai but wanted to transform it into something unexpected, blending the richness of blondies with the aromatic allure of chai tea.

Inspired by the Spice Trails

The story begins centuries ago along the spice routes of South Asia, where traders carried precious cargo like cinnamon, cardamom, ginger, and cloves. These spices were prized for their ability to transform simple ingredients into something extraordinary. Chai, a spiced tea that emerged from these traditions, became a symbol of hospitality and warmth, served to guests as a gesture of welcome and care.

Fast forward to a chilly autumn afternoon in a modern kitchen, where a baker—let’s call her Priya—was sipping her favorite cup of chai and pondering her next dessert creation. She loved the way blondies offered a buttery, chewy canvas for flavors but felt they could use a touch of spice to make them extraordinary. That’s when inspiration struck: What if the rich, aromatic spices of chai could be baked into blondies?

A Cozy Experiment

Priya set to work, crafting a chai spice blend that balanced warmth, sweetness, and depth. She melted butter, whisked in sugars, and infused the batter with cinnamon, cardamom, ginger, nutmeg, and cloves, creating a batter that smelt like a cozy hug. For texture, she added a handful of chopped nuts and white chocolate chips, imagining how the creamy sweetness would complement the spices.

As the blondies baked, the kitchen filled with the intoxicating aroma of chai spices mingling with butter and sugar. The anticipation was almost too much to bear, but when the timer dinged, Priya knew she had created something special.

The first bite was everything she’d hoped for: buttery richness, chewy texture, and the warmth of chai spices in every bite. It was like a cup of chai, but in dessert form—a treat that felt both familiar and new.

A Recipe That Brings People Together

The Chai-Spiced Blondies quickly became a favorite among Priya’s family and friends. They were perfect for cozy evenings by the fire, paired with a steaming cup of tea, and even better when shared at gatherings. Everyone loved how the spices elevated the humble blondie into a dessert that felt both comforting and elegant.

Word spread, and soon these blondies found their way to bake sales, brunch tables, and even café menus. Each batch carried the warmth of chai and the joy of sharing something special with loved ones.

Personal Connection

For me, these Chai-Spiced Blondies are more than a dessert—they’re a celebration of the little moments. Baking them fills my home with the warm, nostalgic scent of spices, and each bite is like a small escape to a cozy café on a rainy day.

They’re also incredibly versatile. Whether I’m making them as a quick treat for myself or a thoughtful gift for a friend, these blondies never fail to bring a smile. And the best part? They’re as easy to make as they are delightful to eat.

A Blondie for Every Occasion

Chai-Spiced Blondies are the perfect blend of tradition and creativity, combining the beloved flavors of chai with the classic appeal of blondies. They’re a treat for any season but especially wonderful during fall and winter, when their warm spices feel like a hug in dessert form.

Ingredients
🛒

✅For the Blondies:

  • 1 cup unsalted butter, melted 🧈
  • 1 1/4 cups brown sugar 🍬
  • 1/2 cup granulated sugar
  • 2 large eggs 🥚
  • 1 teaspoon vanilla extract 🍦
  • 2 cups all-purpose flour 🌾
  • 1 teaspoon baking powder
  • 1/2 teaspoon salt 🧂

Chai Spice Mix:

  • 1 teaspoon ground cinnamon 🌿
  • 1/2 teaspoon ground cardamom
  • 1/4 teaspoon ground ginger
  • 1/4 teaspoon ground cloves
  • 1/4 teaspoon ground nutmeg

Optional Add-Ins:

  • 1/2 cup white chocolate chips 🍫
  • 1/2 cup chopped nuts (pecans or walnuts) 🌰

Recipe Details 📏

  • Prep Time: 15 mins
  • Bake Time: 25-30 mins
  • Cooling Time: 20 mins
  • Yield: 12 blondies

Instructions

  1. Preheat the Oven 🔥
    Preheat your oven to 350°F (175°C) and line an 8x8-inch baking pan with parchment paper.

  2. Mix the Wet Ingredients 🥣
    In a large bowl, whisk together the melted butter, brown sugar, and granulated sugar until smooth. Add the eggs one at a time, mixing well after each addition. Stir in the vanilla extract.

  3. Combine Dry Ingredients 🌾
    In a separate bowl, whisk together the flour, baking powder, salt, and the chai spice mix (cinnamon, cardamom, ginger, cloves, and nutmeg).

  4. Make the Batter 🍂
    Gradually fold the dry ingredients into the wet ingredients until just combined. If desired, fold in white chocolate chips or chopped nuts.

  5. Bake the Blondies 🎂
    Pour the batter into the prepared pan, spreading it evenly. Bake for 25-30 minutes, or until a toothpick inserted into the center comes out clean.

  6. Cool & Slice
    Let the blondies cool in the pan for 15 minutes before transferring them to a wire rack. Once cooled, slice into squares or rectangles.

Pro Tips 🎓

  • For a stronger chai flavor, double the chai spice mix.
  • Avoid overmixing the batter to keep the blondies chewy.
  • Store in an airtight container for up to 5 days or freeze for longer freshness.

These Chai-Spiced Blondies are a cozy and flavorful twist on a classic dessert. The combination of buttery richness and warm spices makes them irresistible. Whether you enjoy them with a cup of tea or share them with friends, they’re sure to be a hit! ☕✨

Happy New Year!

Sam

Monday, 23 December 2024

Stuffed Croissant Muffins: A Fun Twist on a Classic!

Flaky, buttery croissants meet the delightful surprise of hidden fillings in these Stuffed Croissant Muffins! Perfect for breakfast, brunch, or an indulgent snack, these muffins are incredibly versatile, fun to make, and oh-so-delicious. 😍 Let’s turn your kitchen into a bakery with this simple recipe! 🏠✨

Origin Story: Stuffed Croissant Muffins 🥐✨

Some recipes are born from necessity, others from creativity, and a few—like Stuffed Croissant Muffins—are the result of pure, delicious curiosity. Combining the buttery elegance of croissants with the versatility of muffins, this recipe is a love letter to those who believe that breakfast and snacks should always come with a delightful surprise inside.

The Classic Croissant: A French Icon

To understand the magic of Stuffed Croissant Muffins, we first need to pay homage to the croissant itself. A symbol of French baking, the croissant’s history actually begins in Austria. The “kipferl,” its predecessor, was a crescent-shaped pastry enjoyed as early as the 13th century. When Austrian bakers brought their craft to France in the 17th century, the French elevated the recipe with layers of buttery, flaky dough, creating the croissant we know and love today.

With its delicate layers and melt-in-your-mouth texture, the croissant quickly became a breakfast staple. But as versatile as it is, one thing remained constant: its shape. That is, until someone asked a very important question: What if we could reinvent the croissant as a muffin?

The Birth of the Stuffed Croissant Muffin

The story goes that a home baker, inspired by the viral “cruffin” trend—a hybrid of croissant and muffin—wanted to take things a step further. They thought, why stop at just merging shapes? Why not stuff these flaky pastries with an array of fillings, making every bite a new experience?

The idea came to life during a brunch experiment. Armed with refrigerated crescent roll dough (because life’s too short to laminate your own pastry every time), they rolled, filled, and folded their way into muffin tin magic. The first batch featured classic flavors: cream cheese and jam for sweetness, ham and cheese for savory. The result? Puffy, golden parcels of goodness that were crispy on the outside, tender on the inside, and bursting with flavor.

The concept of stuffed croissant muffins was born—a recipe that marries the sophistication of croissants with the practicality of muffins, offering endless possibilities for customization.

A Bite of Joy, Anytime

Stuffed Croissant Muffins quickly became a favorite for their versatility. They’re perfect for breakfast, brunch, or even dessert. Want a cozy treat on a rainy day? Fill them with Nutella or caramel and pair them with hot cocoa. Need an easy, crowd-pleasing appetizer? Opt for savory fillings like herbed goat cheese or spinach and feta.

These muffins also shine as a fun activity in the kitchen. Kids love helping to stuff and seal the dough, while adults enjoy experimenting with gourmet fillings. They’re the kind of recipe that turns an ordinary day into a celebration—simple to make but impressive enough to wow your family or guests.

Personal Connection

For me, Stuffed Croissant Muffins represent the joy of discovery. The first time I made them, it felt like opening a gift with every bite. Would it be creamy, chocolatey, or cheesy? Each muffin was a little surprise, and that’s what made them so special.

Now, they’ve become a go-to recipe in my household. Whether it’s a lazy weekend brunch or a last-minute dessert for unexpected guests, these muffins never fail to deliver. Watching the dough puff up in the oven, turning golden and glossy, is just as satisfying as taking the first bite.

A Recipe for Every Occasion

What makes Stuffed Croissant Muffins so magical is their adaptability. They can be sweet, savory, or a little of both. They’re perfect for mornings when you want something extra special, or evenings when you need a quick and indulgent snack.

Ingredients
🛒

  • 1 can (8 oz) refrigerated crescent roll dough 🥐
  • 1/2 cup cream cheese, softened 🧀
  • 1/4 cup powdered sugar 🍥
  • 1 teaspoon vanilla extract 🍦
  • 1/4 cup Nutella or chocolate spread 🍫 (optional for sweet version)
  • 1/4 cup jam (strawberry, raspberry, or your favorite!) 🍓
  • 1/4 cup diced ham and shredded cheese (for savory version) 🧀🍖
  • 1 egg, beaten 🥚
  • Optional: Powdered sugar for dusting 🍥 or fresh herbs for savory garnish 🌿

Recipe Details 📏

  • Prep Time: 10 mins
  • Bake Time: 12-15 mins
  • Yield: 8 stuffed croissant muffins

Instructions

  1. Preheat & Prep 🔥
    Preheat your oven to 375°F (190°C) and lightly grease a muffin tin.

  2. Roll It Out 🥐
    Separate the crescent roll dough into individual triangles. Lightly flatten each triangle with your fingers.

  3. Sweet Fillings 🍓🍫
    For sweet versions, mix cream cheese, powdered sugar, and vanilla extract in a small bowl until smooth. Add a dollop of the cream cheese mixture, Nutella, or jam to the center of each dough triangle.

  4. Savory Fillings 🧀🍖
    For savory versions, place a bit of diced ham and shredded cheese in the center.

  5. Wrap It Up 🎁
    Fold the edges of the dough around the filling, pinching to seal. Place the stuffed dough balls seam-side down into the muffin tin.

  6. Egg Wash & Bake 🥚
    Brush the tops with beaten egg for a golden, glossy finish. Bake for 12-15 minutes or until puffed and golden brown.

  7. Cool & Serve 🍽️
    Let cool slightly before removing from the tin. Dust sweet versions with powdered sugar or garnish savory ones with fresh herbs.

Pro Tips 🎓

  • Use refrigerated crescent dough sheets for a more uniform texture.
  • For extra flaky muffins, chill the stuffed dough for 10 minutes before baking.
  • Experiment with fillings! Think caramelized onions and goat cheese for a gourmet touch or peanut butter and banana for a fun twist. 🍌

Serving Suggestions 🍴

  • Sweet: Pair with a fresh cup of coffee ☕ or hot cocoa for a cozy treat.
  • Savory: Serve with a side salad 🥗 or soup 🍲 for a complete meal.
  • Dessert: Drizzle chocolate sauce or caramel over the sweet muffins for extra indulgence. 🍫

Whether you go sweet or savory, these Stuffed Croissant Muffins are guaranteed to impress! They’re flaky, versatile, and full of surprises in every bite. Perfect for any occasion or just because—you deserve it! 💕

Let me know if you'd like to generate some images to bring this recipe to life! 📸✨

Golden Saffron Milk Cake

Bring a touch of luxury to your dessert table with this Golden Saffron Milk Cake! Inspired by the beloved tres leches cake, this recipe adds a fragrant saffron twist that transforms a simple dessert into a rich, aromatic masterpiece. Perfect for celebrations or just to indulge in something extraordinary! 💛

Origin Story: Golden Saffron Milk Cake 🌼✨

There’s a magic in saffron—a golden thread of history, flavor, and luxury that has traveled across continents and centuries. The Golden Saffron Milk Cake takes this precious ingredient and weaves it into the beloved tres leches tradition, creating a dessert that’s both indulgent and aromatic, with a story as vibrant as its color.

A Journey Through Time and Spice

The roots of this cake are a celebration of two culinary treasures. Tres leches, originating from Latin America, is adored for its airy sponge cake soaked in a trio of milks, creating a dessert that’s impossibly rich and moist. Meanwhile, saffron—a spice prized for its distinct aroma and vibrant hue—has been treasured in the Middle East and South Asia for thousands of years, often reserved for festive dishes and special occasions.

The idea of combining these two culinary traditions was born in a bustling spice market. A young pastry chef, inspired by the intoxicating fragrance of saffron and the creamy decadence of tres leches, envisioned a dessert that would marry the simplicity of milk cake with the sophistication of saffron. The result? A cake that feels like a celebration of cultures, flavors, and moments of pure indulgence.

A Dash of Golden Luxury

The first time this cake was made, it was for a wedding—a joyous union of two families from different corners of the world. The chef wanted to create something symbolic: a dessert that represented the richness of love and the merging of traditions. Saffron was the perfect choice, symbolizing joy, wealth, and the golden threads of connection that weave us all together.

As the milk was infused with saffron, it turned into a beautiful golden hue, its fragrance filling the air like a warm embrace. The sponge cake, delicate yet resilient, absorbed the saffron-infused milk, transforming into a dessert that was soft, creamy, and utterly luxurious. Garnished with crushed pistachios and a touch of saffron, the cake became the centerpiece of the celebration, drawing gasps of delight with every slice.

Personal Connection

For me, the Golden Saffron Milk Cake is more than just a dessert—it’s a memory on a plate. It reminds me of family gatherings filled with laughter, where dishes like this were made with care and shared with love. Saffron, with its warm, earthy aroma, always takes me back to my grandmother’s kitchen, where she would carefully steep it in milk for her special desserts.

When I bake this cake, it’s about more than the ingredients. It’s about honoring traditions, experimenting with flavors, and creating something that feels both timeless and new. It’s the kind of dessert you make when you want to leave a lasting impression, when you want to say, “This moment is special.”

A Modern Masterpiece

The Golden Saffron Milk Cake is perfect for celebrations of all kinds, from weddings to birthdays to a simple dinner with friends. Its vibrant color, luxurious texture, and delicate balance of flavors make it a showstopper. The saffron brings a subtle warmth, the milk mixture adds creaminess, and the pistachios lend a satisfying crunch.

For those who want to create something extraordinary, this cake is your answer. It’s a dessert that invites you to slow down, savor the moment, and indulge in the joy of baking.

Ingredients 🛒

✅Cake Base:

  • 1 cup all-purpose flour 🌾
  • 1 teaspoon baking powder 🌟
  • 1/4 teaspoon salt 🧂
  • 4 large eggs, separated 🥚🥚
  • 3/4 cup granulated sugar 🍬 (divided)
  • 1/2 teaspoon vanilla extract 🍦

Milk Mixture:

  • 1 cup whole milk 🥛
  • 1/2 cup evaporated milk
  • 1/2 cup condensed milk 🥫
  • 1/4 teaspoon saffron threads 🌼
  • 1/2 teaspoon cardamom powder (optional)

Topping:

  • 1 cup heavy cream 🥛
  • 2 tablespoons powdered sugar 🍥
  • Saffron strands & crushed pistachios for garnish 🌿

Recipe Details 📏

  • Prep Time: 20 mins
  • Bake Time: 25-30 mins
  • Cool Time: 30 mins
  • Yield: 8-10 servings

Instructions

  1. Preheat & Prep 🌟
    Preheat your oven to 350°F (175°C) and grease a 9x9-inch square pan.

  2. Whisk the Dry Ingredients
    In a bowl, combine flour, baking powder, and salt. Set aside.

  3. Beat the Egg Whites 🥚💨
    In a large bowl, beat the egg whites with an electric mixer until soft peaks form. Gradually add 1/2 cup of sugar and continue beating until stiff peaks form.

  4. Mix the Yolks 🍰
    In a separate bowl, beat the egg yolks with the remaining sugar and vanilla until pale and creamy. Gently fold the yolks into the egg whites.

  5. Incorporate Dry Ingredients 🌾
    Sift the dry ingredients into the egg mixture in three additions, folding gently after each addition to retain the airy texture.

  6. Bake the Cake 🔥
    Pour the batter into the prepared pan and bake for 25-30 minutes, or until a toothpick comes out clean. Let the cake cool completely.

  7. Make the Milk Mixture 🌼
    Warm the milk and stir in saffron threads until infused (golden and fragrant). Add evaporated milk, condensed milk, and cardamom powder.

  8. Soak the Cake 🥛
    Poke holes all over the cooled cake with a fork. Slowly pour the milk mixture over the cake, allowing it to soak in. Refrigerate for at least 2 hours.

  9. Whip the Cream 🍥
    Beat the heavy cream and powdered sugar until stiff peaks form. Spread over the chilled cake.

  10. Garnish & Serve 🌟
    Sprinkle saffron threads and crushed pistachios on top. Slice, serve, and enjoy the luxury in every bite!

Pro Tips 🎓

  • For stronger saffron flavor, soak the threads in warm milk overnight.
  • Use room-temperature eggs for better volume when beating.
  • Chill the cake overnight for an even richer taste.


This Golden Saffron Milk Cake is a symphony of flavors and textures: fluffy sponge, creamy milk, and aromatic saffron with pistachio crunch. It's more than dessert—it's an experience! 🌼✨ Whether for a celebration or just to treat yourself, this cake is sure to impress. 💛

Let me know if you'd like an image to match this recipe! 📸✨

Happy Baking !

Sam

Thursday, 7 November 2024

Spiced Orange & Olive Oil Cake with Pistachio Glaze

Say hello to the Zesty Orange & Olive Oil Cake with Pistachio Glaze – a bright, vibrant dessert that’ll make your taste buds dance! With the tangy pop of orange zest, the warm embrace of olive oil, and a nutty pistachio drizzle, this cake is a fun twist on classic flavors. Let’s bake some happiness and spread the joy! 🌞🌿

Origin Story: Orange & Olive Oil Cake with Pistachio Glaze

The Zesty Orange & Olive Oil Cake with Pistachio Glaze is more than just a dessert; it’s a celebration of sunshine, Mediterranean flavors, and the joy of reinventing the classics. This recipe has roots in Mediterranean baking traditions, where olive oil and citrus are cherished ingredients, valued for their freshness, warmth, and unique ability to bring simple ingredients to life.

A Recipe Inspired by the Mediterranean

The inspiration for this cake comes from the sun-drenched hills of southern Europe, where olive groves and citrus orchards flourish under clear blue skies. Olive oil cakes are common in Italian, Greek, and Spanish kitchens, where home bakers use this golden liquid to add moisture and richness to their creations. Adding orange zest and juice gives the cake a zesty, fresh twist, reminiscent of an orange tree in full bloom.

The pistachio glaze is a nod to Middle Eastern influences, where pistachios are prized for their nutty, slightly sweet flavor. The combination of vibrant green pistachios, the rich aroma of olive oil, and the bright tang of oranges creates a cake that’s both earthy and refreshing, indulgent yet light.

A Story of Accidental Brilliance

Legend has it that this cake came to be when a baker, originally planning to make a simple orange cake, accidentally reached for olive oil instead of butter. Realizing the mistake only after mixing, the baker decided to carry on with the recipe, hoping the olive oil’s mild fruitiness would complement the orange. To their surprise, the olive oil not only enhanced the orange flavor but also gave the cake a beautiful texture—moist, tender, and just a bit more sophisticated.

As a finishing touch, the baker whipped up a glaze using leftover pistachios, and the cake was transformed. The glaze added just the right amount of crunch and earthiness, balancing the sweetness and tying together the Mediterranean flavors in one glorious bite.

Personal Connection

For me, baking this cake is like bringing a piece of the Mediterranean sunshine into my kitchen. It’s the cake I make when I want to surprise friends or family with something that’s familiar yet unexpected. The process of rubbing orange zest into sugar, watching the olive oil blend smoothly into the batter, and drizzling the pistachio glaze over the top feels almost like creating a piece of art.

Every time I bake this, I think of winding coastal roads, sun-dappled olive groves, and the simple beauty of fresh, natural ingredients. It’s a recipe that reminds me that baking can be adventurous and comforting all at once.

A Cake for All Seasons

The Zesty Orange & Olive Oil Cake with Pistachio Glaze is a dessert that can be enjoyed all year round. In the cooler months, it brings a pop of brightness and warmth, and in summer, it’s the perfect light dessert for an afternoon gathering. The flavors are sophisticated but not intimidating, making it a cake that’s as much about the experience as it is about taste.

Whether you’re serving it with coffee in the morning, tea in the afternoon, or a glass of wine in the evening, this cake adapts beautifully. Each slice is a reminder of the magic that can happen when you bring together flavors from different parts of the world.

Ingredients 🛒

✅Cake:

  • 1 1/2 cups all-purpose flour 🌾
  • 1 teaspoon baking powder 🌟
  • 1/2 teaspoon baking soda 🧂
  • 1/4 teaspoon salt
  • 1 teaspoon cinnamon 🌰
  • 1/2 teaspoon cardamom 🍃
  • 1/4 teaspoon nutmeg
  • 3/4 cup granulated sugar 🍚
  • Zest of 2 oranges 🍊🍊
  • 1/2 cup olive oil 🫒
  • 2 large eggs 🥚🥚
  • 1/2 cup freshly squeezed orange juice 🍹
  • 1/2 cup Greek yogurt or sour cream 🍶
  • 1 teaspoon vanilla extract 🍦

✅Pistachio Glaze:

  • 1/2 cup powdered sugar 🍥
  • 1-2 tablespoons milk or orange juice 🍊
  • 2 tablespoons finely chopped pistachios 🌿 (plus extra for garnish)

Recipe Details 📏

  • Prep Time: 15 mins
  • Bake Time: 35-40 mins
  • Cool Time: 15 mins
  • Yield: 8-10 servings

Instructions

  1. Let’s Start the Party! 🎉
    Preheat your oven to 350°F (175°C) and get your 9-inch round cake pan ready with a little grease and flour love.

  2. Mixing the Magic 🪄
    In a medium bowl, whisk together flour, baking powder, baking soda, salt, cinnamon, cardamom, and nutmeg – think of it as a warm spice hug! 🧡

  3. Infuse the Citrus Love 🍊✨
    In a large bowl, use your fingers to rub the orange zest into the sugar until it smells heavenly. (Trust me, this step is magical!) 💫

  4. Add the Good Stuff 👩‍🍳
    Stir in the olive oil, eggs, orange juice, Greek yogurt, and vanilla until you have a smooth, sunny batter. 🌞

  5. Blend It All 🌈
    Add your dry ingredients to the wet, stirring just until combined. Don’t overmix – we want this cake to stay light and airy! 🎈

  6. Bake to Perfection 🍞
    Pour the batter into your prepared pan and bake for 35-40 minutes, or until a toothpick comes out clean. The golden brown top will tell you it’s ready to shine! 🌟

  7. Cool & Make the Glaze 🍯
    While the cake cools, whip up the glaze! Mix powdered sugar, milk (or OJ for extra orange oomph), and chopped pistachios until smooth.

  8. Drizzle & Dazzle
    Drizzle the glaze over your cooled cake, letting it drip down for that rustic charm. Top with extra pistachios because...why not? 🌿

Pro Tips 🎓

  • Rub the Zest! 👉 Infusing the zest into the sugar releases the orange’s oils for an extra citrusy punch.
  • Olive Oil Choice: Use a mild olive oil for a hint of flavor or fruity olive oil for a bolder taste.

Serving Vibes
☕🍰

  • Pair with Tea or Coffee: 🍵🍂 This cake and a warm drink? Match made in heaven.
  • A Dollop of Whipped Cream: 🍦 Add a little fluff on top for extra decadence.

Health Perks 💪🌱

  • Olive Oil: Healthy fats that keep the cake moist and delightful.
  • Oranges: Vitamin C boost that adds both taste and nutrition!

Twist it Up! 🎉

  • Nut-Free: Swap out pistachios for a nut-free experience.
  • Herby Delight: Try a teaspoon of rosemary in the glaze for a surprise twist 🌿
  • Chocolate Drizzle: Drizzle with melted chocolate instead of glaze – orange + chocolate = love! 🍫💖


This Zesty Orange & Olive Oil Cake with Pistachio Glaze is all about celebrating flavors in a new, fun way. With its spiced, citrusy essence and glossy pistachio finish, it’s a showstopper dessert you’ll make time and time again. Enjoy every slice, and let this cake bring a splash of sunshine to your table! 🌞🍰

Happy Baking!

Sam

Tuesday, 5 November 2024

Maple Pecan Streusel Muffins

These Maple Pecan Streusel Muffins are a delightful way to bring cozy flavors to your kitchen. With warm maple undertones, a hint of cinnamon, and crunchy pecan streusel, each bite offers a comforting taste of home. Perfect with a cup of coffee or tea, they’re a lovely treat for any time of day.

Origin Story: Maple Pecan Streusel Muffins

Maple Pecan Streusel Muffins are like a cozy sweater for your taste buds—warm, comforting, and just the right amount of sweet. These muffins bring together the flavors of rich maple syrup, buttery pecans, and a crumbly streusel topping, making them perfect for chilly mornings or lazy afternoons with a hot drink in hand. The story behind these muffins is as charming as the muffins themselves, capturing the essence of a simple treat that feels like a big, warm hug.

A Muffin Born from a Sweet Accident

Legend has it that the idea for Maple Pecan Streusel Muffins came about one frosty morning in Vermont, where a young baker found herself in a bit of a breakfast crisis. She had promised her family fresh muffins, but her pantry was nearly bare. She managed to dig up some basic ingredients but was missing her usual sweeteners. The only thing left? A bottle of pure maple syrup, a local favorite.

Determined not to give up, she decided to try maple syrup as her sweetener, thinking it would add a unique twist. Just as she was mixing it in, her little brother—whose “help” often meant making a bit of a mess—accidentally tipped a bag of chopped pecans into the batter. She sighed, but, instead of removing them, she shrugged and stirred them in. The pecans would, after all, add some crunch.

To top it all off, she sprinkled a quick streusel mixture on top for a little extra flair, hoping it would make the muffins look more “intentional.” As the muffins baked, the kitchen filled with the cozy aroma of maple, butter, and toasted nuts, and she knew she was onto something special.

The Maple Pecan Craze

When her family bit into the warm, crumbly muffins, they were instantly hooked. The combination of maple’s natural sweetness, the nuttiness of pecans, and the crispy streusel topping was the stuff of breakfast legend. Word quickly spread around town, and soon everyone was asking for “those maple pecan muffins with the crumbly top.”

Before long, the recipe became a local hit, and the baker found herself making batch after batch for friends, neighbors, and eventually the town bakery. The Maple Pecan Streusel Muffins became a go-to treat for chilly days and autumn gatherings, celebrated for their comforting flavor and rustic charm.

Personal Connection

For me, these Cozy Maple Pecan Streusel Muffins aren’t just a breakfast pastry—they’re a reminder of the warmth that simple ingredients can bring. The way the maple syrup caramelizes slightly during baking, the buttery pecans adding a satisfying crunch, and that streusel… well, it’s just the cherry on top (or, in this case, the crumble on top).

Whenever I bake these muffins, I’m reminded of the magic that happens when you embrace imperfections and make the best of what you have. They’re the kind of muffin that doesn’t need a fancy occasion—just a cool morning, a hot drink, and maybe someone special to share them with.

Ingredients

✅Muffins:

  • 1 3/4 cups all-purpose flour
  • 1/2 cup granulated sugar
  • 1/4 cup brown sugar
  • 1 teaspoon baking powder
  • 1/2 teaspoon baking soda
  • 1/4 teaspoon salt
  • 1/2 teaspoon cinnamon
  • 1/2 cup unsalted butter, melted
  • 1/2 cup maple syrup
  • 2 large eggs
  • 1 teaspoon vanilla extract
  • 1/2 cup whole milk

✅Streusel Topping:

  • 1/4 cup all-purpose flour
  • 1/4 cup brown sugar
  • 1/2 teaspoon cinnamon
  • 1/4 cup chopped pecans
  • 2 tablespoons cold butter, cut into small pieces

Recipe Details

  • Preparation Time: 15 minutes
  • Baking Time: 18-20 minutes
  • Yield: 12 muffins

Instructions

  1. Preheat Oven and Prepare Muffin Tin: Preheat your oven to 375°F (190°C) and line a 12-cup muffin tin with paper liners.

  2. Prepare Streusel: In a small bowl, combine the flour, brown sugar, cinnamon, and pecans. Add the cold butter and mix until crumbly. Set aside.

  3. Mix Dry Ingredients: In a large bowl, whisk together flour, granulated sugar, brown sugar, baking powder, baking soda, salt, and cinnamon.

  4. Combine Wet Ingredients: In a separate bowl, whisk the melted butter, maple syrup, eggs, vanilla extract, and milk until smooth.

  5. Combine Wet and Dry Mixtures: Pour the wet ingredients into the dry ingredients, stirring until just combined. Be careful not to overmix.

  6. Fill Muffin Cups: Divide the batter evenly among the muffin cups, filling each about two-thirds full. Sprinkle the streusel topping over each muffin.

  7. Bake: Bake in the preheated oven for 18-20 minutes or until a toothpick inserted in the center comes out clean.

  8. Cool and Serve: Allow the muffins to cool in the pan for a few minutes, then transfer to a wire rack. Enjoy warm or at room temperature!

Pro Tips

  • Room Temperature Ingredients: Ensure ingredients like eggs and milk are at room temperature for the best texture.
  • Double the Streusel: Love a lot of topping? Double the streusel recipe for extra crunch.

Serving Options

  • With Butter: Serve with a light spread of butter for extra richness.
  • Maple Glaze: Drizzle with a simple maple glaze for extra sweetness.

Health Benefits

  • Pecans: A great source of healthy fats and antioxidants.
  • Maple Syrup: A natural sweetener, rich in minerals and antioxidants.

Variations

  • Nut-Free: Substitute pecans with rolled oats for a crunchy oat topping.
  • Gluten-Free: Use a gluten-free flour blend for the muffin base.
These Maple Pecan Streusel Muffins are a true embodiment of cozy baking, combining the natural sweetness of maple syrup with the satisfying crunch of pecan streusel. With their warm flavors and inviting aroma, they’re perfect for any occasion, whether it’s a relaxed morning with family or a treat to share with friends. Each bite offers a balance of soft, moist cake and a crumbly topping that makes these muffins irresistibly comforting. So, gather your ingredients, warm up the oven, and let these muffins bring a touch of joy and warmth to your day. Enjoy every bite, and don’t forget to share the love!

Happy Baking!
Sam

Friday, 18 October 2024

Honey Almond Dream Cake

This Honey Almond Dream Cake is a celebration of natural flavors. Made with wholesome ingredients, it’s sweetened with honey and enriched with ground almonds for a delightful texture. The golden-brown crust and moist, tender crumb make it an irresistible choice for any occasion. Whether you’re serving it for breakfast, dessert, or a cozy tea-time treat, this cake is sure to impress with its simple yet elegant flavors.

Origin Story: Honey Almond Cake

There’s something timeless about a Honey Almond Cake—simple ingredients, rich flavors, and a touch of nostalgia in every bite. This cake isn’t just about dessert; it’s about creating moments of warmth and comfort, turning the ordinary into something special. Inspired by ancient flavors and modern simplicity, the Honey Almond Cake bridges past and present, making it a perfect choice for any occasion that calls for sweetness, elegance, and a touch of nature.

A Taste Rooted in History

The story of the Honey Almond Cake stretches back to ancient civilizations. Honey, one of nature’s earliest sweeteners, has been used in baking for millennia. The Greeks and Romans revered honey for its richness and versatility, often incorporating it into their desserts as a symbol of prosperity and celebration. Meanwhile, almonds, native to the Middle East, were considered a delicacy and a sign of wealth, often gifted during important festivals.

It’s easy to imagine a honeyed almond cake being served in the grand halls of Roman banquets, or being prepared in small Mediterranean kitchens by home cooks who understood the power of simplicity. Combining these two ingredients—honey and almonds—was a way to create something both sweet and earthy, indulgent yet nourishing. That same tradition has traveled through time, becoming a cornerstone of many European and Middle Eastern desserts.

Modern Inspiration

My journey with Honey Almond Cake began unexpectedly. I was searching for a dessert that felt like it belonged in the past but still had a place in today’s kitchen. I wanted something simple—without the bells and whistles of overly complicated recipes—yet rich in flavor and meaning. This cake is my answer to that search. It’s the cake I turn to when I want to bake something that feels both indulgent and wholesome.

The first time I made it, I was struck by how few ingredients it needed—just honey, almonds, flour, butter, and eggs—but how beautifully they worked together. The honey caramelizes in the oven, creating a golden-brown crust that contrasts with the soft, nutty interior. The ground almonds give the cake a unique texture that’s both dense and tender, while the honey adds a natural sweetness without being overpowering.

As the cake bakes, the smell of warm honey fills the kitchen, mingling with the roasted nuttiness of the almonds. It’s a scent that transports you somewhere else—perhaps a countryside kitchen or a sunny Mediterranean home where life moves a little slower, and food is savored with gratitude.

The Simplicity of Perfection

The beauty of Honey Almond Cake lies in its simplicity. It’s not overly sweet or complex; instead, it relies on the quality of its ingredients to shine. A drizzle of honey over the top before serving adds just the right amount of extra sweetness, while slivered almonds give a bit of crunch. You can enjoy it as a snack with a cup of tea or coffee, or dress it up for a special occasion with a dollop of whipped cream or fresh berries.

What I love most about this cake is its versatility. It feels just as appropriate for a quiet afternoon with family as it does for a celebratory dinner with friends. And because it’s made with honey and almonds, it even feels somewhat wholesome—a treat you can indulge in without guilt.

A Slice of Comfort and Tradition

Baking this cake has become a tradition in my home. It’s the kind of recipe you keep coming back to because it’s reliable, comforting, and always delicious. Whenever I bake it, I’m reminded of how food can connect us to history, to nature, and to the people we love.

Ingredients

  • 1 1/2 cups almond flour
  • 1 cup all-purpose flour
  • 1 teaspoon baking powder
  • 1/4 teaspoon salt
  • 1/2 teaspoon cinnamon (optional)
  • 1/2 cup unsalted butter, softened
  • 3/4 cup honey
  • 2 large eggs
  • 1 teaspoon vanilla extract
  • 1/2 cup whole milk
  • 1/4 cup sliced almonds (for topping)

Recipe Details

  • Preparation Time: 15 minutes
  • Cooking Time: 40-45 minutes
  • Cooling Time: 10 minutes
  • Yield: 8-10 servings

Instructions

  1. Preheat and Prepare: Preheat your oven to 350°F (175°C). Grease and line an 8-inch round cake pan.

  2. Mix Dry Ingredients: In a medium bowl, whisk together the almond flour, all-purpose flour, baking powder, salt, and cinnamon (if using).

  3. Cream Butter and Honey: In a large bowl, cream together the softened butter and honey until smooth and fluffy. Beat in the eggs, one at a time, followed by the vanilla extract.

  4. Combine Wet and Dry Ingredients: Gradually add the dry ingredients to the wet ingredients, alternating with the milk, mixing until just combined. Be careful not to overmix.

  5. Pour and Top: Pour the batter into the prepared cake pan. Sprinkle the sliced almonds evenly over the top.

  6. Bake: Bake in the preheated oven for 40-45 minutes, or until a toothpick inserted into the center comes out clean and the top is golden brown.

  7. Cool and Serve: Let the cake cool in the pan for 10 minutes before transferring it to a wire rack to cool completely. Drizzle with extra honey for a finishing touch, if desired.

Pro Tips

  • Don’t Overmix: For a light, tender cake, mix the batter just until combined.
  • Even Almonds: Gently press the sliced almonds into the batter before baking to ensure they stick.

Secret Tips

  • Extra Flavor: Add a teaspoon of orange zest for a subtle citrus note that pairs wonderfully with the honey.
  • Rustic Texture: Replace half of the all-purpose flour with whole wheat flour for a heartier, more rustic texture.

Serving Options

  • With Whipped Cream: Serve with a dollop of lightly sweetened whipped cream or Greek yogurt.
  • With Fresh Berries: Pair with fresh berries or a drizzle of berry compote for a fruity contrast.
  • With Tea or Coffee: This cake is the perfect companion to a hot cup of tea or coffee.

Health Benefits

  • Almond Flour: Rich in protein and healthy fats, almond flour adds both flavor and nutrition to the cake.
  • Honey: A natural sweetener with antioxidants and anti-inflammatory properties.

Variations & Customization Options

  • Nut-Free: Substitute almond flour with oat flour and skip the almond topping for a nut-free version.
  • Gluten-Free: Use a gluten-free flour blend in place of all-purpose flour for a gluten-free cake.
  • Vegan: Substitute the butter with coconut oil and replace eggs with flax eggs for a vegan alternative.

Here are a few fun and funny facts about the Honey Almond Cake recipe:

  1. Bee Happy: This cake is like a sweet love letter to bees—without them, we wouldn’t have honey! So every bite is like saying, “Thank you, bees!”

  2. Almond Joy: Almonds are technically seeds, not nuts! So, you’re basically eating a seed cake—sounds a bit more exotic, doesn’t it?

  3. One Bowl Wonder: This cake comes together so easily, it feels like the universe is conspiring for you to have dessert! Minimal effort, maximum reward.

  4. Sweets for Strength: Did you know ancient Olympians used to eat honey and almonds for energy? You’re basically fueling up like a champion with this cake.

  5. Cake without the Crumbs: Almond flour helps keep this cake extra moist, so if you’re the type to avoid dry cakes like the plague, this one’s on your side!

  6. Gluten-Free-ish: With almond flour being a star player, you’re halfway to gluten-free already! Just one small tweak, and you’ve got a gluten-free delight.

  7. Dressed to Impress: Sprinkle a few extra almond flakes on top, and you can easily convince everyone that you’re a fancy pastry chef—even if your secret ingredient is store-bought honey.

This cake may seem humble, but it’s packed with history, simplicity, and a whole lot of natural goodness!

Happy Baking!

Sam