Turning Your Wishes into Sweet Realities, One Homemade Treat at a Time. 🌟
Showing posts with label Homemade Cakes. Show all posts

Monday, 1 July 2024

Blueberry Bundt Cake

This Blueberry Bundt Cake is a delightful and elegant dessert perfect for any occasion. It features a moist, tender crumb studded with juicy blueberries and a hint of lemon zest. Topped with a sweet lemon glaze, this cake is sure to impress your friends and family.

Origin Story: Blueberry Bundt Cake

Blueberry Bundt Cake is a delightful dessert that combines the sweetness of blueberries with the rich, moist texture of a bundt cake. This cake is perfect for special occasions, family gatherings, or simply as a treat to enjoy with a cup of coffee. The unique shape of the bundt cake, along with the vibrant burst of blueberries, makes this dessert both visually appealing and delicious.

Historical Roots

The Bundt cake, with its distinctive ring shape, has its origins in Europe, particularly Germany and Austria, where cakes baked in similar ring-shaped pans were known as "Gugelhupf." These cakes were often yeast-based and filled with nuts, fruit, and sometimes liquor.

The Bundt pan as we know it today was popularized in the United States in the 1950s and 1960s. The pan's design was patented by H. David Dalquist, the founder of Nordic Ware, who created it at the request of the Minneapolis chapter of the Hadassah Society. The pan gained immense popularity after a "Tunnel of Fudge" cake recipe won second place in the 1966 Pillsbury Bake-Off, resulting in a surge in demand for Bundt pans.

Blueberries, native to North America, have been enjoyed by indigenous peoples for centuries and became widely cultivated in the 20th century. The combination of blueberries and Bundt cake is a relatively modern invention, celebrating the freshness of blueberries within the classic structure of a Bundt cake.

Cultural Significance

Blueberry Bundt Cake holds a special place in American baking culture, particularly in regions where blueberries are abundant. It is often associated with summer, when blueberries are in season, and is a favorite for summer picnics, Fourth of July celebrations, and other warm-weather gatherings.

The Bundt cake's unique shape and ease of slicing make it ideal for serving at parties and events. The addition of blueberries adds a burst of color and flavor, making the cake not only delicious but also visually stunning.

Personal Connection

My journey with Blueberry Bundt Cake began with a desire to create a show-stopping dessert for a family reunion. I wanted something that combined the fresh, sweet flavor of blueberries with a cake that was easy to serve and enjoyed by all ages. The Bundt cake, with its beautiful shape and moist texture, seemed like the perfect choice.

Experimenting in the kitchen, I found that incorporating fresh blueberries into the batter and adding a lemon glaze elevated the cake's flavor profile. The result was a moist, tender cake with pockets of juicy blueberries and a zesty finish that delighted everyone at the reunion.

Recipe Evolution

Creating the perfect Blueberry Bundt Cake involves a few key steps. Using fresh, ripe blueberries ensures the best flavor and texture. Coating the blueberries in a bit of flour before folding them into the batter helps prevent them from sinking to the bottom of the cake.

The cake batter should be rich and moist, achieved by using a combination of butter, sugar, eggs, and buttermilk or yogurt. Adding lemon zest to the batter enhances the flavor, providing a subtle contrast to the sweetness of the blueberries.

Baking the cake in a well-greased and floured Bundt pan ensures it releases easily after baking. A lemon glaze, drizzled over the cooled cake, adds a touch of sweetness and a beautiful finish.

Sharing the Tradition

Today, Blueberry Bundt Cake is a favorite in my household, especially during blueberry season. It is the cake I bake when I want to impress guests with a beautiful and delicious dessert. Each slice is a reminder of the joy of baking and the simple pleasures of fresh, seasonal ingredients.

Ingredients

✅For the Cake:

  • 2 1/2 cups all-purpose flour
  • 2 teaspoons baking powder
  • 1/2 teaspoon baking soda
  • 1/2 teaspoon salt
  • 1 cup unsalted butter, softened
  • 1 1/2 cups granulated sugar
  • 3 large eggs
  • 1 teaspoon vanilla extract
  • Zest of 1 lemon
  • 1 cup buttermilk
  • 2 cups fresh blueberries (tossed with 1 tablespoon flour)

For the Lemon Glaze:

  • 1 cup powdered sugar
  • 2-3 tablespoons lemon juice

Recipe Duration

  • Preparation Time: 20 minutes
  • Cooking Time: 55-60 minutes
  • Yield: 12 servings

Instructions

  1. Preheat and Prepare Pan: Preheat your oven to 350°F (175°C). Grease and flour a Bundt pan.

  2. Mix Dry Ingredients: In a medium bowl, whisk together the flour, baking powder, baking soda, and salt.

  3. Cream Butter and Sugar: In a large mixing bowl, beat the butter and granulated sugar until light and fluffy. Add the eggs one at a time, beating well after each addition. Mix in the vanilla extract and lemon zest.

  4. Combine Wet and Dry Ingredients: Alternately add the flour mixture and buttermilk to the butter mixture, beginning and ending with the flour mixture. Mix until just combined. Gently fold in the blueberries.

  5. Fill Bundt Pan: Pour the batter into the prepared Bundt pan, spreading it evenly.

  6. Bake: Bake in the preheated oven for 55-60 minutes, or until a toothpick inserted into the center comes out clean. Allow the cake to cool in the pan for 10 minutes, then transfer to a wire rack to cool completely.

  7. Make the Lemon Glaze: In a small bowl, whisk together the powdered sugar and lemon juice until smooth. Adjust the consistency by adding more lemon juice if necessary.

  8. Glaze the Cake: Once the cake is completely cool, drizzle the lemon glaze over the top, allowing it to drip down the sides.

Pro Tips

  1. Toss Blueberries in Flour: Prevent blueberries from sinking by tossing them in a tablespoon of flour.
  2. Room Temperature Ingredients: Use room temperature ingredients for a smoother batter.
  3. Avoid Overmixing: Mix the batter until just combined to avoid a dense cake.
  4. Test for Doneness: Check for doneness with a toothpick; it should come out clean.
  5. Cool Completely Before Glazing: Ensure the cake is completely cool before adding the glaze to prevent it from melting.

Secret Tips

  1. Extra Moisture: Add a tablespoon of sour cream for extra moisture.
  2. Flavor Boost: Add a teaspoon of almond extract for an extra layer of flavor.
  3. Berry Variation: Use a mix of berries like raspberries and blackberries for a different twist.

Serving Options

  1. With Whipped Cream: Serve with a dollop of whipped cream.
  2. With Ice Cream: Pair with a scoop of vanilla ice cream.
  3. With Fresh Berries: Garnish with fresh blueberries and mint leaves.
  4. With Lemon Curd: Add a spoonful of lemon curd on the side.
  5. With Tea or Coffee: Enjoy with a hot cup of tea or coffee.

Health Benefits

  • Blueberries: Rich in antioxidants and vitamins.
  • Lemon: Provides vitamin C and a refreshing flavor.
  • Buttermilk: Adds a tangy flavor and moisture.

Variations & Customization Options

  1. Gluten-Free: Use gluten-free flour.
  2. Vegan: Substitute eggs with flax eggs and use dairy-free milk.
  3. Nutty Twist: Add 1/2 cup of chopped nuts to the batter.
  4. Spiced Up: Add a teaspoon of cinnamon or nutmeg for a warm spice flavor.
  5. Chocolate Lovers: Fold in 1/2 cup of chocolate chips for a sweet treat.


This Blueberry Bundt Cake is a delicious and beautiful dessert that's perfect for any occasion. With its moist crumb, juicy blueberries, and tangy lemon glaze, it's sure to be a hit with everyone. 

Happy baking!
Sam

Friday, 28 June 2024

Homemade Tiramisu Cake

Tiramisu Cake is a rich, creamy Italian dessert that's perfect for any occasion. This homemade version features layers of espresso-soaked ladyfingers, mascarpone cheese filling, and a dusting of cocoa powder. Follow this simple recipe to create a delectable Tiramisu Cake that will impress your friends and family.

Origin Story: Tiramisu Cake

Tiramisu Cake is an elegant and decadent dessert that combines the classic flavors of the traditional Italian tiramisu with the structure of a cake. This fusion dessert offers layers of moist cake, rich mascarpone cream, and a dusting of cocoa powder, making it a show-stopping treat for any occasion.

Historical Roots

The origins of tiramisu, which translates to "pick me up" or "cheer me up" in Italian, are relatively recent in the culinary world. Tiramisu is believed to have been created in the Veneto region of Italy in the 1960s. While the exact origin is debated, one popular account attributes its creation to a restaurant called Le Beccherie in Treviso. Traditional tiramisu is made with layers of coffee-soaked ladyfingers, mascarpone cheese, eggs, sugar, and cocoa powder.

The evolution of tiramisu into a cake form likely occurred as chefs and home bakers sought to combine the beloved flavors of tiramisu with the familiar structure of layered cakes. This adaptation allows for a more stable dessert that can be sliced and served like a traditional cake, while still retaining the creamy, coffee-infused essence of tiramisu.

Cultural Significance

Tiramisu Cake holds a special place in contemporary dessert culture, blending the best of Italian and American baking traditions. It is a popular choice for celebrations, from birthdays to weddings, due to its luxurious taste and impressive presentation. The cake's rich layers and sophisticated flavors make it a favorite for dessert lovers seeking something both classic and innovative.

This dessert also symbolizes the fusion of culinary techniques and the willingness to innovate within traditional recipes, showcasing how classic dishes can evolve and adapt to new forms and tastes.

Personal Connection

My journey with Tiramisu Cake began when I wanted to create a special dessert for a family celebration. Traditional tiramisu, while delicious, seemed too informal for the occasion. Inspired by the idea of transforming it into a cake, I experimented with different recipes to find the perfect balance of flavors and textures.

The key was to maintain the rich, creamy layers of mascarpone and coffee while ensuring the cake structure was moist and flavorful. Incorporating elements like a coffee syrup to soak the cake layers and a mascarpone cream frosting helped achieve the desired results.

Recipe Evolution

Creating the perfect Tiramisu Cake involves several key steps. The cake layers should be moist and tender, infused with a coffee syrup to mimic the coffee-soaked ladyfingers of traditional tiramisu. Using a combination of all-purpose flour, sugar, eggs, and butter creates a rich, flavorful cake base.

The mascarpone cream filling is made with mascarpone cheese, heavy cream, and sugar, creating a luscious, smooth layer. Adding a bit of Marsala wine or coffee liqueur enhances the flavor, adding depth and complexity.

Assembling the cake involves layering the coffee-soaked cake with the mascarpone cream, then finishing with a dusting of cocoa powder. Chilling the cake before serving allows the flavors to meld and the texture to set, ensuring each slice is perfect.

Sharing the Tradition

Today, Tiramisu Cake is a favorite dessert in my household, especially for special occasions and gatherings. It is the cake I bake when I want to impress guests with a sophisticated and delicious treat. Each bite is a reminder of the joy of baking and the rich culinary heritage of both Italy and contemporary fusion desserts.

Ingredients

✅For the Cake Layers:

  • 6 large eggs, separated
  • 1 cup granulated sugar
  • 1 cup all-purpose flour
  • 1 teaspoon baking powder
  • 1/2 teaspoon salt
  • 1/4 cup milk
  • 1/4 cup vegetable oil
  • 1 teaspoon vanilla extract

✅For the Filling:

  • 1 cup heavy cream
  • 8 oz mascarpone cheese
  • 1/2 cup granulated sugar
  • 2 teaspoons vanilla extract
  • 1 cup strong brewed espresso, cooled
  • 1/4 cup coffee liqueur (optional)

✅For the Assembly and Topping:

  • 24 ladyfinger cookies
  • Unsweetened cocoa powder, for dusting
  • Dark chocolate shavings (optional)

Recipe Duration

  • Preparation Time: 30 minutes
  • Cooking Time: 20-25 minutes
  • Chilling Time: 4 hours
  • Yield: 12 servings

Instructions

  1. Preheat your oven to 350°F (175°C). Grease and flour two 9-inch round cake pans.
  2. In a medium bowl, whisk together the flour, baking powder, and salt. In a large bowl, beat the egg yolks and sugar until thick and pale. Add milk, oil, and vanilla extract, mixing well. Gradually add the flour mixture to the egg mixture until just combined.
  3. In a separate bowl, beat the egg whites until stiff peaks form. Gently fold the egg whites into the cake batter until no streaks remain.
  4. Divide the batter evenly between the prepared pans and bake for 20-25 minutes, or until a toothpick inserted into the center comes out clean. Let the cakes cool in the pans for 10 minutes, then transfer to a wire rack to cool completely.
  5. In a large bowl, beat the heavy cream until stiff peaks form. In another bowl, mix mascarpone cheese, sugar, and vanilla extract until smooth. Gently fold the whipped cream into the mascarpone mixture.
  6. Place one cake layer on a serving plate. Brush with half of the espresso and coffee liqueur mixture. Spread half of the mascarpone filling over the cake layer. Arrange 12 ladyfingers on top, then spread another layer of mascarpone filling.
  7. Place the second cake layer on top and brush with the remaining espresso mixture. Spread the remaining mascarpone filling over the top and sides of the cake. Dust with cocoa powder and garnish with dark chocolate shavings if desired. Chill for at least 4 hours or overnight.

Pro Tips

  1. Use Fresh Espresso: Freshly brewed espresso enhances the flavor.
  2. Room Temperature Ingredients: Ensure all ingredients are at room temperature for smooth blending.
  3. Don't Overmix: Fold ingredients gently to maintain airiness.
  4. Chill Overnight: Chilling overnight allows flavors to meld.
  5. Use High-Quality Mascarpone: For the best taste and texture.
  6. Stiff Peaks for Cream: Ensure the heavy cream reaches stiff peaks.
  7. Brush Evenly: Evenly brush espresso mixture for consistent flavor.
  8. Dust Just Before Serving: Dust cocoa powder just before serving for the best appearance.
  9. Sharp Knife: Use a sharp knife for clean slices.
  10. Decorate with Chocolate Shavings: For an extra touch of elegance.

Serving Options

  1. With Coffee: Serve with a cup of strong coffee.
  2. With Fresh Berries: Garnish with fresh raspberries or strawberries.
  3. With Mint Leaves: Add a sprig of mint for a fresh touch.
  4. With Whipped Cream: A dollop of whipped cream on the side.
  5. With Chocolate Sauce: Drizzle with warm chocolate sauce.
  6. With Amaretto: Serve with a glass of Amaretto liqueur.
  7. With Vanilla Ice Cream: A scoop of vanilla ice cream on the side.
  8. With Caramel Drizzle: Drizzle with caramel sauce.
  9. With Pistachios: Sprinkle chopped pistachios for a crunch.
  10. With Lemon Zest: A hint of lemon zest for freshness.

Variations and Customization Options

  1. Berry Tiramisu: Add a layer of fresh berries.
  2. Chocolate Tiramisu: Use chocolate ladyfingers and add cocoa to the filling.
  3. Nutty Tiramisu: Sprinkle chopped nuts between layers.
  4. Caramel Tiramisu: Drizzle caramel sauce between layers.
  5. Lemon Tiramisu: Add lemon zest and juice to the filling.
  6. Pumpkin Tiramisu: Add pumpkin puree and spices to the filling.
  7. Berry Compote: Serve with a berry compote on the side.
  8. Coconut Tiramisu: Add coconut extract and shredded coconut.
  9. Mint Tiramisu: Add mint extract and fresh mint leaves.
  10. Spiced Tiramisu: Add cinnamon and nutmeg to the filling.


This homemade Tiramisu Cake is a delightful and indulgent dessert that combines rich flavors and creamy textures. Perfect for special occasions or simply to satisfy your sweet tooth, this recipe is sure to impress. Enjoy creating and sharing this classic Italian treat with your loved ones!


Sunday, 12 May 2024

Moist Upside-Down Peach Cake

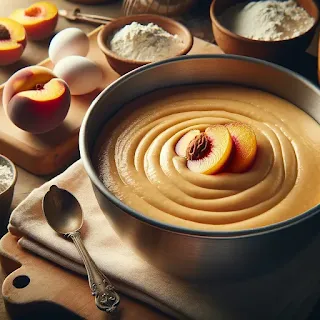
Welcome back to Sam's Baking Blog! Today, we're baking a summer favorite with a twist — a Moist Upside-Down Peach Cake. This cake combines juicy peaches with a moist, buttery sponge, making it a perfect dessert for warm evenings or a cozy treat with afternoon tea.

Origin Story: Upside-Down Peach Cake

Upside-down cakes are a delightful dessert with a unique presentation, and the Upside-Down Peach Cake is no exception. This cake combines the sweetness of ripe peaches with a buttery cake batter, creating a beautiful and delicious treat that’s perfect for any occasion.

Historical Roots

The concept of upside-down cakes dates back to medieval times when people cooked cakes in cast-iron skillets over an open fire. Fruit and sugar were placed at the bottom of the skillet, and the batter was poured on top. When the cake was done, it was flipped over, revealing a caramelized fruit topping.

The upside-down cake became particularly popular in America during the early 20th century, especially with the introduction of canned pineapple. The pineapple upside-down cake, featuring pineapple rings, maraschino cherries, and a brown sugar glaze, became an iconic dessert. The idea of using other fruits, such as peaches, naturally followed, allowing for seasonal variations and new flavor combinations.

Cultural Significance

Upside-down cakes hold a special place in American dessert culture, often associated with home baking and family gatherings. Their easy preparation and striking appearance make them a favorite for potlucks, picnics, and festive occasions. The use of fresh, seasonal fruits like peaches adds a touch of summer to the dessert, making it a popular choice during the warmer months.

Peaches themselves have a rich history in American agriculture, particularly in the southern states, where they are celebrated for their juicy sweetness. Incorporating peaches into an upside-down cake highlights the fruit’s natural flavors and creates a dessert that is both visually appealing and delicious.

Personal Connection

My first experience with upside-down peach cake was at a summer barbecue hosted by a close family friend. The cake was served warm, with a scoop of vanilla ice cream melting over the caramelized peach topping. The combination of flavors and textures was unforgettable, and I was inspired to recreate the dessert in my own kitchen.

Using fresh peaches from a local farmer’s market, I experimented with different recipes until I found the perfect balance of sweetness and texture. The key was to caramelize the peaches just enough to enhance their natural sweetness without making them too soft. A hint of cinnamon and nutmeg added warmth to the flavor, complementing the peaches beautifully.

Recipe Evolution

Creating the perfect Upside-Down Peach Cake involves several steps. First, the peaches are sliced and arranged in a skillet or baking pan with a mixture of melted butter and brown sugar. This creates the caramelized topping that will crown the cake when it is flipped over. The cake batter, often flavored with vanilla and spices, is then poured over the peaches and baked until golden and fragrant.

The choice of peaches is crucial for the best results. Fresh, ripe peaches are ideal, but canned or frozen peaches can also be used when fresh ones are not in season. Adjusting the amount of sugar in the caramel and the cake batter can help balance the sweetness, depending on the ripeness of the fruit.

Sharing the Tradition

Today, Upside-Down Peach Cake is a favorite in my family, particularly during the summer when peaches are at their peak. It’s the dessert I bring to gatherings and potlucks, always greeted with smiles and requests for the recipe. Each bite is a reminder of warm summer days and the joy of sharing good food with loved ones.

Ingredients:

✅For the Topping:

4 tablespoons unsalted butter
1/2 cup brown sugar
4-5 fresh peaches, sliced (or canned peaches, drained)

✅For the Cake:

1 1/2 cups all-purpose flour
1 teaspoon baking powder
1/4 teaspoon salt
1/2 cup unsalted butter, softened
1 cup granulated sugar
2 large eggs
1 teaspoon vanilla extract
1/2 cup milk

Prep Time: 20 minutes
Cook Time: 35-40 minutes
Yield: 1 (9-inch) cake

Instructions:

🍥Prepare the Topping:

  1. Preheat the oven to 350°F (175°C).
  2. Melt butter in a 9-inch round baking pan in the oven. Remove and sprinkle brown sugar evenly over the melted butter. 
  3. Arrange peach slices in a circular pattern over the brown sugar. Set aside.

🍥Make the Cake Batter:

  1. In a medium bowl, sift together flour, baking powder, and salt. Set aside.
  2. In a large bowl, cream the softened butter and granulated sugar until light and fluffy. 
  3. Beat in the eggs one at a time, then stir in the vanilla extract.
  4. Gradually mix in the dry ingredients, alternating with the milk, beginning and ending with the flour mixture. Mix until just combined.

🍥Assemble and Bake:

  1. Carefully pour the cake batter over the peach layer in the pan, spreading evenly.
  2. Bake in the preheated oven for 35-40 minutes, or until a toothpick inserted into the center comes out clean.
  3. Let the cake cool in the pan for about 10 minutes, then invert onto a serving plate to reveal the peach topping.

Pro Tips:

  • Ensure the peaches are not too ripe, which can make them mushy during baking.
  • Allow the cake to cool slightly before inverting to prevent it from breaking apart.

Secret Tips:

Add a pinch of cinnamon or nutmeg to the brown sugar topping for a warm, spicy note.

Serving Options:

Serve warm with a scoop of vanilla ice cream or a dollop of whipped cream.

This Moist Upside-Down Peach Cake is a delightful treat that brings the flavors of summer into your home. It's simple to make but impressive enough for special occasions. The caramelized peaches on top add a beautiful finish that's as delicious as it looks. Enjoy this sweet end to any meal!

Happy Baking!
Sam

Wednesday, 20 March 2024

Heavenly Light Tea-Time Cake

Welcome back to Sam's Baking Blog! Today, we're going to whip up a classic favorite - an Easy Fluffy Tea Cake. This cake is perfect for pairing with your afternoon tea or coffee, and its light, airy texture is sure to impress your guests.

Origin Story: Light Tea-Time Cake

A Light Tea-Time Cake is the epitome of simplicity and elegance, perfect for enjoying with a cup of tea in the afternoon. This cake is known for its delicate crumb, subtle flavors, and the ability to be paired with a variety of toppings or enjoyed plain. The concept of tea-time cakes has a rich history, deeply rooted in British culinary traditions.

Historical Roots

The tradition of afternoon tea began in Britain in the early 19th century, credited to Anna, the Duchess of Bedford. She found herself hungry in the long stretch between lunch and dinner and began inviting friends to join her for an afternoon snack of tea and light refreshments. This practice quickly became a social event, and soon, the idea of afternoon tea was embraced by the upper echelons of society and eventually by the middle class.

Light tea-time cakes were a staple at these gatherings, chosen for their simplicity and elegance. These cakes were designed to be light and not overly sweet, making them a perfect accompaniment to the robust flavors of tea. Classic examples include sponge cakes, Madeira cakes, and Victoria sponge cakes, all known for their light and airy textures.

Cultural Significance

Tea-time cakes hold a special place in British culture, symbolizing refinement and tradition. They are often associated with the leisurely practice of afternoon tea, a time to relax, socialize, and enjoy light refreshments. The tradition of afternoon tea has spread globally, and with it, the popularity of tea-time cakes.

The versatility of tea-time cakes also adds to their charm. They can be flavored with citrus, vanilla, or almond, and paired with fresh fruit, whipped cream, or a simple dusting of powdered sugar. This adaptability allows them to fit seamlessly into various cultural traditions and personal preferences.

Personal Connection

My interest in light tea-time cakes began during a visit to a quaint tea room in the English countryside. The experience of enjoying a slice of delicate cake with a perfectly brewed cup of tea was unforgettable. Inspired by this, I decided to recreate the experience at home.

After experimenting with different recipes, I found that the key to a perfect light tea-time cake is in the balance of ingredients and the method of mixing. Whipping the eggs and sugar to a light, fluffy consistency before gently folding in the flour and other ingredients helps achieve a delicate crumb. Adding a touch of citrus zest or a splash of vanilla enhances the flavor without overpowering the simplicity of the cake.

Recipe Evolution

Creating the perfect Light Tea-Time Cake involves a few key steps. The ingredients should be at room temperature to ensure they blend smoothly. Whipping the eggs and sugar until they are pale and fluffy helps incorporate air, which contributes to the cake's light texture. Folding in the flour gently prevents the batter from deflating, ensuring a tender crumb.

The cake can be baked in a variety of pans, from loaf tins to round cake pans, and can be finished with a simple glaze, a dusting of powdered sugar, or served with fresh berries and cream. The simplicity of the cake allows it to be a versatile base for various toppings and accompaniments.

Sharing the Tradition

Today, Light Tea-Time Cake is a favorite in my household, especially when hosting afternoon tea or casual gatherings. It is the cake I bake when I want to offer something light yet satisfying, perfect for enjoying with a hot cup of tea. Each slice is a reminder of the timeless tradition of afternoon tea and the joy of sharing simple, elegant treats with friends and family.

Ingredients:

1/2 cup unsalted butter, softened
1 cup granulated sugar
2 large eggs
1 teaspoon vanilla extract
1 1/2 cups all-purpose flour
1 1/2 teaspoons baking powder
1/4 teaspoon salt
1/2 cup milk

Prep Time: 15 minutes
Cook Time: 25-30 minutes
Yield: 1 (8-inch) cake

Instructions:

  1. Preheat the oven to 350°F (175°C). Grease and flour an 8-inch round cake pan.
  2. In a large bowl, cream together the butter and sugar until light and fluffy. Add the eggs one at a time, beating well after each addition. Stir in the vanilla extract.
  3. In a separate bowl, whisk together the flour, baking powder, and salt. Gradually add the dry ingredients to the wet ingredients, alternating with the milk, starting and ending with the dry ingredients. Mix until just combined.

  4. Pour the batter into the prepared cake pan and smooth the top. Bake for 25-30 minutes, or until a toothpick inserted into the center comes out clean.
  5. Let the cake cool in the pan for 10 minutes, then transfer to a wire rack to cool completely.

Pro Tips:

  • Ensure your butter is at room temperature for easier creaming.
  • Do not overmix the batter to maintain the cake's fluffy texture.

Secret Tips:

Add a tablespoon of lemon zest or orange zest to the batter for a citrusy twist.

Serving Options:

Dust with powdered sugar or serve with a dollop of whipped cream and fresh berries.

Health Benefits:

Opt for whole wheat flour for a healthier version with more fiber.

Variations & Customization Options:

  • Fold in 1/2 cup of blueberries or raspberries into the batter for a fruity variation.
  • Add a teaspoon of almond extract instead of vanilla for a nutty flavor.

This Easy Fluffy Tea Cake is a versatile and delightful treat that's perfect for any occasion. Whether you're hosting a tea party or just craving something sweet, this cake is sure to satisfy. 

Happy baking!
Sam

Wednesday, 31 January 2024

Irresistible Lemon Poppy Seed Cake Recipe

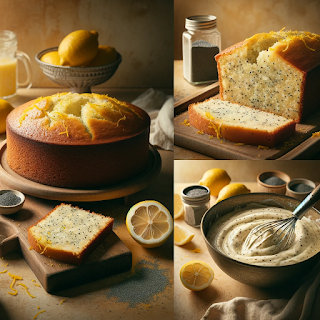
Prepare to be delighted by the zesty and enchanting flavors of our Lemon Poppy Seed Cake! This homemade treat is a burst of sunshine on your taste buds, combining the tangy goodness of lemons with the delightful crunch of poppy seeds. Every bite is a journey into citrusy bliss, making it the perfect dessert for any occasion.

Origin Story: Lemon Poppy Seed Cake

The Lemon Poppy Seed Cake is a timeless dessert that balances the bright, zesty flavor of lemons with the subtle crunch of poppy seeds. This cake has a rich history that spans continents and centuries, making it a beloved treat in many cultures.

Historical Roots

The history of poppy seeds dates back to ancient civilizations. They were cultivated by the Sumerians as early as 3400 BC and were widely used in the cuisines of the ancient Egyptians, Greeks, and Romans. Poppy seeds were valued not only for their flavor but also for their supposed medicinal properties.

Lemons, on the other hand, are believed to have originated in Northeast India or China and were brought to Europe by Arab traders in the Middle Ages. The combination of lemon and poppy seeds in baking likely began in Europe, where both ingredients were popular. The bright citrus flavor of lemons provided a perfect contrast to the nutty taste of poppy seeds, creating a delightful and refreshing dessert.

Cultural Significance

Lemon poppy seed cakes and breads have become staples in many countries. In Europe, particularly in Germany and Austria, poppy seeds are a common ingredient in pastries and cakes. In the United States, lemon poppy seed cakes gained popularity in the mid-20th century, often enjoyed as a breakfast treat or a light dessert.

The cake’s appeal lies in its versatility and the simple yet sophisticated flavor combination. It’s a favorite for afternoon tea, brunches, and festive occasions. The addition of a lemon glaze or cream cheese frosting can elevate it from a humble cake to an elegant dessert.

Personal Connection

My journey with lemon poppy seed cake began during a summer vacation in a quaint village in the south of France. The local bakery was renowned for its lemon poppy seed cake, and one bite was enough to make me fall in love with it. The cake was moist and tender, bursting with the fresh flavor of lemons and the delightful texture of poppy seeds.

Inspired by this experience, I set out to recreate the cake in my own kitchen. The key was to find the perfect balance of tartness from the lemons and the right amount of poppy seeds to add texture without overpowering the cake. I experimented with different types of lemon juice and zest, as well as various ratios of poppy seeds, until I achieved a recipe that captured the essence of that unforgettable cake.

Recipe Evolution

Creating the perfect lemon poppy seed cake involved several tweaks and refinements. I discovered that using both lemon juice and zest in the batter added a more intense lemon flavor. Incorporating yogurt or sour cream into the batter helped keep the cake moist and tender. For an extra burst of flavor, I sometimes add a lemon syrup that soaks into the warm cake, enhancing its citrusy goodness.

To finish the cake, I often drizzle a simple lemon glaze over the top. The glaze adds a touch of sweetness and a beautiful shine, making the cake as visually appealing as it is delicious. For special occasions, I might top it with a cream cheese frosting, which pairs wonderfully with the tangy lemon flavor.

Sharing the Tradition

Today, my lemon poppy seed cake is a favorite among friends and family. It’s the cake I bake for spring and summer gatherings, and it never fails to bring smiles and compliments. Each slice is a reminder of that summer in France and the joy of discovering new flavors.

Ingredients
:

✅For the Cake:

2 cups all-purpose flour
2 tablespoons poppy seeds
1 1/2 teaspoons baking powder
1/2 teaspoon baking soda
1/2 teaspoon salt
1 cup (2 sticks) unsalted butter, softened
1 1/2 cups granulated sugar
3 large eggs
Zest of 2 lemons
1/4 cup fresh lemon juice
1 teaspoon pure vanilla extract
1 cup sour cream

✅For the Lemon Glaze:

1 cup powdered sugar
2-3 tablespoons fresh lemon juice
Zest of 1 lemon

Preparation Time: 15 minutes
Baking Time: 50-60 minutes
Yield: This recipe yields one delicious Lemon Poppy Seed Cake.

Instructions:

  1. Preheat your oven to 350°F (175°C). Grease and flour a 9x5-inch loaf pan.
  2. In a mixing bowl, whisk together the all-purpose flour, poppy seeds, baking powder, baking soda, and salt. Set aside.
  3. In a separate bowl, cream together the softened unsalted butter and granulated sugar until light and fluffy.
  4. Beat in the eggs one at a time, ensuring each is fully incorporated.
  5. Add the lemon zest, fresh lemon juice, and pure vanilla extract to the butter mixture. Mix until well combined.
  6. Gradually add the dry mixture to the wet mixture, alternating with the sour cream. Begin and end with the dry mixture. Mix until just combined.
  7. Pour the batter into the prepared loaf pan and spread it evenly.
  8. Bake in the preheated oven for 50-60 minutes or until a toothpick inserted into the center comes out clean.
  9. While the cake is baking, prepare the lemon glaze. In a small bowl, whisk together the powdered sugar, fresh lemon juice, and lemon zest until smooth.
  10. Once the cake is done, remove it from the oven and let it cool in the pan for about 10 minutes. Then, transfer it to a wire rack.
  11. While the cake is still warm, drizzle the lemon glaze over the top. Allow the glaze to set before slicing and serving.

Pro Tips

  1. Fresh Lemons: Use fresh lemons for the best flavor. Their zest and juice infuse the cake with bright citrus notes.
  2. Room Temperature Ingredients: Ensure your butter, eggs, and sour cream are at room temperature for smoother blending.
  3. Poppy Seed Freshness: Check the expiration date on your poppy seeds to ensure they are fresh and flavorful.

Secret Tips

  1. Zest Technique: When zesting lemons, use a fine grater or zester, being careful not to include the bitter white pith.
  2. Even Glazing: For a beautiful glaze, drizzle it over the cake while it's still warm. The warmth helps the glaze soak in and create a lovely finish.


"Indulge in the irresistible allure of our Lemon Poppy Seed Cake, where every slice is a burst of lemony delight. Whether you're enjoying it with a cup of tea, sharing it with loved ones, or savoring it all on your own, this cake is a treat that brightens your day and leaves you craving for more."

Enjoy creating and savoring this mouthwatering Lemon Poppy Seed Cake recipe!
Sam Salih