Turning Your Wishes into Sweet Realities, One Homemade Treat at a Time. 🌟
Showing posts with label Homemade Baking. Show all posts

Friday, 20 December 2024

Whimsical Waffles: The Ultimate Simple Recipe

Who doesn’t love waffles? πŸ§‡ These fluffy, golden beauties are the ultimate breakfast (or brunch!) treat. Whether you’re stacking them sky-high with toppings or enjoying them plain with a pat of butter, waffles bring joy to every bite! ❤️ Let’s whip up a batch of crispy-on-the-outside, soft-on-the-inside waffles that are as fun to make as they are to eat. πŸŽ‰

Origin Story: Whimsical Waffles

Waffles aren’t just food—they’re nostalgia, happiness, and a little bit of breakfast magic. These golden, grid-patterned delights have traveled through history, gathering stories and flavors from around the globe, and now they’re here to transform your mornings. But how did they become the whimsical wonders we know and love today? Let’s dive into the delicious origin of these fluffy favorites.

A Waffle-Worthy Beginning

The story of waffles dates back over 1,000 years to medieval Europe, where they began as simple flat cakes made from grain flour and water. Cooked between two metal plates over an open flame, these early waffles were plain and utilitarian—more about sustenance than indulgence. But as time passed and culinary ingenuity grew, waffles became a canvas for creativity.

By the Renaissance, waffles had evolved into delicate confections flavored with honey, spices, and sometimes wine. They were no longer just food; they were an experience. Bakers designed intricate patterns into their waffle irons, turning each creation into edible art. These waffles graced royal feasts and street markets alike, becoming a favorite treat across Europe.

When waffles crossed the Atlantic with European settlers, they found a new home in America. Here, they gained popularity as a breakfast staple, celebrated for their versatility and crowd-pleasing appeal. Whether served at church socials, county fairs, or family brunches, waffles became a symbol of community and joy.

The Whimsical Twist

So where does the "whimsical" part come in? It’s said that the inspiration for these particular waffles came from a baker who wanted to create a recipe that was both foolproof and fun—a blank canvas for morning creativity. The baker imagined waffles as more than just a meal. They wanted them to be an event, a celebration of the start of the day.

Drawing from the heritage of classic waffles, they simplified the recipe to its essentials: flour for structure, baking powder for fluffiness, and melted butter for that irresistible crisp edge. But they didn’t stop there. They added a splash of vanilla for a touch of sweetness and encouraged everyone to personalize their waffles with toppings as whimsical as their imaginations.

The Magic of Waffles Today

The beauty of Whimsical Waffles lies in their endless possibilities. They’re the chameleons of the breakfast world, effortlessly adapting to whatever mood or craving strikes. Feeling indulgent? Pile them high with whipped cream and chocolate chips. Craving comfort? Go classic with butter and maple syrup. Need a savory twist? Add a fried egg and crispy bacon on top.

And let’s not forget their versatility. These waffles aren’t just for breakfast—they can be transformed into desserts, snacks, or even savory sandwiches. The magic is in their adaptability, making them perfect for every occasion.

Personal Connection

For me, waffles are a family tradition. Some of my favorite memories involve gathering around the waffle iron on weekend mornings, each of us customizing our waffles with different toppings. The sound of the batter sizzling, the smell of vanilla and butter wafting through the kitchen, and the sight of a perfectly golden waffle emerging from the iron—it’s pure joy.

When I created the Whimsical Waffles recipe, I wanted to capture that feeling of togetherness and creativity. This recipe is designed to be simple enough for a busy weekday morning but special enough to serve at a weekend brunch with friends. It’s all about making every bite feel like a little celebration.

A Breakfast Tradition Reimagined

Whimsical Waffles are more than a meal—they’re a moment. Whether you’re laughing with loved ones over a towering stack or enjoying a quiet morning with a single perfect waffle, this recipe brings a little bit of magic to your day.

Ingredients
πŸ›’

  • 2 cups all-purpose flour 🌾
  • 1 tablespoon sugar 🍬
  • 1 tablespoon baking powder 🌟
  • 1/2 teaspoon salt πŸ§‚
  • 2 large eggs πŸ₯šπŸ₯š
  • 1 3/4 cups milk πŸ₯›
  • 1/2 cup unsalted butter, melted 🧈
  • 1 teaspoon vanilla extract 🍦

Recipe Details πŸ“

  • Prep Time: 5 mins
  • Cook Time: 10 mins
  • Yield: 4-5 waffles

Instructions

  1. Get Set, Waffle! πŸ§‡
    Preheat your waffle iron to your preferred setting – crispy or soft, your choice! πŸŽ›️

  2. Mix the Magic
    In a large bowl, whisk together the flour, sugar, baking powder, and salt. In another bowl, beat the eggs and combine with milk, melted butter, and vanilla extract.

  3. Combine & Whisk πŸ’«
    Slowly pour the wet ingredients into the dry, stirring just until combined. A few lumps are okay – don’t overmix!

  4. Pour & Cook 🍳
    Pour the batter into the preheated waffle iron (carefully, don’t overfill!). Cook until golden brown and crisp. Your kitchen will smell AMAZING. 🌟

  5. Stack & Serve πŸ”️
    Serve warm with your favorite toppings and enjoy the waffle magic! ✨

Pro Tips πŸŽ“

  • Crispy Waffles: Add a tablespoon of cornstarch to the batter for extra crispiness.
  • Buttermilk Swap: Use buttermilk instead of regular milk for a richer flavor. πŸ₯›
  • Freeze-Friendly: Make extra and freeze for quick breakfasts – just pop in the toaster! 🧊

Topping Ideas πŸ“πŸ«

  • Classic: Butter & maple syrup 🍁
  • Decadent: Whipped cream & chocolate chips 🍫
  • Healthy: Fresh fruit & Greek yogurt πŸ“
  • Savory: Fried egg & crispy bacon πŸ₯“

Waffles are the perfect canvas for creativity! πŸ§‡ Whether you keep it simple or load up the toppings, these Whimsical Waffles will bring a smile to your morning. So, dust off your waffle iron and make some breakfast magic today. 🍽️✨

Sunday, 12 May 2024

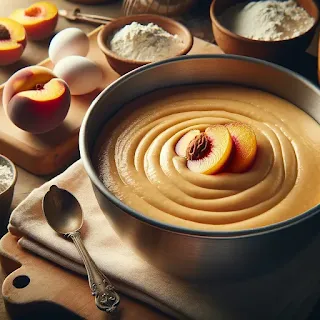
Moist Upside-Down Peach Cake

Welcome back to Sam's Baking Blog! Today, we're baking a summer favorite with a twist — a Moist Upside-Down Peach Cake. This cake combines juicy peaches with a moist, buttery sponge, making it a perfect dessert for warm evenings or a cozy treat with afternoon tea.

Origin Story: Upside-Down Peach Cake

Upside-down cakes are a delightful dessert with a unique presentation, and the Upside-Down Peach Cake is no exception. This cake combines the sweetness of ripe peaches with a buttery cake batter, creating a beautiful and delicious treat that’s perfect for any occasion.

Historical Roots

The concept of upside-down cakes dates back to medieval times when people cooked cakes in cast-iron skillets over an open fire. Fruit and sugar were placed at the bottom of the skillet, and the batter was poured on top. When the cake was done, it was flipped over, revealing a caramelized fruit topping.

The upside-down cake became particularly popular in America during the early 20th century, especially with the introduction of canned pineapple. The pineapple upside-down cake, featuring pineapple rings, maraschino cherries, and a brown sugar glaze, became an iconic dessert. The idea of using other fruits, such as peaches, naturally followed, allowing for seasonal variations and new flavor combinations.

Cultural Significance

Upside-down cakes hold a special place in American dessert culture, often associated with home baking and family gatherings. Their easy preparation and striking appearance make them a favorite for potlucks, picnics, and festive occasions. The use of fresh, seasonal fruits like peaches adds a touch of summer to the dessert, making it a popular choice during the warmer months.

Peaches themselves have a rich history in American agriculture, particularly in the southern states, where they are celebrated for their juicy sweetness. Incorporating peaches into an upside-down cake highlights the fruit’s natural flavors and creates a dessert that is both visually appealing and delicious.

Personal Connection

My first experience with upside-down peach cake was at a summer barbecue hosted by a close family friend. The cake was served warm, with a scoop of vanilla ice cream melting over the caramelized peach topping. The combination of flavors and textures was unforgettable, and I was inspired to recreate the dessert in my own kitchen.

Using fresh peaches from a local farmer’s market, I experimented with different recipes until I found the perfect balance of sweetness and texture. The key was to caramelize the peaches just enough to enhance their natural sweetness without making them too soft. A hint of cinnamon and nutmeg added warmth to the flavor, complementing the peaches beautifully.

Recipe Evolution

Creating the perfect Upside-Down Peach Cake involves several steps. First, the peaches are sliced and arranged in a skillet or baking pan with a mixture of melted butter and brown sugar. This creates the caramelized topping that will crown the cake when it is flipped over. The cake batter, often flavored with vanilla and spices, is then poured over the peaches and baked until golden and fragrant.

The choice of peaches is crucial for the best results. Fresh, ripe peaches are ideal, but canned or frozen peaches can also be used when fresh ones are not in season. Adjusting the amount of sugar in the caramel and the cake batter can help balance the sweetness, depending on the ripeness of the fruit.

Sharing the Tradition

Today, Upside-Down Peach Cake is a favorite in my family, particularly during the summer when peaches are at their peak. It’s the dessert I bring to gatherings and potlucks, always greeted with smiles and requests for the recipe. Each bite is a reminder of warm summer days and the joy of sharing good food with loved ones.

Ingredients:

✅For the Topping:

4 tablespoons unsalted butter
1/2 cup brown sugar
4-5 fresh peaches, sliced (or canned peaches, drained)

✅For the Cake:

1 1/2 cups all-purpose flour
1 teaspoon baking powder
1/4 teaspoon salt
1/2 cup unsalted butter, softened
1 cup granulated sugar
2 large eggs
1 teaspoon vanilla extract
1/2 cup milk

Prep Time: 20 minutes
Cook Time: 35-40 minutes
Yield: 1 (9-inch) cake

Instructions:

πŸ₯Prepare the Topping:

  1. Preheat the oven to 350°F (175°C).
  2. Melt butter in a 9-inch round baking pan in the oven. Remove and sprinkle brown sugar evenly over the melted butter. 
  3. Arrange peach slices in a circular pattern over the brown sugar. Set aside.

πŸ₯Make the Cake Batter:

  1. In a medium bowl, sift together flour, baking powder, and salt. Set aside.
  2. In a large bowl, cream the softened butter and granulated sugar until light and fluffy. 
  3. Beat in the eggs one at a time, then stir in the vanilla extract.
  4. Gradually mix in the dry ingredients, alternating with the milk, beginning and ending with the flour mixture. Mix until just combined.

πŸ₯Assemble and Bake:

  1. Carefully pour the cake batter over the peach layer in the pan, spreading evenly.
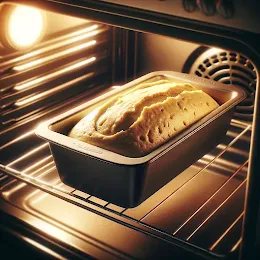
  2. Bake in the preheated oven for 35-40 minutes, or until a toothpick inserted into the center comes out clean.
  3. Let the cake cool in the pan for about 10 minutes, then invert onto a serving plate to reveal the peach topping.

Pro Tips:

  • Ensure the peaches are not too ripe, which can make them mushy during baking.
  • Allow the cake to cool slightly before inverting to prevent it from breaking apart.

Secret Tips:

Add a pinch of cinnamon or nutmeg to the brown sugar topping for a warm, spicy note.

Serving Options:

Serve warm with a scoop of vanilla ice cream or a dollop of whipped cream.

This Moist Upside-Down Peach Cake is a delightful treat that brings the flavors of summer into your home. It's simple to make but impressive enough for special occasions. The caramelized peaches on top add a beautiful finish that's as delicious as it looks. Enjoy this sweet end to any meal!

Happy Baking!
Sam

Saturday, 23 March 2024

Twisted Temptation Marble Cake

Welcome back to Sam's Baking Blog! Today, we're diving into the world of classic bakes with a Simple Marble Cake. This cake combines the best of both worlds with its beautiful swirls of vanilla and chocolate, making it a treat for both the eyes and the taste buds.

Origin Story: Marble Cake

Marble cake is a dessert that captivates both the eyes and the palate with its beautiful swirls of chocolate and vanilla. This cake has a storied history that reflects the blending of culinary traditions across continents and centuries.

Historical Roots

The concept of marble cake is believed to have originated in Germany in the 19th century, where it was known as "Marmor Kuchen." The cake was named for its resemblance to marble stone, created by swirling light and dark batters together. This technique was brought to America by German immigrants, where it quickly became popular.

In the United States, marble cake evolved into a beloved classic, often featured in cookbooks from the 1800s. The American version typically used chocolate and vanilla batters, creating a harmonious blend of flavors that appealed to a wide audience. The visual appeal of the marbled effect, combined with the delicious taste, made it a staple for celebrations and gatherings.

Cultural Significance

Marble cake holds a special place in various cultures due to its aesthetic and taste. In Germany, it is traditionally enjoyed with afternoon coffee, embodying the cozy, convivial spirit of "Kaffee und Kuchen" (coffee and cake). In America, marble cake became a popular choice for birthdays, holidays, and other special occasions, symbolizing a blend of classic flavors and family traditions.

The cake's versatility allows for numerous variations. Some recipes incorporate spices like cinnamon or nutmeg, while others use different types of chocolate or flavorings to create unique twists on the classic marble cake.

Personal Connection

My fascination with marble cake began during a trip to a small bakery in a picturesque German village. The baker explained the history of the cake and demonstrated how to create the perfect marble effect by carefully swirling the batters. Watching the transformation from simple ingredients to a beautiful, marbled cake was mesmerizing and inspired me to recreate it at home.

Determined to perfect my own version, I experimented with different recipes and techniques. I found that using high-quality cocoa powder and real vanilla extract made a significant difference in both the taste and appearance of the cake. The challenge was to achieve a balanced swirl, ensuring that each slice had an enticing mix of chocolate and vanilla.

Recipe Evolution

Creating the perfect marble cake involves a few key steps. The batters for the chocolate and vanilla layers should be mixed separately to ensure distinct flavors. The chocolate batter is typically enhanced with cocoa powder and sometimes melted chocolate, while the vanilla batter is flavored with vanilla extract.

To create the marble effect, spoonfuls of each batter are alternately placed in the baking pan. A knife or skewer is then used to gently swirl the batters together, creating the signature marbled pattern. Care must be taken not to overmix, as this can cause the batters to blend too much and lose the distinct marbling.

Baking the cake at a moderate temperature ensures it cooks evenly and develops a beautiful golden crust. The result is a cake that is both visually stunning and delicious, with a perfect balance of chocolate and vanilla flavors.

Sharing the Tradition

Today, marble cake remains a favorite in my home. It is the cake I bake when I want to share a taste of nostalgia and creativity with friends and family. Each slice is a reminder of the rich history and the joy of creating something beautiful and delicious.

Ingredients:

1/2 cup unsalted butter, softened
1 cup granulated sugar
3 large eggs
2 teaspoons vanilla extract
1 3/4 cups all-purpose flour
2 teaspoons baking powder
1/2 teaspoon salt
1/2 cup milk
2 tablespoons cocoa powder


Prep Time: 20 minutes
Cook Time: 35-40 minutes
Yield: 1 (9x5-inch) loaf

Instructions:

  1. Preheat the oven to 350°F (175°C). Grease and flour a 9x5-inch loaf pan.
  2. In a large bowl, cream together the butter and sugar until light and fluffy. Add the eggs one at a time, beating well after each addition. Stir in the vanilla extract.
  3. In a separate bowl, whisk together the flour, baking powder, and salt. Gradually add the dry ingredients to the wet ingredients, alternating with the milk, starting and ending with the dry ingredients. Mix until just combined.
  4. Divide the batter in half. Stir the cocoa powder into one half of the batter.
  5. Spoon the vanilla and chocolate batters alternately into the prepared pan. Use a knife to swirl the batters together gently.
  6. Bake for 35-40 minutes, or until a toothpick inserted into the center comes out clean.
  7. Let the cake cool in the pan for 10 minutes, then transfer to a wire rack to cool completely.

Pro Tips:

  • Ensure all ingredients are at room temperature for a smoother batter.
  • Don't overmix the batter to keep the cake tender.

Secret Tips:

Add a tablespoon of strong brewed coffee to the chocolate batter to enhance the chocolate flavor.

Serving Options:

Dust with powdered sugar or drizzle with a simple glaze for added sweetness.

Health Benefits:

For a healthier version, use whole wheat flour instead of all-purpose flour and reduce the sugar to 3/4 cup.

Variations & Customization Options:

  • For a festive twist, add a teaspoon of orange zest to the vanilla batter.
  • Mix in some chopped nuts or chocolate chips into the batter for added texture.

This Simple Marble Cake is a timeless classic that's perfect for any occasion. Whether you're enjoying a slice with your afternoon tea or serving it as a dessert at a gathering, it's sure to be a hit. 

Happy baking!

Sam

Wednesday, 20 March 2024

Heavenly Light Tea-Time Cake

Welcome back to Sam's Baking Blog! Today, we're going to whip up a classic favorite - an Easy Fluffy Tea Cake. This cake is perfect for pairing with your afternoon tea or coffee, and its light, airy texture is sure to impress your guests.

Origin Story: Light Tea-Time Cake

A Light Tea-Time Cake is the epitome of simplicity and elegance, perfect for enjoying with a cup of tea in the afternoon. This cake is known for its delicate crumb, subtle flavors, and the ability to be paired with a variety of toppings or enjoyed plain. The concept of tea-time cakes has a rich history, deeply rooted in British culinary traditions.

Historical Roots

The tradition of afternoon tea began in Britain in the early 19th century, credited to Anna, the Duchess of Bedford. She found herself hungry in the long stretch between lunch and dinner and began inviting friends to join her for an afternoon snack of tea and light refreshments. This practice quickly became a social event, and soon, the idea of afternoon tea was embraced by the upper echelons of society and eventually by the middle class.

Light tea-time cakes were a staple at these gatherings, chosen for their simplicity and elegance. These cakes were designed to be light and not overly sweet, making them a perfect accompaniment to the robust flavors of tea. Classic examples include sponge cakes, Madeira cakes, and Victoria sponge cakes, all known for their light and airy textures.

Cultural Significance

Tea-time cakes hold a special place in British culture, symbolizing refinement and tradition. They are often associated with the leisurely practice of afternoon tea, a time to relax, socialize, and enjoy light refreshments. The tradition of afternoon tea has spread globally, and with it, the popularity of tea-time cakes.

The versatility of tea-time cakes also adds to their charm. They can be flavored with citrus, vanilla, or almond, and paired with fresh fruit, whipped cream, or a simple dusting of powdered sugar. This adaptability allows them to fit seamlessly into various cultural traditions and personal preferences.

Personal Connection

My interest in light tea-time cakes began during a visit to a quaint tea room in the English countryside. The experience of enjoying a slice of delicate cake with a perfectly brewed cup of tea was unforgettable. Inspired by this, I decided to recreate the experience at home.

After experimenting with different recipes, I found that the key to a perfect light tea-time cake is in the balance of ingredients and the method of mixing. Whipping the eggs and sugar to a light, fluffy consistency before gently folding in the flour and other ingredients helps achieve a delicate crumb. Adding a touch of citrus zest or a splash of vanilla enhances the flavor without overpowering the simplicity of the cake.

Recipe Evolution

Creating the perfect Light Tea-Time Cake involves a few key steps. The ingredients should be at room temperature to ensure they blend smoothly. Whipping the eggs and sugar until they are pale and fluffy helps incorporate air, which contributes to the cake's light texture. Folding in the flour gently prevents the batter from deflating, ensuring a tender crumb.

The cake can be baked in a variety of pans, from loaf tins to round cake pans, and can be finished with a simple glaze, a dusting of powdered sugar, or served with fresh berries and cream. The simplicity of the cake allows it to be a versatile base for various toppings and accompaniments.

Sharing the Tradition

Today, Light Tea-Time Cake is a favorite in my household, especially when hosting afternoon tea or casual gatherings. It is the cake I bake when I want to offer something light yet satisfying, perfect for enjoying with a hot cup of tea. Each slice is a reminder of the timeless tradition of afternoon tea and the joy of sharing simple, elegant treats with friends and family.

Ingredients:

1/2 cup unsalted butter, softened
1 cup granulated sugar
2 large eggs
1 teaspoon vanilla extract
1 1/2 cups all-purpose flour
1 1/2 teaspoons baking powder
1/4 teaspoon salt
1/2 cup milk

Prep Time: 15 minutes
Cook Time: 25-30 minutes
Yield: 1 (8-inch) cake

Instructions:

  1. Preheat the oven to 350°F (175°C). Grease and flour an 8-inch round cake pan.
  2. In a large bowl, cream together the butter and sugar until light and fluffy. Add the eggs one at a time, beating well after each addition. Stir in the vanilla extract.
  3. In a separate bowl, whisk together the flour, baking powder, and salt. Gradually add the dry ingredients to the wet ingredients, alternating with the milk, starting and ending with the dry ingredients. Mix until just combined.

  4. Pour the batter into the prepared cake pan and smooth the top. Bake for 25-30 minutes, or until a toothpick inserted into the center comes out clean.
  5. Let the cake cool in the pan for 10 minutes, then transfer to a wire rack to cool completely.

Pro Tips:

  • Ensure your butter is at room temperature for easier creaming.
  • Do not overmix the batter to maintain the cake's fluffy texture.

Secret Tips:

Add a tablespoon of lemon zest or orange zest to the batter for a citrusy twist.

Serving Options:

Dust with powdered sugar or serve with a dollop of whipped cream and fresh berries.

Health Benefits:

Opt for whole wheat flour for a healthier version with more fiber.

Variations & Customization Options:

  • Fold in 1/2 cup of blueberries or raspberries into the batter for a fruity variation.
  • Add a teaspoon of almond extract instead of vanilla for a nutty flavor.

This Easy Fluffy Tea Cake is a versatile and delightful treat that's perfect for any occasion. Whether you're hosting a tea party or just craving something sweet, this cake is sure to satisfy. 

Happy baking!
Sam

Wednesday, 31 January 2024

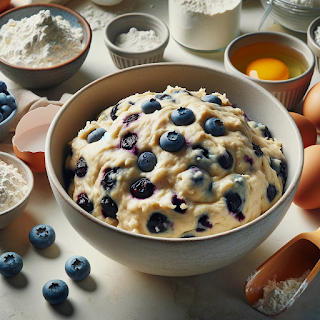
Homemade with Love: Blueberry Muffins Recipe

Embrace the warmth of your kitchen and the joy of sharing with our Homemade with Love Blueberry Muffins. These little delights are a testament to the simple pleasures of baking. With plump, juicy blueberries nestled in tender, buttery muffins, every bite is a hug for your taste buds. Whether enjoyed fresh out of the oven or saved for a delightful morning treat, our Blueberry Muffins are made with love.

Origin Story: Blueberry Muffins

Blueberry muffins are a classic breakfast staple, celebrated for their moist texture, sweet flavor, and burst of juicy blueberries in every bite. This beloved treat has a rich history that reflects the evolution of baking in America and the incorporation of native ingredients.

Historical Roots

Blueberries are native to North America, and indigenous peoples have been consuming them for thousands of years, both fresh and dried, for their nutritional benefits. European settlers quickly adopted blueberries into their diets, incorporating them into various dishes.

The muffin, as we know it today, originated in England but took on a new form in America. American muffins, also known as quick breads, became popular in the 19th century. Unlike their English counterparts, which are yeast-based and cooked on a griddle, American muffins are made with baking powder or soda and baked in an oven. This style of baking led to the creation of the blueberry muffin, a natural combination given the abundance of wild blueberries in New England.

Cultural Significance

Blueberry muffins hold a special place in American culture, particularly in New England where wild blueberries are plentiful. They are a common feature at breakfast tables, coffee shops, and bakeries across the country. Their popularity extends beyond the United States, as they are enjoyed worldwide for their delicious taste and simple preparation.

The use of blueberries, known for their antioxidants and health benefits, also contributes to the appeal of blueberry muffins as a relatively healthy treat. They are often associated with home baking, evoking a sense of nostalgia and comfort.

Personal Connection

My connection to blueberry muffins began with a summer trip to Maine, where wild blueberries grow in abundance. Picking fresh blueberries and baking them into muffins became a cherished activity. The fresh, sweet-tart flavor of wild blueberries made those muffins unforgettable and inspired me to create my own version at home.

Experimenting with different recipes, I found that using buttermilk added a slight tanginess that complemented the sweetness of the blueberries. Incorporating a streusel topping provided a delightful crunch, adding an extra layer of texture and flavor.

Recipe Evolution

Creating the perfect blueberry muffins involves a few key steps. Fresh or frozen blueberries can be used, but fresh is preferred when they are in season. Coating the blueberries in a bit of flour before folding them into the batter helps prevent them from sinking to the bottom.

The batter should be mixed gently to avoid overworking the flour, which can result in tough muffins. A combination of all-purpose flour and baking powder ensures a light and airy texture. Adding lemon zest or a touch of vanilla extract can enhance the flavor.

For a special touch, a streusel topping made from butter, sugar, and flour can be sprinkled on top before baking, creating a sweet, crunchy layer that contrasts beautifully with the soft muffins.

Sharing the Tradition

Today, blueberry muffins are a favorite in my household, especially during the summer when fresh blueberries are in season. They are the muffins I bake when I want to offer a taste of summer and a bit of comfort to friends and family. Each bite is a celebration of the simple pleasures of home baking and the deliciousness of fresh, seasonal ingredients.

Ingredients:

2 cups all-purpose flour
1 cup granulated sugar
1/2 cup unsalted butter, melted
2 large eggs
1 cup milk
1 1/2 cups fresh blueberries
1 1/2 teaspoons baking powder
1/2 teaspoon baking soda
1/2 teaspoon salt
1 teaspoon pure vanilla extract
Zest of 1 lemon (optional)

Preparation Time: 15 minutes
Baking Time: 18-20 minutes
Yield: This recipe yields approximately 12 delicious Blueberry Muffins.

Instructions:

  1. Preheat your oven to 375°F (190°C). Line a muffin tin with paper liners or grease the cups.
  2. In a mixing bowl, whisk together the all-purpose flour, baking powder, baking soda, and salt. If using, add the lemon zest for a citrusy twist.
  3. In another bowl, beat the melted unsalted butter and granulated sugar until well combined.
  4. Add the eggs one at a time, beating well after each addition. Stir in the pure vanilla extract.
  5. Gradually add the dry mixture to the wet mixture, alternating with the milk. Begin and end with the dry mixture. Mix until just combined.
  6. Gently fold in the fresh blueberries, being careful not to overmix.
  7. Spoon the muffin batter into the prepared muffin cups, filling each about two-thirds full.
  8. Bake in the preheated oven for 18-20 minutes or until the muffins are golden and a toothpick inserted into the center comes out clean.
  9. Allow the muffins to cool in the tin for a few minutes, then transfer them to a wire rack to cool completely.

Pro Tips

  • Room Temperature Ingredients: Ensure your eggs, milk, and butter are at room temperature for smoother blending.
  • Gentle Blueberry Folding: When adding blueberries, fold them into the batter gently to avoid smashing them and to distribute them evenly.

Secret Tips

Lemon Zest Enhancement: If you love a hint of citrus, add lemon zest for a refreshing twist to your muffins.


As you savor these Homemade Blueberry Muffins, may you feel the love and care that went into each one. Share them with loved ones, enjoy them as a snack, or make them part of your breakfast routine. Baking with love truly makes life sweeter."


Enjoy creating and savoring this heartwarming Blueberry Muffins recipe!
Sam 

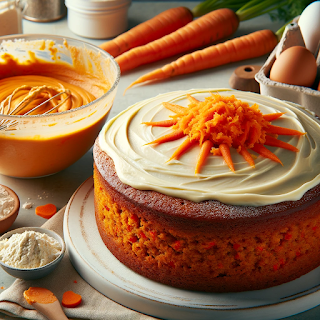
Love in Every Slice: Easy Bake Carrot Cake Recipe

Welcome to a slice of warmth and comfort, where sweet memories and delicious flavors intertwine. Our Easy Bake Carrot Cake recipe is a testament to the simple joys of baking and sharing love through food. This classic favorite brings together the wholesome goodness of carrots, the sweetness of cream cheese frosting, and the magic of homemade treats. Whether you're celebrating a special occasion or simply craving a slice of goodness, let's embark on a baking journey that fills your home with the aroma of happiness.

Origin Story: Carrot Cake Recipe

Carrot cake, with its rich, moist texture and warm spices, is a beloved dessert with a fascinating history. The story of carrot cake is a blend of necessity, innovation, and a touch of nostalgia, making it a classic treat that continues to delight generations.

Historical Roots

The roots of carrot cake can be traced back to the Middle Ages when sweeteners were scarce and expensive. Resourceful bakers used naturally sweet ingredients like carrots to sweeten their cakes and puddings. The use of carrots in desserts can be seen in medieval recipes for carrot puddings, which were precursors to the modern carrot cake.

Carrot cake as we know it today became popular in the 20th century, particularly during World War II when rationing made sugar a luxury. Carrots, rich in natural sugars, became a popular substitute. The recipe evolved over time, incorporating spices like cinnamon and nutmeg, as well as cream cheese frosting, which has become a signature element of the cake.

Personal Connection

My connection to carrot cake began in my grandmother's kitchen. She had a way of making everything from scratch, and her carrot cake was no exception. I remember grating the carrots by hand, the smell of spices filling the air, and the anticipation of tasting the creamy frosting that she made with real butter and cream cheese.

The process was a labor of love, with each step carefully followed. My grandmother's secret was toasting the nuts before adding them to the batter, which gave the cake a deeper, richer flavor. Her carrot cake was always the highlight of family gatherings, and the recipe was a closely guarded family secret.

Recipe Evolution

As I grew older and began to explore baking on my own, I experimented with my grandmother's recipe, adding my own touches while preserving its essence. I found that using freshly grated carrots and high-quality spices made a significant difference in the cake's flavor. I also played with different types of nuts and dried fruits, sometimes adding pineapple for extra moisture and sweetness.

One of the key elements I focused on was the cream cheese frosting. I wanted it to be smooth and tangy, complementing the sweetness of the cake without overpowering it. After numerous attempts, I found the perfect balance of cream cheese, butter, powdered sugar, and a hint of vanilla extract.

Sharing the Tradition

Today, my version of carrot cake is a favorite among friends and family. It’s the cake I bake for birthdays, holidays, and special occasions, each slice a tribute to my grandmother’s legacy. The combination of moist carrot cake, warm spices, and creamy frosting brings back fond memories and creates new ones with every bite.

Ingredients
:

✅For the Cake:

2 cups all-purpose flour
1 1/2 cups granulated sugar
1 cup vegetable oil
4 large eggs
2 cups grated carrots
1/2 cup crushed pineapple, drained
1/2 cup chopped walnuts or pecans (optional)
1 teaspoon baking powder
1/2 teaspoon baking soda
1/2 teaspoon salt
1 teaspoon ground cinnamon
1/2 teaspoon ground nutmeg
1/2 teaspoon ground ginger
1 teaspoon pure vanilla extract


✅For the Cream Cheese Frosting:

8 oz (1 package) cream cheese, softened
1/2 cup (1 stick) unsalted butter, softened
4 cups powdered sugar
1 teaspoon pure vanilla extract

Preparation Time: 20 minutes
Baking Time: 25-30 minutes
Frosting Time: 10 minutes
Yield: This recipe yields one delicious Carrot Cake that serves approximately 12 slices.

Instructions:

  1. Preheat your oven to 350°F (175°C). Grease and flour two 9-inch round cake pans.
  2. In a large mixing bowl, combine the flour, granulated sugar, baking powder, baking soda, salt, ground cinnamon, ground nutmeg, and ground ginger.
  3. In a separate bowl, whisk together the vegetable oil, eggs, and pure vanilla extract until well combined.
  4. Pour the wet ingredients into the dry ingredients and mix until just combined.
  5. Fold in the grated carrots, crushed pineapple, and chopped nuts (if using).
  6. Divide the cake batter equally between the prepared cake pans.
  7. Bake in the preheated oven for 25-30 minutes or until a toothpick inserted into the center comes out clean.
  8. Allow the cakes to cool in the pans for 10 minutes, then transfer them to a wire rack to cool completely.
  9. While the cakes are cooling, prepare the cream cheese frosting. In a mixing bowl, beat together the softened cream cheese and softened unsalted butter until smooth and creamy. Gradually add the powdered sugar and pure vanilla extract, beating until the frosting is light and fluffy.
  10. Once the cakes are completely cool, spread a layer of cream cheese frosting on top of one cake layer. Place the second cake layer on top and frost the top and sides of the entire cake.
  11. Slice, serve, and savor the joy of your homemade Easy Bake Carrot Cake!

Pro Tips

  1. Grate Fresh Carrots: For the best flavor and texture, grate fresh carrots rather than using pre-packaged ones. They have a natural sweetness that elevates the cake.
  2. Room Temperature Ingredients: Ensure that your eggs, cream cheese, and butter are at room temperature. This makes for smoother blending and better incorporation of ingredients.
  3. Crushed Pineapple: The crushed pineapple adds moisture and a hint of sweetness. Drain it well to prevent excess moisture in the cake.

Secret Tips

  1. The Spice Blend: The combination of ground cinnamon, nutmeg, and ginger creates a warm and aromatic spice blend that elevates the flavor of the cake.
  2. Nuts or No Nuts: While chopped nuts are optional, they add a delightful crunch and nutty flavor to the cake. Customize your cake to suit your preference.


"May your journey into the world of baking be filled with joy and satisfaction as you create this Easy Bake Carrot Cake. Whether it graces your table on a special occasion or becomes a comforting treat for your loved ones, every slice is a reminder of the sweet moments we share. Happy baking!"

Enjoy creating and savoring this heartwarming Carrot Cake recipe!

Sam Salih