Turning Your Wishes into Sweet Realities, One Homemade Treat at a Time. 🌟

Friday, 18 October 2024

Honey Almond Dream Cake

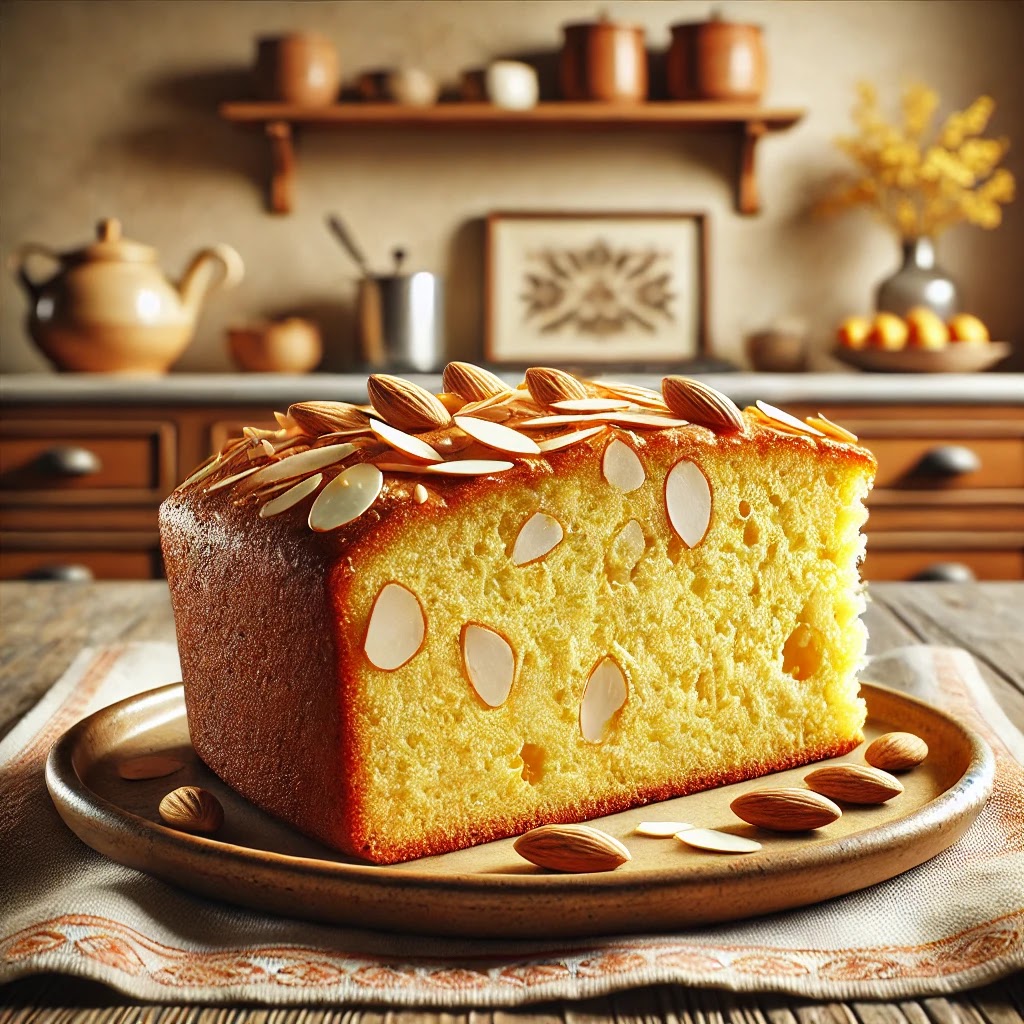
This Honey Almond Dream Cake is a celebration of natural flavors. Made with wholesome ingredients, it’s sweetened with honey and enriched with ground almonds for a delightful texture. The golden-brown crust and moist, tender crumb make it an irresistible choice for any occasion. Whether you’re serving it for breakfast, dessert, or a cozy tea-time treat, this cake is sure to impress with its simple yet elegant flavors.

Origin Story: Honey Almond Cake

There’s something timeless about a Honey Almond Cake—simple ingredients, rich flavors, and a touch of nostalgia in every bite. This cake isn’t just about dessert; it’s about creating moments of warmth and comfort, turning the ordinary into something special. Inspired by ancient flavors and modern simplicity, the Honey Almond Cake bridges past and present, making it a perfect choice for any occasion that calls for sweetness, elegance, and a touch of nature.

A Taste Rooted in History

The story of the Honey Almond Cake stretches back to ancient civilizations. Honey, one of nature’s earliest sweeteners, has been used in baking for millennia. The Greeks and Romans revered honey for its richness and versatility, often incorporating it into their desserts as a symbol of prosperity and celebration. Meanwhile, almonds, native to the Middle East, were considered a delicacy and a sign of wealth, often gifted during important festivals.

It’s easy to imagine a honeyed almond cake being served in the grand halls of Roman banquets, or being prepared in small Mediterranean kitchens by home cooks who understood the power of simplicity. Combining these two ingredients—honey and almonds—was a way to create something both sweet and earthy, indulgent yet nourishing. That same tradition has traveled through time, becoming a cornerstone of many European and Middle Eastern desserts.

Modern Inspiration

My journey with Honey Almond Cake began unexpectedly. I was searching for a dessert that felt like it belonged in the past but still had a place in today’s kitchen. I wanted something simple—without the bells and whistles of overly complicated recipes—yet rich in flavor and meaning. This cake is my answer to that search. It’s the cake I turn to when I want to bake something that feels both indulgent and wholesome.

The first time I made it, I was struck by how few ingredients it needed—just honey, almonds, flour, butter, and eggs—but how beautifully they worked together. The honey caramelizes in the oven, creating a golden-brown crust that contrasts with the soft, nutty interior. The ground almonds give the cake a unique texture that’s both dense and tender, while the honey adds a natural sweetness without being overpowering.

As the cake bakes, the smell of warm honey fills the kitchen, mingling with the roasted nuttiness of the almonds. It’s a scent that transports you somewhere else—perhaps a countryside kitchen or a sunny Mediterranean home where life moves a little slower, and food is savored with gratitude.

The Simplicity of Perfection

The beauty of Honey Almond Cake lies in its simplicity. It’s not overly sweet or complex; instead, it relies on the quality of its ingredients to shine. A drizzle of honey over the top before serving adds just the right amount of extra sweetness, while slivered almonds give a bit of crunch. You can enjoy it as a snack with a cup of tea or coffee, or dress it up for a special occasion with a dollop of whipped cream or fresh berries.

What I love most about this cake is its versatility. It feels just as appropriate for a quiet afternoon with family as it does for a celebratory dinner with friends. And because it’s made with honey and almonds, it even feels somewhat wholesome—a treat you can indulge in without guilt.

A Slice of Comfort and Tradition

Baking this cake has become a tradition in my home. It’s the kind of recipe you keep coming back to because it’s reliable, comforting, and always delicious. Whenever I bake it, I’m reminded of how food can connect us to history, to nature, and to the people we love.

Ingredients

  • 1 1/2 cups almond flour
  • 1 cup all-purpose flour
  • 1 teaspoon baking powder
  • 1/4 teaspoon salt
  • 1/2 teaspoon cinnamon (optional)
  • 1/2 cup unsalted butter, softened
  • 3/4 cup honey
  • 2 large eggs
  • 1 teaspoon vanilla extract
  • 1/2 cup whole milk
  • 1/4 cup sliced almonds (for topping)

Recipe Details

  • Preparation Time: 15 minutes
  • Cooking Time: 40-45 minutes
  • Cooling Time: 10 minutes
  • Yield: 8-10 servings

Instructions

  1. Preheat and Prepare: Preheat your oven to 350°F (175°C). Grease and line an 8-inch round cake pan.

  2. Mix Dry Ingredients: In a medium bowl, whisk together the almond flour, all-purpose flour, baking powder, salt, and cinnamon (if using).

  3. Cream Butter and Honey: In a large bowl, cream together the softened butter and honey until smooth and fluffy. Beat in the eggs, one at a time, followed by the vanilla extract.

  4. Combine Wet and Dry Ingredients: Gradually add the dry ingredients to the wet ingredients, alternating with the milk, mixing until just combined. Be careful not to overmix.

  5. Pour and Top: Pour the batter into the prepared cake pan. Sprinkle the sliced almonds evenly over the top.

  6. Bake: Bake in the preheated oven for 40-45 minutes, or until a toothpick inserted into the center comes out clean and the top is golden brown.

  7. Cool and Serve: Let the cake cool in the pan for 10 minutes before transferring it to a wire rack to cool completely. Drizzle with extra honey for a finishing touch, if desired.

Pro Tips

  • Don’t Overmix: For a light, tender cake, mix the batter just until combined.
  • Even Almonds: Gently press the sliced almonds into the batter before baking to ensure they stick.

Secret Tips

  • Extra Flavor: Add a teaspoon of orange zest for a subtle citrus note that pairs wonderfully with the honey.
  • Rustic Texture: Replace half of the all-purpose flour with whole wheat flour for a heartier, more rustic texture.

Serving Options

  • With Whipped Cream: Serve with a dollop of lightly sweetened whipped cream or Greek yogurt.
  • With Fresh Berries: Pair with fresh berries or a drizzle of berry compote for a fruity contrast.
  • With Tea or Coffee: This cake is the perfect companion to a hot cup of tea or coffee.

Health Benefits

  • Almond Flour: Rich in protein and healthy fats, almond flour adds both flavor and nutrition to the cake.
  • Honey: A natural sweetener with antioxidants and anti-inflammatory properties.

Variations & Customization Options

  • Nut-Free: Substitute almond flour with oat flour and skip the almond topping for a nut-free version.
  • Gluten-Free: Use a gluten-free flour blend in place of all-purpose flour for a gluten-free cake.
  • Vegan: Substitute the butter with coconut oil and replace eggs with flax eggs for a vegan alternative.

Here are a few fun and funny facts about the Honey Almond Cake recipe:

  1. Bee Happy: This cake is like a sweet love letter to bees—without them, we wouldn’t have honey! So every bite is like saying, “Thank you, bees!”

  2. Almond Joy: Almonds are technically seeds, not nuts! So, you’re basically eating a seed cake—sounds a bit more exotic, doesn’t it?

  3. One Bowl Wonder: This cake comes together so easily, it feels like the universe is conspiring for you to have dessert! Minimal effort, maximum reward.

  4. Sweets for Strength: Did you know ancient Olympians used to eat honey and almonds for energy? You’re basically fueling up like a champion with this cake.

  5. Cake without the Crumbs: Almond flour helps keep this cake extra moist, so if you’re the type to avoid dry cakes like the plague, this one’s on your side!

  6. Gluten-Free-ish: With almond flour being a star player, you’re halfway to gluten-free already! Just one small tweak, and you’ve got a gluten-free delight.

  7. Dressed to Impress: Sprinkle a few extra almond flakes on top, and you can easily convince everyone that you’re a fancy pastry chef—even if your secret ingredient is store-bought honey.

This cake may seem humble, but it’s packed with history, simplicity, and a whole lot of natural goodness!

Happy Baking!

Sam

Thursday, 3 October 2024

Homestyle Raspberry Swirl Delight Cake

This Homestyle Raspberry Swirl Delight Cake is the perfect combination of a soft, buttery cake base swirled with tangy raspberry goodness. The visual appeal of the vibrant raspberry swirls makes each slice a feast for the eyes, while the moist and tender cake provides the ultimate comfort. Whether you’re baking for a special family gathering or just want a cozy dessert for your kitchen table, this cake will add that special homemade touch.

Origin Story: Raspberry Swirl Cake

Some recipes carry more than just flavors—they carry stories, memories, and the comforting essence of home. That’s exactly what the Home Style Raspberry Swirl Cake does. It’s a cake that doesn’t just sit on the table but tells a story with every beautiful swirl. The inspiration for this cake came from my desire to combine simplicity with beauty, turning an everyday bake into something that feels like a warm hug from home.

A Slice of Home in Every Bite

Growing up, the kitchen was always the heart of our home. The rhythmic sound of the mixer, the clatter of bowls, and the sweet smell of something baking in the oven made everything feel right. When I was young, there was one cake that stood out from the rest—my grandmother’s raspberry swirl cake. It was the cake we baked when we celebrated something special or needed to bring some joy to an ordinary day.

I remember standing on tiptoes, watching her swirl the ruby-red raspberry preserves into the vanilla batter with the grace of an artist, knowing that each swirl held a unique promise of sweetness in every bite. To me, that swirl wasn’t just about the flavor—it was a symbol of the unpredictability of life. No two slices were the same, yet each was perfect in its own way.

The Power of a Simple Cake

The magic of the Home Style Raspberry Swirl Cake lies in its simplicity. There are no fancy tricks, no elaborate ingredients—just flour, sugar, butter, and a few spoonfuls of sweet raspberry preserves. But simplicity doesn’t mean boring. What makes this cake so special is the feeling it brings. It’s the kind of cake you make for a cozy afternoon with friends or when you want to bake something that reminds you of home.

As I grew older, this cake became more than just a nostalgic memory—it became a way for me to connect with the people I love. I’d bake it for Sunday brunches, housewarming gifts, or simply when I needed a taste of home after a long week. The moment the first slice is cut, the beautiful raspberry swirls come to life, and it always brings a smile to everyone’s face.

Recipe Evolution: A Fresh Take on Tradition

While my grandmother’s original recipe was perfect in its simplicity, I’ve made a few small tweaks to make it my own. A hint of lemon zest adds a bright, fresh contrast to the sweetness of the raspberries, while the buttery vanilla cake brings a melt-in-your-mouth tenderness that makes it hard to stop at just one slice.

I’ve also experimented with fresh raspberries when they’re in season, reducing them down into a simple, homemade jam. There’s something special about using fresh fruit—knowing that it’s been hand-picked, bringing nature’s best flavors right into the heart of your cake.

And then, there’s the swirl. It’s an art that doesn’t require perfection, just a little patience and care. I always say that the swirl should feel like painting—gentle, free, and never rushed. It’s what gives this cake its soul, transforming it from a simple loaf into something that feels handcrafted and one-of-a-kind.

Why It Matters

The Home Style Raspberry Swirl Cake is more than just a dessert—it’s a story you can taste. It’s the story of family, of tradition, and of the simple joy that comes from baking something with love. Whether you’re sharing it with loved ones or savoring it on your own, this cake has a way of making you feel at home, no matter where you are.

Ingredients

  • 1 3/4 cups all-purpose flour
  • 1 teaspoon baking powder
  • 1/2 teaspoon baking soda
  • 1/4 teaspoon salt
  • 1/2 cup unsalted butter, softened
  • 3/4 cup granulated sugar
  • 2 large eggs
  • 1 teaspoon vanilla extract
  • 1/2 cup whole milk
  • 1/3 cup sour cream
  • 1/2 cup raspberry jam (or fresh raspberries)
  • 1/2 cup powdered sugar (for dusting)

Recipe Details

  • Preparation Time: 20 minutes
  • Cooking Time: 50-55 minutes
  • Cooling Time: 15 minutes
  • Yield: 10-12 servings

Instructions

  1. Preheat and Prepare: Preheat your oven to 350°F (175°C). Grease and flour a 9-inch round cake pan or a loaf pan.

  2. Mix Dry Ingredients: In a medium bowl, whisk together the flour, baking powder, baking soda, and salt.

  3. Cream Butter and Sugar: In a large mixing bowl, cream together the softened butter and granulated sugar until light and fluffy. Add the eggs one at a time, mixing well after each addition. Stir in the vanilla extract.

  4. Combine Wet and Dry Ingredients: Add the dry ingredients to the butter mixture alternately with the milk and sour cream, starting and ending with the dry ingredients. Mix until just combined, being careful not to overmix.

  5. Create the Swirl: Pour half the batter into the prepared pan. Drop spoonfuls of the raspberry jam or fresh raspberries on top of the batter, then pour the remaining batter over it. Use a butter knife to gently swirl the jam into the batter, creating a marbled effect.

  6. Bake: Bake for 50-55 minutes or until a toothpick inserted into the center of the cake comes out clean. The cake should be golden and slightly firm to the touch.

  7. Cool and Dust: Let the cake cool in the pan for 10 minutes before transferring to a wire rack to cool completely. Once cooled, dust with powdered sugar for a lovely finish.

Pro Tips

  • Avoid Overmixing: To keep the cake tender, make sure to mix only until the ingredients are just combined.
  • Swirling Technique: Be gentle when swirling the jam to keep the marbled effect and prevent it from sinking.

Secret Tips

  • Extra Flavor: Add a teaspoon of lemon zest to the batter for a refreshing citrus twist.
  • Flavor Variety: Substitute the raspberry jam with strawberry, blueberry, or blackberry jam for different flavors.

Serving Options

  • With Whipped Cream: Serve with a dollop of whipped cream or a scoop of vanilla ice cream for an extra treat.
  • For Breakfast or Dessert: This cake is versatile enough to be enjoyed as a light breakfast or a delicious dessert.

Health Benefits

  • Raspberries: Full of antioxidants, vitamins, and fiber, raspberries add a healthy touch to this indulgent cake.

Variations & Customization Options

  • Nutty Delight: Add 1/4 cup of finely chopped almonds or walnuts for a bit of crunch.
  • Gluten-Free: Substitute the flour with a gluten-free blend for a gluten-free version.
  • Vegan: Replace the butter with vegan butter and the eggs with flax eggs to make the cake vegan-friendly.


This Homestyle Raspberry Swirl Delight Cake is the ultimate comfort dessert, combining a moist, buttery cake with the tangy sweetness of raspberry swirls. It’s easy to make and perfect for sharing with loved ones, offering a little taste of homemade warmth with every bite.

Happy Baking!

Sam

Tuesday, 1 October 2024

Tropical Bliss Coconut Macaroons

Transport yourself to a tropical paradise with these delightful Tropical Bliss Coconut Macaroons! Light, chewy, and full of sweet coconut flavor, these macaroons are the perfect treat for any occasion. Whether you’re hosting a party, looking for a simple dessert, or just want to indulge, these macaroons will quickly become a favorite. With their golden exterior and soft, melt-in-your-mouth center, they offer a little bite of tropical bliss in every bite.

Origin Story: Coconut Macaroons

Coconut Macaroons are delightful, chewy treats with a tropical twist, combining the sweetness of coconut with a light, crispy exterior. These cookies have a history that is both rich and surprising, with origins that span across cultures. The evolution of coconut macaroons from a humble, simple confection to a beloved global treat reflects a story of exploration, creativity, and the joy of discovering new flavors.

Historical Roots

Macaroons, in their earliest form, originated in Italy during the 9th century as part of the culinary repertoire of monasteries. The word “macaroon” is derived from the Italian word maccarone, which means paste, and it originally referred to the ground almonds that were used to make these light, chewy cookies. These early versions of macaroons were almond-based and similar to what we now know as amaretti.

As the recipe spread across Europe, it became particularly popular among Jewish communities because it did not require flour or leavening agents, making it an ideal dessert for Passover. It wasn’t until the recipe traveled to France and then across the Atlantic to the Americas that the use of coconut as a substitute for almonds became common.

The arrival of coconut in Europe and North America, brought by explorers and traders from tropical regions, introduced a new and exciting ingredient to bakers. Coconut was praised for its unique flavor, long shelf life, and ability to add moisture to recipes. Coconut macaroons soon emerged as a variation of the original almond-based cookie, offering a tropical twist to this centuries-old dessert.

A New Twist: Coconut Macaroons’ Global Journey

As coconut macaroons began to spread across continents, they evolved into a symbol of creativity and cultural fusion. In the Caribbean, where coconuts were plentiful, local bakers embraced the recipe, adding their own tropical flair. These coconut macaroons, often baked to perfection under the warm island sun, became a favorite treat at beachside cafés and family gatherings, symbolizing relaxation and celebration.

In other parts of the world, coconut macaroons became a delicate dessert served at elegant tea parties or enjoyed as a quick snack at bustling street markets. The versatility of the recipe allowed it to adapt to different tastes and occasions, making it a universal favorite.

Personal Connection

For me, the inspiration to bake coconut macaroons came from a desire to combine my love for travel and discovery with the comforts of home baking. The first time I tried coconut macaroons was on a beach vacation, where I tasted a version of the cookie that was crisp on the outside, soft on the inside, and bursting with the sweet flavor of coconut. It was unlike anything I had tried before, and I was instantly hooked.

Back home, I experimented with different variations of the recipe, incorporating fresh shredded coconut and adding a touch of vanilla to enhance the natural sweetness. The process of whipping egg whites to give the macaroons their light, airy texture became almost therapeutic, reminding me of the carefree days spent on the beach. With each bite of the macaroons, I was transported back to the sunshine and sea breeze, and I knew I had found something special.

Recipe Evolution

Creating the perfect Coconut Macaroons involves a few essential steps. Using high-quality shredded coconut is key to achieving the right texture—moist but not overly wet. The combination of coconut with egg whites, sugar, and a hint of vanilla creates a batter that is light, chewy, and delicately sweet.

To add a personal twist, some bakers dip their macaroons in melted chocolate or drizzle them with caramel, elevating the simple cookie into a gourmet treat. Others might sprinkle a bit of sea salt on top to balance the sweetness and enhance the flavors.

The beauty of coconut macaroons lies in their simplicity and adaptability. Whether enjoyed plain, with a chocolate coating, or even with a hint of citrus zest for a refreshing touch, these cookies are a blank canvas for creativity.

Sharing the Tradition

Today, Coconut Macaroons are a favorite in my household, especially when I want to bring a taste of the tropics into my kitchen. They are the cookies I bake when I want to share something light, sweet, and filled with warmth and adventure. Each bite is a reminder of the joy of exploring new flavors and the happiness that comes from creating something simple yet special.

Ingredients

  • 3 cups sweetened shredded coconut
  • 1/2 cup sweetened condensed milk
  • 1 teaspoon vanilla extract
  • 2 large egg whites
  • 1/4 teaspoon salt
  • 1/2 cup semi-sweet chocolate chips (optional for dipping)

Recipe Details

  • Preparation Time: 10 minutes
  • Cooking Time: 20-25 minutes
  • Yield: 24 macaroons

Instructions

  1. Preheat and Prepare: Preheat your oven to 325°F (165°C). Line a baking sheet with parchment paper.

  2. Mix the Coconut Base: In a large mixing bowl, combine the shredded coconut, sweetened condensed milk, and vanilla extract. Stir until the mixture is well combined and evenly coated.

  3. Whip the Egg Whites: In a separate bowl, beat the egg whites and salt until stiff peaks form. Gently fold the whipped egg whites into the coconut mixture until fully combined.

  4. Shape the Macaroons: Use a small cookie scoop or spoon to drop rounded spoonfuls of the coconut mixture onto the prepared baking sheet, leaving about an inch between each macaroon.

  5. Bake: Bake in the preheated oven for 20-25 minutes, or until the tops are golden brown and the edges are crispy.

  6. Cool and Dip (Optional): Allow the macaroons to cool on the baking sheet for 5 minutes, then transfer to a wire rack to cool completely. If desired, melt the chocolate chips and dip the bottoms of the macaroons in the chocolate, then place them back on the wire rack to set.

Pro Tips

  • Shape Consistency: Use a cookie scoop for evenly shaped macaroons.
  • Prevent Sticking: Ensure the baking sheet is well-lined to prevent the macaroons from sticking.
  • Egg Whites: Make sure the egg whites are beaten to stiff peaks for the best texture.

Secret Tips

  • Flavor Boost: Add a teaspoon of almond extract for a subtle nutty flavor.
  • Tropical Twist: Add finely chopped dried pineapple or mango to the coconut mixture for an extra tropical kick.

Serving Options

  • With Coffee or Tea: Serve with a warm cup of coffee or tea for a delightful treat.
  • With Ice Cream: Enjoy with a scoop of vanilla or coconut ice cream for a tropical dessert.
  • Gift Idea: Package these macaroons in a decorative tin for a beautiful homemade gift.

Health Benefits

  • Coconut: Packed with healthy fats and fiber, coconut adds a natural sweetness and texture.
  • Gluten-Free: These macaroons are naturally gluten-free, making them a great option for those with gluten sensitivities.

Variations & Customization Options

  • Chocolate Lovers: Drizzle or dip in dark chocolate for a decadent version.
  • Nutty Delight: Fold in some finely chopped almonds or pecans for added crunch.
  • Fruit-Infused: Add dried cranberries or apricots for a fruity variation.


These Tropical Bliss Coconut Macaroons are a heavenly treat that combines the sweetness of coconut with a light, airy texture. Whether you enjoy them plain or dipped in chocolate, they’re sure to bring a little piece of paradise to your kitchen. Perfect for any occasion or just to satisfy your sweet tooth, these macaroons will be a hit wherever they go!

Happy Baking!

Sam

Monday, 30 September 2024

Romantic Velvet Kiss Cookies

 Add a touch of romance to your baking with these delightful Romantic Velvet Kiss Cookies! Featuring the iconic deep red color of red velvet, a hint of cocoa, and a kiss of sweetness on top, these cookies are perfect for special occasions or a cozy date night. Soft, chewy, and visually stunning, these cookies will win over any heart.

Origin Story: Red Velvet Cookies

Red Velvet Cookies, with their vibrant color, tender texture, and luxurious flavor, are more than just a dessert—they are a symbol of love and passion, a sweet treat born from romance and indulgence. These cookies, inspired by the rich history of red velvet cake, have captured the hearts of many with their dramatic red hue and delicate cocoa flavor. But beyond the taste, Red Velvet Cookies carry a love story that makes each bite feel like a celebration of romance.

Historical Roots

The origins of red velvet cake itself are shrouded in mystery, but the most widely accepted story places its roots in the early 20th century. During the Victorian era, elaborate desserts were the centerpiece of high society events. Red velvet cake was believed to have been first introduced at the Waldorf Astoria Hotel in New York, where its deep red color, achieved by the combination of cocoa powder and acidic ingredients, made it stand out among other desserts.

As baking practices evolved, the vibrant red color became more pronounced with the addition of food coloring, and red velvet cake soon became associated with special occasions like Valentine’s Day and weddings. The cake, with its soft crumb and rich, velvety texture, symbolized love, luxury, and celebration.

Red Velvet Cookies emerged as a modern twist on the classic cake, offering the same beloved flavors in a compact, handheld form. Their playful size and soft texture are reminiscent of the indulgence of red velvet cake, yet they bring a sense of intimacy, as they are often baked and shared between loved ones.

A Love Story in Every Bite

The creation of Red Velvet Cookies began as a gesture of love. Legend has it that a baker, deeply in love with her partner, wanted to create something special for their anniversary. Inspired by the elegance and passion of red velvet cake, she adapted the recipe into cookies—small, sweet tokens of affection that could be easily shared and enjoyed together.

As she rolled the dough into perfect spheres, carefully dusting them with powdered sugar, the baker imagined the joy these cookies would bring to her partner. With each batch, the aroma of vanilla, cocoa, and love filled the kitchen, creating an atmosphere of warmth and tenderness.

When her partner took the first bite, their eyes lit up with surprise and delight. The soft, chewy texture of the cookie, paired with the rich, yet delicate flavor, captured the essence of their relationship: sweet, soft, and unforgettable. Red Velvet Cookies became their tradition, a symbol of their love story, and a reminder of the little moments that make love so special.

Soon, the recipe spread among their friends and family, becoming a beloved treat at weddings, anniversaries, and romantic celebrations. The cookies, like the love they were born from, continued to inspire couples everywhere to celebrate their affection in small, meaningful ways.

Recipe Evolution

While the essence of Red Velvet Cookies remains rooted in romance, bakers have found ways to add their own personal touches to the recipe. Some add a cream cheese filling, a nod to the traditional frosting that accompanies red velvet cake. Others sprinkle white chocolate chips or a dusting of powdered sugar, making the cookies feel even more luxurious.

The deep red color of the cookies is achieved using a combination of cocoa powder and red food coloring, though some prefer a natural approach using beet juice for the crimson hue. Vanilla and a hint of tang from buttermilk or vinegar enhance the flavor, creating that signature red velvet taste.

Sharing the Tradition

Today, Red Velvet Cookies are not only a symbol of love between partners but also a way to express affection for family and friends. They are the cookies I bake when I want to offer a sweet, romantic gesture, whether it’s for a special date night or to share with someone I care about. Each bite is a reminder of the love that inspired these cookies and the joy that comes from baking for the people we cherish.

Ingredients

  • 1 1/2 cups all-purpose flour
  • 1/4 cup unsweetened cocoa powder
  • 1 teaspoon baking soda
  • 1/4 teaspoon salt
  • 1/2 cup unsalted butter, softened
  • 3/4 cup granulated sugar
  • 1/4 cup brown sugar
  • 1 large egg
  • 1 tablespoon milk
  • 1 teaspoon vanilla extract
  • 1 teaspoon red food coloring
  • 1/2 cup white chocolate chips (or Hershey’s kisses)
  • Powdered sugar (for rolling)

Recipe Details

  • Preparation Time: 15 minutes
  • Chilling Time: 30 minutes
  • Cooking Time: 10-12 minutes
  • Yield: 24 cookies

Instructions

  1. Preheat and Prepare: Preheat your oven to 350°F (175°C). Line a baking sheet with parchment paper.

  2. Mix Dry Ingredients: In a medium bowl, whisk together the flour, cocoa powder, baking soda, and salt.

  3. Cream Butter and Sugar: In a large mixing bowl, cream together the softened butter, granulated sugar, and brown sugar until light and fluffy. Add the egg, milk, vanilla extract, and red food coloring, mixing until smooth.

  4. Combine Wet and Dry Ingredients: Gradually add the dry ingredients to the wet ingredients, mixing until just combined. Fold in the white chocolate chips. Chill the dough for 30 minutes to make it easier to handle.

  5. Shape and Roll: Roll the dough into 1-inch balls and roll each ball in powdered sugar. Place the cookies 2 inches apart on the prepared baking sheet.

  6. Bake: Bake for 10-12 minutes, or until the edges are set and the tops are slightly cracked. Remove from the oven and immediately press a white chocolate kiss or chip into the center of each cookie.

  7. Cool and Serve: Let the cookies cool on the baking sheet for 5 minutes before transferring them to a wire rack to cool completely.

Pro Tips

  • Chill the Dough: Chilling the dough helps keep the cookies from spreading too much during baking.
  • Press Gently: Be gentle when pressing the chocolate into the cookies to avoid cracking.

Secret Tips

  • Extra Flavor: Add a pinch of cinnamon for a subtle warmth that complements the cocoa.
  • Flavor Variation: Swap the white chocolate for dark or milk chocolate for a richer taste.

Serving Options

  • With Coffee or Hot Chocolate: These cookies are perfect alongside a warm drink for a romantic evening.
  • Gift Idea: Package these cookies in a heart-shaped box for a thoughtful, homemade gift.
  • With Strawberries: Serve with fresh strawberries for an extra romantic touch.

Health Benefits

  • Cocoa Powder: Adds antioxidants and a touch of rich flavor to these delightful cookies.

Variations & Customization Options

  • Heart-Shaped Twist: Roll out the dough and use a heart-shaped cookie cutter for an extra romantic touch.
  • Chocolate Dipped: Dip half of each cookie in melted white or dark chocolate for a visually stunning presentation.
  • Gluten-Free: Use a gluten-free flour blend for those with gluten sensitivities.


These Romantic Velvet Kiss Cookies are the perfect treat for any romantic occasion. With their beautiful red hue, soft texture, and sweet kiss of chocolate, they are sure to impress and delight. Whether you’re baking for a special someone or simply indulging yourself, these cookies will make your day a little sweeter.

Baked with Love

Sam!

Unique Lemon Crinkle Cookies with a Coconut Twist

 Lemon Crinkle Cookies are a zesty and refreshing treat, but we’re taking them to the next level by adding a coconut twist! These cookies combine the tangy flavor of lemon with the subtle sweetness of coconut, creating a soft, chewy cookie with a crinkled, powdered sugar exterior. Perfect for any occasion, these cookies are sure to become a favorite with their unique blend of flavors.

Origin Story: Lemon Crinkle Cookies

Lemon Crinkle Cookies are a burst of sunshine in every bite, combining the brightness of fresh lemon zest with a soft, chewy texture. These cookies are not only a delightful treat but also carry a story of inspiration, family, and the joy of creating something special from the simplest ingredients. What makes them truly captivating is their unique crinkled appearance, achieved by rolling the dough in powdered sugar before baking, allowing cracks to form as the cookies puff up in the oven.

Historical Roots

Though citrus fruits have been cultivated for thousands of years, lemons became particularly popular in European and American kitchens in the 18th and 19th centuries. Their tangy flavor added a refreshing contrast to sweet desserts, and their zest and juice were often used to balance the richness of butter, cream, and sugar. Cookies, a relatively simple and affordable dessert, became the perfect canvas for experimenting with these bright flavors.

The crinkle effect in baking originated as a simple way to add texture and visual appeal to soft cookies. This technique became popular in recipes like chocolate crinkle cookies, where the powdered sugar highlights the cracks on the cookie’s surface. Applying this technique to lemon-flavored cookies resulted in the delightful Lemon Crinkle Cookie—a blend of tartness and sweetness wrapped in a visually striking appearance.

Cultural Significance

Lemon Crinkle Cookies have found their place in modern baking culture, particularly during the spring and summer months when citrus flavors are at their peak. They are often associated with family gatherings, garden parties, and holiday celebrations, where their refreshing flavor provides a light, uplifting dessert option.

These cookies symbolize a balance between tradition and innovation. Their method, rooted in old-world baking techniques, combines with the fresh, zesty flavor of lemon, making them a favorite for those who seek both comfort and adventure in their baking. The crinkle effect, while simple, adds an artisanal touch, making each cookie feel like a small work of art.

Personal Connection

My personal connection to Lemon Crinkle Cookies began on a warm spring day when I was searching for a dessert that would capture the fresh, bright feeling of the season. I had a bowl of lemons on my kitchen counter, their vibrant yellow skin catching the sunlight, and I knew I wanted to create something that would embody the happiness and renewal that spring brings.

Experimenting in the kitchen, I decided to adapt a family recipe for chocolate crinkle cookies, substituting the rich cocoa with the refreshing flavor of lemon. As I rolled the dough in powdered sugar and watched the cookies bake, I was mesmerized by the way the crinkles formed, giving the cookies a beautiful, rustic appearance.

The moment I tasted the first cookie, I knew I had created something special. The tangy lemon flavor, combined with the soft, chewy texture and the delicate sweetness of the powdered sugar, was a perfect balance. From that day forward, Lemon Crinkle Cookies became a go-to recipe for family gatherings, especially when I wanted to share something bright, fresh, and full of love.

Recipe Evolution

The success of Lemon Crinkle Cookies lies in their simplicity and the quality of their ingredients. Fresh lemon zest and juice are essential for achieving the bold citrus flavor that makes these cookies stand out. The dough should be soft and pliable, made with a combination of flour, butter, sugar, and eggs, creating the ideal base for the crinkles to form during baking.

The key to achieving the crinkle effect is rolling the dough balls generously in powdered sugar before placing them on the baking sheet. As the cookies bake, the dough expands, and cracks naturally form on the surface, revealing the bright yellow dough underneath.

For an extra touch of sophistication, some bakers add a hint of vanilla or almond extract to the dough, complementing the lemon flavor. The cookies are baked until just set, resulting in a soft, chewy texture with a light, crisp exterior.

Sharing the Tradition

Today, Lemon Crinkle Cookies are a beloved treat in my household, especially during the spring and summer months. They are the cookies I bake when I want to brighten someone’s day with a fresh, homemade treat. Each bite is a reminder of the simple joys of baking and the happiness that comes from sharing something special with those we care about.

Ingredients

  • 1 3/4 cups all-purpose flour
  • 1/2 teaspoon baking powder
  • 1/4 teaspoon baking soda
  • 1/4 teaspoon salt
  • 1/2 cup unsweetened shredded coconut
  • 1/2 cup unsalted butter, softened
  • 1 cup granulated sugar
  • 1 large egg
  • 1 tablespoon lemon zest
  • 1 tablespoon freshly squeezed lemon juice
  • 1/2 teaspoon vanilla extract
  • 1/2 teaspoon coconut extract (optional)
  • 1/2 cup powdered sugar (for rolling)

Recipe Details

  • Preparation Time: 15 minutes
  • Chilling Time: 30 minutes
  • Cooking Time: 10-12 minutes
  • Yield: 24 cookies

Instructions

  1. Preheat and Prepare: Preheat your oven to 350°F (175°C). Line a baking sheet with parchment paper.

  2. Mix Dry Ingredients: In a medium bowl, whisk together the flour, baking powder, baking soda, salt, and shredded coconut.

  3. Cream Butter and Sugar: In a large mixing bowl, cream the softened butter and granulated sugar until light and fluffy. Beat in the egg, lemon zest, lemon juice, vanilla extract, and coconut extract (if using).

  4. Combine Wet and Dry Ingredients: Gradually add the dry ingredients to the wet ingredients, mixing until just combined. Chill the dough for at least 30 minutes.

  5. Form and Coat: Roll the chilled dough into 1-inch balls. Roll each ball in powdered sugar until fully coated. Place the cookies on the prepared baking sheet about 2 inches apart.

  6. Bake: Bake in the preheated oven for 10-12 minutes, or until the edges are set and the tops are crinkled. The centers should remain soft.

  7. Cool and Serve: Allow the cookies to cool on the baking sheet for 5 minutes before transferring them to a wire rack to cool completely.

Pro Tips

  • Chill the Dough: Chilling the dough helps prevent the cookies from spreading too much, giving them that perfect crinkle effect.
  • Roll Generously: Be generous with the powdered sugar coating to ensure a beautiful crinkled appearance after baking.

Secret Tips

  • Extra Lemon Flavor: Add a teaspoon of lemon extract for an extra zesty kick.
  • Coconut Boost: For even more coconut flavor, toast the shredded coconut lightly before adding it to the dough.

Serving Options

  • With Tea or Lemonade: Serve these cookies with a cup of tea or a refreshing glass of lemonade for a perfect pairing.
  • With Ice Cream: Sandwich two cookies together with a scoop of vanilla or coconut ice cream for a delightful dessert.
  • Gift Idea: Package these cookies in a decorative tin or jar for a thoughtful homemade gift.

Health Benefits

  • Lemon: Rich in vitamin C, lemons offer a refreshing boost and natural flavor.
  • Coconut: Provides healthy fats and a natural sweetness without needing too much added sugar.

Variations & Customization Options

  • Lemon-Lime Crinkle Cookies: Swap half the lemon juice and zest for lime for a citrus twist.
  • Gluten-Free: Use a gluten-free flour blend to make these cookies suitable for gluten-sensitive guests.
  • Vegan: Substitute the butter with coconut oil and the egg with a flax egg for a vegan version.


These Lemon Crinkle Cookies with a Coconut Twist are the perfect blend of tangy and sweet, with a unique coconut flavor that sets them apart from the traditional recipe. Whether you're baking them for a party, a gift, or just for fun, these cookies are sure to impress!

Classic Sugar Cookies

Sugar Cookies are a timeless classic, loved by both kids and adults alike. These cookies are soft, buttery, and perfect for decorating or enjoying plain. Whether you're baking for a special occasion or just a simple treat, this sugar cookie recipe is sure to delight!

Origin Story: Classic Sugar Cookies

Classic Sugar Cookies are much more than a simple treat; they are a symbol of warmth, tradition, and love passed down through generations. Whether rolled in sugar, decorated with frosting, or simply enjoyed plain, these cookies hold a special place in the hearts of many families. The recipe for these beloved cookies is as timeless as the memories made while baking them.

Historical Roots

The origins of sugar cookies can be traced back to the 1700s in Pennsylvania, where German settlers, also known as the Pennsylvania Dutch, brought with them a simple yet delicious cookie recipe. These early cookies were known as "Nazareth Sugar Cookies," named after the town of Nazareth, Pennsylvania, where they were first baked. Made with basic ingredients like flour, sugar, butter, eggs, and vanilla, these cookies quickly became a staple in American households.

The simplicity of sugar cookies made them accessible to all, as the ingredients were commonly found in most kitchens. Over the years, sugar cookies became a favorite during holidays, particularly Christmas, when they were cut into festive shapes and decorated with colored icing and sprinkles. They also became a tradition for other special occasions like birthdays, weddings, and family gatherings, where the act of baking and decorating the cookies became a cherished family activity.

Cultural Significance

Classic Sugar Cookies hold a special place in American baking culture, symbolizing warmth, togetherness, and celebration. They are often associated with childhood memories of baking with parents or grandparents, rolling out the dough, cutting the cookies into fun shapes, and decorating them with colorful frosting and sprinkles.

The beauty of sugar cookies lies in their versatility. From simple circles dusted with sugar to intricately designed shapes adorned with royal icing, sugar cookies are a blank canvas for creativity. They have become a favorite at bake sales, holiday cookie exchanges, and family gatherings, where each bite brings back a flood of nostalgic memories.

Beyond the taste, sugar cookies are often seen as a gesture of love. Whether given as a homemade gift or shared among family and friends, these cookies carry with them the essence of home and care. They are a reminder of the joy that comes from sharing something sweet with those we love.

Personal Connection

For me, Classic Sugar Cookies are a symbol of my childhood and the special moments spent in the kitchen with my family. My earliest memories of baking involve helping my mother roll out the dough, pressing cookie cutters into the soft dough, and eagerly waiting for the cookies to bake while the kitchen filled with the sweet aroma of vanilla and sugar.

Decorating the cookies was always my favorite part. My mother would set out bowls of colorful frosting and sprinkles, and my siblings and I would spend hours creating our own cookie masterpieces. The final product was never perfect, but it was always beautiful in its own way—because each cookie was made with love and joy.

As I grew older, I continued the tradition of baking sugar cookies with my own family, passing down the recipe and the memories. Every time I bake a batch of sugar cookies, I’m reminded of the laughter, the love, and the togetherness that these simple cookies represent.

Recipe Evolution

While the basic ingredients of Classic Sugar Cookies have remained the same over the centuries, bakers have put their own unique spin on the recipe. Some add a hint of almond extract for extra flavor, while others experiment with different decorating techniques. The dough itself can be rolled thin for a crisp cookie or kept thick for a soft, chewy texture.

Baking sugar cookies is a tradition that encourages creativity. The act of cutting out shapes and decorating them with frosting, edible glitter, and sprinkles allows both kids and adults to express their artistic side. The cookies become more than just a dessert; they become edible works of art.

Sharing the Tradition

Today, Classic Sugar Cookies continue to be a favorite in my household, especially during the holidays. They are the cookies I bake when I want to share a piece of my family’s tradition with friends and loved ones. Each batch is a reminder of the joy that comes from baking, decorating, and sharing something sweet with those we care about.

Ingredients

  • 2 3/4 cups all-purpose flour
  • 1 teaspoon baking soda
  • 1/2 teaspoon baking powder
  • 1 cup unsalted butter, softened
  • 1 1/2 cups granulated sugar
  • 1 large egg
  • 1 teaspoon vanilla extract
  • 1/2 teaspoon almond extract (optional)
  • 3 tablespoons milk
  • 1/4 cup granulated sugar (for rolling)

Recipe Details

  • Preparation Time: 15 minutes
  • Cooking Time: 8-10 minutes
  • Yield: 24-30 cookies

Instructions

  1. Preheat and Prepare Pan: Preheat your oven to 350°F (175°C). Line a baking sheet with parchment paper.

  2. Mix Dry Ingredients: In a medium bowl, whisk together the flour, baking soda, and baking powder.

  3. Cream Butter and Sugar: In a large bowl, cream together the softened butter and 1 1/2 cups of sugar until light and fluffy. Add the egg, vanilla extract, and almond extract, mixing until combined.

  4. Combine Wet and Dry Ingredients: Gradually add the dry ingredients to the wet ingredients, alternating with the milk, mixing until just combined.

  5. Shape Cookies: Roll the dough into 1-inch balls, then roll each ball in the 1/4 cup of sugar. Place the cookies 2 inches apart on the prepared baking sheet.

  6. Bake: Bake in the preheated oven for 8-10 minutes, or until the edges are lightly golden. Allow the cookies to cool on the baking sheet for 2 minutes before transferring them to a wire rack to cool completely.

Pro Tips

  • Don’t Overbake: Sugar cookies should be soft, so remove them when the edges are just starting to turn golden.
  • Chill the Dough: If the dough feels too sticky, refrigerate it for 15-20 minutes before rolling into balls.

Secret Tips

  • Flavor Enhancer: Add a pinch of lemon zest to the dough for a subtle citrus flavor.
  • Colorful Fun: Roll the dough in colored sugar or sprinkles for a festive touch.

Serving Options

  • With Frosting: Top with your favorite frosting or royal icing for a sweet finish.
  • With Ice Cream: Serve as a base for an ice cream sandwich with your favorite flavor.
  • With Coffee: Enjoy these cookies with a hot cup of coffee or tea for a classic treat.

Health Benefits

  • Moderate Sugar: Sugar cookies are an indulgent treat, but you can reduce the sugar slightly for a lighter version.

Variations & Customization Options

  • Spiced Sugar Cookies: Add 1/2 teaspoon of cinnamon and a pinch of nutmeg for a warm, spiced flavor.
  • Gluten-Free: Use a gluten-free flour blend for those with gluten sensitivities.
  • Vegan: Replace the butter with a vegan butter alternative and use a flax egg.


These Classic Sugar Cookies are a delicious and versatile treat, perfect for any occasion. Whether you decorate them with icing or enjoy them plain, their soft and buttery texture will win you over. Get ready to bake and enjoy this simple yet delightful recipe!