Turning Your Wishes into Sweet Realities, One Homemade Treat at a Time. 🌟

Thursday, 18 July 2024

Lemon Lavender Shortbread Cookies

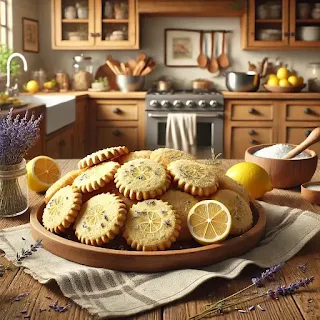
 Experience a burst of refreshing lemon and a hint of floral lavender in these delightful shortbread cookies. Perfect for tea time or as a sophisticated treat, these cookies are sure to impress with their unique flavor combination.

Origin Story: Lemon Lavender Shortbread Cookies

Lemon Lavender Shortbread Cookies are a delightful and elegant treat that combines the zesty brightness of lemon with the subtle floral notes of lavender. This unique recipe was inspired by a desire to create a sophisticated yet simple cookie that can be enjoyed on special occasions or as a refined everyday treat. These cookies are perfect for afternoon tea, bridal showers, or any event that calls for a touch of elegance.

Historical Roots

Shortbread cookies have their origins in Scotland, where they have been a beloved treat since at least the 16th century. Traditionally made with just three ingredients—flour, butter, and sugar—shortbread is known for its rich, buttery flavor and crumbly texture. The simplicity of shortbread has made it a versatile base for various flavor additions over the centuries.

Lavender, native to the Mediterranean region, has been used for culinary purposes for thousands of years. Its aromatic and floral qualities make it a popular addition to both sweet and savory dishes. The use of lavender in baking has gained popularity in recent years, especially in recipes that aim to provide a unique and sophisticated flavor profile.

Lemon has long been a staple in baking, celebrated for its bright and refreshing taste. The combination of lemon and lavender in a shortbread cookie creates a harmonious blend of flavors, offering a balance of sweet, tart, and floral notes.

Cultural Significance

Lemon Lavender Shortbread Cookies hold a special place in modern baking culture, reflecting the trend towards incorporating floral flavors into traditional recipes. These cookies are often associated with sophistication and elegance, making them a popular choice for high tea, garden parties, and other refined gatherings.

The appeal of these cookies lies in their delicate balance of flavors and their visual appeal. The addition of lavender not only enhances the taste but also adds a touch of color, making the cookies as beautiful as they are delicious.

Personal Connection

My journey with Lemon Lavender Shortbread Cookies began with a desire to create a unique and memorable treat for a special event. I wanted to combine the timeless appeal of shortbread with fresh and intriguing flavors. The idea of pairing lemon with lavender came from my love of gardening and using fresh herbs and citrus in my cooking.

Experimenting in the kitchen, I discovered that using culinary-grade lavender provided the best flavor without being overpowering. Adding lemon zest and a touch of lemon juice to the dough enhanced the brightness of the cookies, creating a perfect balance with the floral notes of lavender.

Recipe Evolution

Creating the perfect Lemon Lavender Shortbread Cookies involves a few key steps. Using high-quality butter is essential for achieving the rich and buttery texture that shortbread is known for. The dough should be mixed just until it comes together to avoid overworking the gluten in the flour, which can make the cookies tough.

The addition of lemon zest and a small amount of lemon juice to the dough provides a fresh and vibrant flavor. Culinary-grade lavender buds should be finely ground to distribute the flavor evenly throughout the dough without creating an overpowering taste.

Rolling the dough to an even thickness and chilling it before baking helps the cookies maintain their shape and ensures a tender texture. Baking the cookies until they are just beginning to turn golden around the edges results in a perfect shortbread texture.

Sharing the Tradition

Today, Lemon Lavender Shortbread Cookies are a favorite in my household, especially for special occasions and afternoon tea. They are the cookies I bake when I want to offer a sophisticated and delightful treat to friends and family. Each bite is a celebration of the creativity and joy that comes from combining classic and modern flavors.

Ingredients

  • 1 cup unsalted butter, softened
  • 1/2 cup granulated sugar
  • 1 tablespoon lemon zest
  • 1 teaspoon vanilla extract
  • 2 cups all-purpose flour
  • 2 tablespoons dried culinary lavender, finely chopped
  • 1/4 teaspoon salt

Recipe Duration

  • Preparation Time: 15 minutes
  • Chilling Time: 30 minutes
  • Cooking Time: 12-15 minutes
  • Yield: 24 cookies

Instructions

  1. Cream Butter and Sugar: In a large mixing bowl, cream together the softened butter and granulated sugar until light and fluffy.

  2. Add Flavorings: Mix in the lemon zest and vanilla extract until well combined.

  3. Combine Dry Ingredients: In a separate bowl, whisk together the all-purpose flour, finely chopped dried lavender, and salt.

  4. Form the Dough: Gradually add the dry ingredients to the butter mixture, mixing until the dough comes together.

  5. Chill the Dough: Shape the dough into a disk, wrap in plastic wrap, and refrigerate for at least 30 minutes.

  6. Preheat and Prepare: Preheat your oven to 325°F (165°C). Line a baking sheet with parchment paper.

  7. Roll Out and Cut Cookies: On a lightly floured surface, roll out the chilled dough to about 1/4 inch thick. Use a cookie cutter to cut out desired shapes and place them on the prepared baking sheet.

  8. Bake: Bake in the preheated oven for 12-15 minutes, or until the edges are lightly golden. Allow the cookies to cool on the baking sheet for 5 minutes, then transfer to a wire rack to cool completely.

Pro Tips

  • Fine Chopping: Ensure the lavender is finely chopped to evenly distribute the flavor.
  • Zest Wisely: Use a microplane zester for finely grated lemon zest.

Secret Tips

  • Extra Lemon Flavor: Add a few drops of lemon extract for an extra burst of lemon flavor.
  • Decorative Touch: Sprinkle a bit of granulated sugar on top before baking for a sweet, decorative touch.

Serving Options

  • With Tea: Perfectly paired with a cup of Earl Grey or chamomile tea.
  • Gift Idea: Package in a decorative tin for a beautiful homemade gift.
  • With Lemon Glaze: Drizzle with a simple lemon glaze made of powdered sugar and lemon juice.

Health Benefits

  • Lavender: Known for its calming properties and delightful aroma.
  • Lemon: Rich in vitamin C and adds a refreshing taste.

Variations & Customization Options

  • Herb Substitution: Substitute lavender with fresh rosemary or thyme for a different herbal twist.
  • Chocolate Dip: Dip half of each cookie in melted white or dark chocolate for an indulgent treat.
  • Nut Addition: Add finely chopped almonds or pistachios to the dough for added texture and flavor.


These Lemon Lavender Shortbread Cookies are a unique and sophisticated treat that will delight your taste buds and impress your guests. Enjoy the refreshing lemon flavor combined with the subtle floral notes of lavender in every bite. 

Happy baking!

Sam

Sweet Potato Chocolate Chip Muffins

Welcome to a delightful twist on a classic treat with our Sweet Potato Chocolate Chip Muffins! These muffins are the perfect blend of health and indulgence, bringing together the earthy sweetness of mashed sweet potatoes and the rich decadence of chocolate chips. Ideal for breakfast, a snack, or dessert, these muffins are moist, flavorful, and sure to satisfy your sweet tooth while providing a nutritious boost. Whether you’re a seasoned baker or a kitchen novice, this recipe is easy to follow and bound to become a household favorite. Enjoy baking and savoring these deliciously unique muffins!

Origin Story: Sweet Potato Chocolate Chip Muffins

Sweet Potato Chocolate Chip Muffins are a delightful fusion of wholesome sweet potatoes and rich chocolate chips, creating a unique and flavorful treat. This recipe was inspired by the desire to combine nutritious ingredients with indulgent flavors, making it a perfect choice for breakfast, snack, or dessert. The inspiration behind these muffins came from the need to create something new, healthy, and appealing, especially for children who may be picky eaters.

Historical Roots

The sweet potato, native to Central and South America, has been a staple food for thousands of years. It was domesticated over 5,000 years ago and later introduced to Europe and Asia by explorers in the 15th and 16th centuries. Sweet potatoes are rich in vitamins, minerals, and fiber, making them a popular ingredient in many cuisines worldwide.

The concept of combining sweet potatoes with chocolate is relatively modern, reflecting the growing trend of incorporating vegetables into sweet treats. This practice not only enhances the nutritional value of desserts but also introduces new and exciting flavor combinations. The idea of sweet potato muffins likely evolved from traditional sweet potato pie and bread recipes, adapting to the convenience and portability of muffins.

Cultural Significance

Sweet Potato Chocolate Chip Muffins hold a special place in contemporary baking, reflecting the trend towards healthier and more inventive recipes. They are particularly popular among health-conscious individuals and families looking to introduce more vegetables into their diet without sacrificing taste.

These muffins represent the fusion of comfort food with a modern twist, making them a favorite for various occasions. They are often enjoyed during the fall and winter months when sweet potatoes are in season, but their appeal extends year-round. The combination of sweet potatoes and chocolate chips creates a balance of sweetness and richness, making these muffins a versatile and beloved treat.

Personal Connection

My journey with Sweet Potato Chocolate Chip Muffins began with the challenge of finding nutritious yet delicious snacks for my family, particularly my young daughter. As a parent, I wanted to ensure she enjoyed eating vegetables and received essential nutrients. Sweet potatoes, with their natural sweetness and creamy texture, seemed like the perfect ingredient to incorporate into a muffin.

Experimenting in the kitchen, I discovered that combining mashed sweet potatoes with whole wheat flour and natural sweeteners created a moist and flavorful base for muffins. Adding chocolate chips provided a touch of indulgence that made the muffins irresistible to both children and adults.

Recipe Evolution

Creating the perfect Sweet Potato Chocolate Chip Muffins involves a few key steps. Using fresh, roasted sweet potatoes ensures the best flavor and texture. The sweet potatoes should be mashed until smooth and mixed with whole wheat flour, eggs, and a touch of honey or maple syrup for sweetness.

Incorporating spices like cinnamon and nutmeg enhances the natural sweetness of the sweet potatoes and adds warmth to the muffins. The addition of dark chocolate chips provides a delightful contrast, making each bite a blend of wholesome and indulgent flavors.

Baking the muffins at the right temperature ensures they rise well and develop a golden brown crust. Allowing them to cool slightly before serving helps the flavors to meld and the muffins to set perfectly.

Sharing the Tradition

Today, Sweet Potato Chocolate Chip Muffins are a favorite in my household, especially for breakfast and snack time. They are the muffins I bake when I want to offer a nutritious and delicious treat that appeals to everyone, from picky eaters to health enthusiasts. Each bite is a celebration of creativity in the kitchen and the joy of making nutritious food fun and appealing.

Ingredients

  • 1 1/2 cups all-purpose flour
  • 1 teaspoon baking powder
  • 1/2 teaspoon baking soda
  • 1/2 teaspoon salt
  • 1 teaspoon ground cinnamon
  • 1/2 teaspoon ground nutmeg
  • 1 cup mashed sweet potatoes (cooked and cooled)
  • 1/2 cup granulated sugar
  • 1/4 cup brown sugar
  • 1/3 cup vegetable oil
  • 2 large eggs
  • 1 teaspoon vanilla extract
  • 1/2 cup milk
  • 1 cup chocolate chips

Recipe Duration

  • Preparation Time: 15 minutes
  • Cooking Time: 20-25 minutes
  • Yield: 12 muffins

Instructions

  1. Preheat and Prepare Pan: Preheat your oven to 350°F (175°C). Grease a 12-cup muffin tin or line with paper liners.

  2. Mix Dry Ingredients: In a medium bowl, whisk together the flour, baking powder, baking soda, salt, cinnamon, and nutmeg.

  3. Combine Wet Ingredients: In a large bowl, beat the mashed sweet potatoes, granulated sugar, brown sugar, and vegetable oil until well combined. Add the eggs, one at a time, beating well after each addition. Stir in the vanilla extract and milk.

  4. Combine Wet and Dry Ingredients: Gradually add the dry ingredients to the wet ingredients, mixing until just combined. Fold in the chocolate chips.

  5. Fill Muffin Cups and Bake: Divide the batter evenly among the muffin cups, filling each about two-thirds full. Bake in the preheated oven for 20-25 minutes, or until a toothpick inserted into the center comes out clean.

  6. Cool and Serve: Allow the muffins to cool in the tin for 5 minutes, then transfer to a wire rack to cool completely.

Pro Tips

  • Mashed Sweet Potatoes: Ensure the sweet potatoes are well mashed for a smooth batter.
  • Don’t Overmix: Mix until just combined to keep the muffins light and fluffy.

Serving Options

  • With Butter: Serve warm with a pat of butter.
  • With Honey: Drizzle honey over the muffins for added sweetness.
  • With Coffee: Enjoy with a hot cup of coffee for a perfect pairing.

Health Benefits

  • Sweet Potatoes: Rich in vitamins A and C, and fiber.
  • Chocolate Chips: Adds a delightful indulgence to the muffins.

Variations & Customization Options

  • Nutty Delight: Add 1/2 cup of chopped pecans or walnuts for extra crunch.
  • Cranberry Twist: Fold in 1/2 cup of dried cranberries for a tart contrast.

These Sweet Potato Chocolate Chip Muffins are a unique and delicious treat that combines the best of sweet potatoes and chocolate. Perfect for any time of day, they are sure to become a favorite in your household. Enjoy the delightful flavors and happy baking!

Wednesday, 17 July 2024

Amazing Pumpkin Bread

Pumpkin Bread is a moist and flavorful treat that's perfect for the fall season. This delightful bread features warm spices and a rich pumpkin flavor, making it ideal for breakfast, a snack, or even dessert. Follow this simple recipe to create a delicious loaf that your family and friends will love.

Origin Story: Pumpkin Bread

Pumpkin Bread is a delicious and moist quick bread that captures the essence of autumn with its warm spices and rich pumpkin flavor. This comforting treat is perfect for breakfast, a snack, or dessert, offering a taste of fall in every bite. The inspiration for this recipe came from a desire to create a wholesome, homemade bread that can be enjoyed by family and friends, especially during the cooler months.

Historical Roots

Pumpkins are native to North America and have been a staple food for Native Americans for thousands of years. They used pumpkins in a variety of ways, including roasting, boiling, and baking them into breads. When European settlers arrived in America, they quickly adopted pumpkins into their diets and culinary traditions.

Pumpkin bread, as we know it today, evolved from traditional pumpkin-based recipes. The concept of quick breads, which are leavened with baking soda or baking powder instead of yeast, became popular in the 18th and 19th centuries. These breads were easier and faster to make than traditional yeast breads, making them a convenient option for home bakers.

The modern pumpkin bread recipe likely emerged in the early 20th century, as canned pumpkin became widely available. This convenience allowed bakers to enjoy pumpkin-flavored treats year-round, not just during the fall harvest season. The addition of warm spices like cinnamon, nutmeg, and cloves further enhanced the flavor of the bread, making it a beloved autumnal treat.

Cultural Significance

Pumpkin bread holds a special place in American baking culture, particularly during the fall and winter months. It is often associated with the holiday season, from Thanksgiving to Christmas, and is a popular choice for bake sales, potlucks, and family gatherings. The rich, spiced flavor of pumpkin bread evokes feelings of warmth and comfort, making it a favorite for cozy moments at home.

In addition to its popularity in the United States, pumpkin bread has gained recognition internationally as part of the broader trend of incorporating pumpkin into various sweet and savory dishes. Its versatility allows for endless variations, from adding nuts and dried fruits to incorporating different spices and flavorings.

Personal Connection

My journey with pumpkin bread began with a desire to recreate the comforting flavors of my childhood. Growing up, pumpkin bread was a staple in our household during the fall. The smell of it baking in the oven brought back memories of family gatherings and festive celebrations.

Inspired by these memories, I set out to create my own version of pumpkin bread. Experimenting with different recipes, I found that using fresh, homemade pumpkin puree added a depth of flavor that canned pumpkin couldn't match. Incorporating a blend of warm spices and a touch of vanilla extract further enhanced the taste, making the bread irresistibly delicious.

Recipe Evolution

Creating the perfect pumpkin bread involves a few key steps. Using fresh or high-quality canned pumpkin puree provides the best flavor and moisture. Combining a blend of all-purpose and whole wheat flour adds a wholesome touch while maintaining a tender crumb.

The use of warm spices like cinnamon, nutmeg, cloves, and ginger is essential for achieving the classic pumpkin bread flavor. Adding ingredients like chopped nuts, dried cranberries, or chocolate chips can provide additional texture and flavor.

Baking the bread at the right temperature ensures it cooks evenly and develops a beautiful golden crust. Allowing it to cool completely before slicing helps the flavors to meld and makes the bread easier to cut.

Sharing the Tradition

Today, pumpkin bread is a favorite in my household, especially during the fall and winter months. It is the bread I bake when I want to share a taste of home and the comforting flavors of the season with friends and family. Each slice is a reminder of the rich culinary heritage and the joy of baking from scratch.

Ingredients

  • 1 3/4 cups all-purpose flour
  • 1 teaspoon baking soda
  • 1/2 teaspoon baking powder
  • 1/2 teaspoon salt
  • 1 teaspoon ground cinnamon
  • 1/2 teaspoon ground nutmeg
  • 1/2 teaspoon ground ginger
  • 1/4 teaspoon ground cloves
  • 1 1/2 cups granulated sugar
  • 1/2 cup vegetable oil
  • 2 large eggs
  • 1 cup canned pumpkin puree
  • 1/4 cup water
  • 1 teaspoon vanilla extract
  • 1/2 cup chopped nuts (optional)
  • 1/2 cup raisins or chocolate chips (optional)

Recipe Duration

  • Preparation Time: 15 minutes
  • Cooking Time: 60-70 minutes
  • Yield: 1 loaf (about 10 servings)

Instructions

  1. Preheat and Prepare Pan: Preheat your oven to 350°F (175°C). Grease and flour a 9x5-inch loaf pan.

  2. Mix Dry Ingredients: In a medium bowl, whisk together the flour, baking soda, baking powder, salt, cinnamon, nutmeg, ginger, and cloves.

  3. Combine Wet Ingredients: In a large bowl, beat the sugar and vegetable oil until well combined. Add the eggs, one at a time, beating well after each addition. Stir in the pumpkin puree, water, and vanilla extract.

  4. Combine Wet and Dry Ingredients: Gradually add the dry ingredients to the wet ingredients, mixing until just combined. Fold in the nuts and raisins or chocolate chips, if using.

  5. Fill Pan and Bake: Pour the batter into the prepared loaf pan and spread it evenly. Bake in the preheated oven for 60-70 minutes, or until a toothpick inserted into the center comes out clean.

  6. Cool and Serve: Allow the bread to cool in the pan for 10 minutes, then transfer to a wire rack to cool completely before slicing.

Pro Tips

  • Don’t Overmix: Mix until just combined to keep the bread tender.
  • Room Temperature Eggs: Use room temperature eggs for better incorporation.
  • Extra Moisture: Add a tablespoon of sour cream for extra moisture.

Secret Tips

  • Flavor Boost: Add a teaspoon of orange zest for a citrusy twist.
  • Health Boost: Substitute half the flour with whole wheat flour for added nutrition.

Serving Options

  • With Butter: Serve warm with a pat of butter.
  • With Cream Cheese: Spread with cream cheese for a delicious combination.
  • With Honey: Drizzle honey over the slices for added sweetness.

Health Benefits

  • Pumpkin: Rich in vitamins A and C, and fiber.
  • Spices: Contain antioxidants and have anti-inflammatory properties.

Variations & Customization Options

  • Nut-Free: Omit the nuts if you have a nut allergy.
  • Gluten-Free: Use a gluten-free flour blend.
  • Vegan: Substitute eggs with flax eggs and use a dairy-free milk.


This Pumpkin Bread is a delightful and versatile treat that’s perfect for the fall season. Easy to make and packed with flavor, it’s sure to become a favorite in your household. Enjoy the warm, spicy goodness of this classic recipe!

Happy Baking!

Sam

Wednesday, 10 July 2024

Classic Pecan Pie

 Pecan Pie is a classic dessert that embodies the flavors of the holiday season. This rich and decadent pie features a buttery crust filled with a gooey, sweet filling and crunchy pecans. Perfect for family gatherings or special occasions, this pie is sure to impress your guests.

Origin Story: Pecan Pie

Pecan Pie is a quintessential American dessert, celebrated for its rich, gooey filling and crunchy pecan topping. This pie has become a staple of Southern cuisine and is especially popular during holidays such as Thanksgiving and Christmas.

Historical Roots

Pecan trees are native to North America, particularly the southern United States, where they have been cultivated for centuries. Native Americans were the first to use pecans in their cooking, and the nut's popularity spread as European settlers began to incorporate it into their recipes.

The exact origin of pecan pie is unclear, but it likely evolved from traditional sugar pies that were common in the American South. These pies were made with simple ingredients such as sugar, eggs, and butter. The first known pecan pie recipes started appearing in Texas cookbooks in the late 19th century.

The widespread popularity of pecan pie is often attributed to the promotion of Karo syrup in the early 20th century. The company published recipes for pecan pie featuring their corn syrup, which quickly became a household favorite. The use of corn syrup is a defining characteristic of the modern pecan pie, providing its signature sweet and gooey filling.

Cultural Significance

Pecan pie holds a special place in American culinary traditions, particularly in the South. It is often associated with family gatherings, celebrations, and holiday feasts. The pie's rich flavor and luxurious texture make it a beloved dessert for special occasions.

In addition to its popularity in the United States, pecan pie has gained recognition internationally, often seen as a symbol of American cuisine. The use of pecans, a distinctly American nut, and the pie's unique flavor profile contribute to its cultural significance.

Personal Connection

My connection to pecan pie began with my grandmother's recipe, a cherished family tradition passed down through generations. Her pecan pie was always the highlight of our Thanksgiving table, and the smell of it baking in the oven brought back memories of family gatherings and holiday cheer.

Inspired by these memories, I set out to perfect my own version of pecan pie, experimenting with different ratios of ingredients to achieve the perfect balance of sweetness and nuttiness. The key was to create a filling that was rich and gooey without being overly sweet, allowing the natural flavor of the pecans to shine through.

Recipe Evolution

Creating the perfect pecan pie involves several key steps. The crust should be tender and flaky, providing a sturdy base for the rich filling. Using a combination of butter and shortening in the crust can achieve this texture.

The filling typically includes corn syrup, brown sugar, eggs, butter, and vanilla extract. Some variations add bourbon or chocolate for an extra layer of flavor. Toasting the pecans before adding them to the filling enhances their natural nuttiness and adds depth to the pie.

Baking the pie at the right temperature ensures that the filling sets properly while maintaining a gooey texture. Allowing the pie to cool completely before slicing helps it hold its shape and makes it easier to serve.

Sharing the Tradition

Today, pecan pie is a favorite dessert in my household, especially during the holiday season. It is the pie I bake when I want to share a taste of tradition and warmth with friends and family. Each slice is a reminder of the rich culinary heritage and the joy of sharing delicious food with loved ones.

Ingredients

✅For the Crust:

  • 1 1/4 cups all-purpose flour
  • 1/2 teaspoon salt
  • 1/2 cup cold unsalted butter, cubed
  • 1/4 cup ice water

For the Filling:

  • 1 cup light corn syrup
  • 1 cup granulated sugar
  • 1/2 cup packed brown sugar
  • 1/4 cup unsalted butter, melted
  • 3 large eggs
  • 1 teaspoon vanilla extract
  • 1/4 teaspoon salt
  • 1 1/2 cups pecan halves

Recipe Duration

  • Preparation Time: 20 minutes
  • Cooking Time: 50-55 minutes
  • Chilling Time: 1 hour (for the crust)
  • Yield: 8 servings

Instructions

  1. Prepare the Crust:

    • In a large bowl, mix the flour and salt. Cut in the cold butter until the mixture resembles coarse crumbs.
    • Gradually add ice water, one tablespoon at a time, until the dough comes together.
    • Form the dough into a disk, wrap in plastic wrap, and refrigerate for at least 1 hour.
    • Preheat your oven to 350°F (175°C).
  2. Roll Out the Dough:

    • On a lightly floured surface, roll out the dough to fit a 9-inch pie dish.
    • Transfer the dough to the pie dish and trim the edges. Crimp the edges if desired.
  3. Prepare the Filling:

    • In a large bowl, whisk together the corn syrup, granulated sugar, brown sugar, melted butter, eggs, vanilla extract, and salt until well combined.
    • Stir in the pecan halves.
  4. Assemble the Pie:

    • Pour the filling into the prepared crust.
    • Arrange additional pecan halves on top if desired for decoration.
  5. Bake the Pie:

    • Bake in the preheated oven for 50-55 minutes, or until the filling is set and the crust is golden brown.
    • Allow the pie to cool completely before serving.

Pro Tips

  • Chill the Dough: Ensure the dough is well chilled before rolling to prevent shrinking during baking.
  • Prevent Overbrowning: Cover the edges of the crust with foil if they begin to brown too quickly.
  • Test for Doneness: The filling should be set and slightly firm when touched.

Secret Tips

  • Flavor Boost: Add a tablespoon of bourbon to the filling for an extra depth of flavor.
  • Nut Variations: Mix in some chopped walnuts or almonds for a unique twist.

Serving Options

  • With Whipped Cream: Serve with a dollop of freshly whipped cream.
  • With Ice Cream: Pair with a scoop of vanilla ice cream for a classic combination.
  • With Coffee: Enjoy with a hot cup of coffee or tea.

Health Benefits

  • Pecans: Rich in healthy fats, antioxidants, and vitamins.
  • Moderate Sugar: Using both granulated and brown sugar for a balanced sweetness.

Variations & Customization Options

  • Chocolate Pecan Pie: Add 1/2 cup of chocolate chips to the filling.
  • Maple Pecan Pie: Substitute corn syrup with maple syrup for a different flavor.
  • Vegan Pecan Pie: Use a vegan butter substitute and flax eggs in the filling.


This Classic Pecan Pie is a delicious and timeless dessert that is sure to be a hit at any gathering. With its rich filling and buttery crust, it's the perfect treat to end a meal. 

Happy baking!

Sam

Wednesday, 3 July 2024

Adventurous Salted Caramel Brownies

 These Salted Caramel Brownies are a decadent and adventurous twist on a classic treat. Combining rich chocolate with gooey caramel and a hint of sea salt, these brownies are the perfect balance of sweet and salty. Ideal for any occasion, they are sure to satisfy your sweet tooth and impress your friends and family.

Origin Story: Salted Caramel Brownies

Salted Caramel Brownies are a decadent fusion of rich, fudgy chocolate and smooth, salted caramel, creating a perfect balance of sweet and salty flavors. This indulgent treat was inspired by the desire to elevate the classic brownie with an additional layer of luxurious caramel, offering a sophisticated twist on a beloved dessert.

Historical Roots

The history of brownies dates back to the late 19th century in the United States. The first recorded brownie recipes appeared in the early 20th century, with the Palmer House Hotel in Chicago often credited for popularizing the dessert with their version made for the 1893 World’s Columbian Exposition.

Caramel, on the other hand, has a much older history, originating in the Arab world where sugarcane was first cultivated. By the 17th century, caramel had spread to Europe and was commonly used in confectionery. The combination of caramel and salt, while seeming modern, has roots in traditional French cooking where salted butter caramels from Brittany became famous.

Cultural Significance

Salted Caramel Brownies hold a special place in contemporary dessert culture, representing the modern trend of combining classic flavors with a touch of gourmet sophistication. The contrast of the rich chocolate brownie with the smooth, salted caramel creates a multi-dimensional flavor experience that appeals to a wide range of tastes.

The appeal of these brownies lies in their ability to offer both comfort and indulgence. They are often featured in upscale bakeries and gourmet dessert menus, yet they remain accessible enough for home bakers to create and enjoy. This versatility has made Salted Caramel Brownies a favorite for special occasions, casual gatherings, and everything in between.

Personal Connection

My journey with Salted Caramel Brownies began with a desire to create an unforgettable dessert for a family celebration. I wanted something that combined the familiar comfort of brownies with an elegant twist. The idea of adding a layer of salted caramel seemed like the perfect way to achieve this.

Experimenting in the kitchen, I found that making a homemade caramel sauce with a hint of sea salt provided the best flavor. The challenge was to create a brownie that was both rich and fudgy, capable of holding up to the caramel layer without becoming overly sweet.

Recipe Evolution

Creating the perfect Salted Caramel Brownies involves several key steps. The brownie base should be dense and fudgy, achieved by using high-quality dark chocolate and a combination of granulated and brown sugar. Adding a touch of espresso powder enhances the chocolate flavor without overpowering the caramel.

The salted caramel layer is made by cooking sugar until it reaches a deep amber color, then adding butter, cream, and sea salt. This mixture is poured over the partially baked brownie base and allowed to set before adding the final layer of brownie batter.

Baking the brownies until they are just set ensures a moist, fudgy texture. Allowing them to cool completely before cutting helps the caramel layer to firm up, making the brownies easier to slice and serve.

Sharing the Tradition

Today, Salted Caramel Brownies are a favorite in my household, especially for special occasions and gatherings. They are the brownies I bake when I want to impress guests with a luxurious and delicious dessert. Each bite is a celebration of the rich history and timeless appeal of combining chocolate and caramel.

Ingredients

✅For the Brownies:

  • 1 cup unsalted butter
  • 8 oz semi-sweet chocolate, chopped
  • 1 1/2 cups granulated sugar
  • 1/2 cup brown sugar, packed
  • 4 large eggs
  • 1 teaspoon vanilla extract
  • 1 cup all-purpose flour
  • 1/2 cup unsweetened cocoa powder
  • 1/2 teaspoon salt

For the Salted Caramel:

  • 1 cup granulated sugar
  • 6 tablespoons unsalted butter, cubed
  • 1/2 cup heavy cream
  • 1 teaspoon sea salt

Recipe Duration

  • Preparation: 20 minutes
  • Cooking: 35-40 minutes
  • Yield: 16 brownies

Instructions

  1. Preheat and Prepare Pan: Preheat your oven to 350°F (175°C). Grease and line a 9x9-inch baking pan with parchment paper.

  2. Make the Brownies: In a medium saucepan, melt the butter and chopped chocolate over low heat, stirring constantly until smooth. Remove from heat and let cool slightly. In a large bowl, whisk together the granulated sugar, brown sugar, eggs, and vanilla extract until combined. Gradually add the melted chocolate mixture, stirring until smooth. Sift in the flour, cocoa powder, and salt, and fold until just combined. Pour half of the brownie batter into the prepared pan and spread evenly.

  3. Prepare the Salted Caramel: In a medium saucepan, heat the granulated sugar over medium heat, stirring constantly until it melts into a thick amber-colored liquid. Add the cubed butter and stir until melted and combined. Slowly pour in the heavy cream while stirring continuously. Let the mixture boil for 1 minute, then remove from heat and stir in the sea salt. Allow to cool slightly.

  4. Assemble the Brownies: Drizzle half of the salted caramel over the brownie batter in the pan. Pour the remaining brownie batter on top and spread evenly. Drizzle the remaining salted caramel over the top and use a knife to swirl it into the batter.

  5. Bake: Bake in the preheated oven for 35-40 minutes, or until a toothpick inserted into the center comes out with a few moist crumbs. Allow the brownies to cool completely in the pan before cutting into squares.

Pro Tips

  • Don’t Overbake: Check for doneness with a toothpick; it should come out with a few moist crumbs.
  • Room Temperature Eggs: Use room temperature eggs for a smoother batter.
  • Swirling Caramel: Use a knife to create a beautiful swirl pattern with the caramel.

Secret Tips

  • Extra Chocolate: Add 1/2 cup of chocolate chips to the brownie batter for extra gooeyness.
  • Flavor Boost: Add a teaspoon of instant espresso powder to the batter to enhance the chocolate flavor.

Serving Options

  • With Ice Cream: Serve warm brownies with a scoop of vanilla ice cream.
  • With Whipped Cream: Top with a dollop of whipped cream for added indulgence.
  • With Coffee: Enjoy with a hot cup of coffee for a perfect pairing.

Health Benefits

  • Dark Chocolate: Contains antioxidants and can improve heart health.
  • Moderate Sugar: Use dark chocolate with a higher cocoa content for a less sweet treat.

Variations & Customization Options

  • Nutty Caramel Brownies: Add 1/2 cup of chopped nuts to the caramel layer.
  • Gluten-Free: Use a gluten-free flour blend for the brownie batter.
  • Vegan: Substitute butter with vegan butter, eggs with flax eggs, and heavy cream with coconut cream.


These Adventurous Salted Caramel Brownies are a luxurious and flavorful dessert that combines the richness of chocolate with the decadence of salted caramel. Perfect for any gathering or a special treat at home, they are sure to become a favorite. 

Happy baking!

Sam

Cozy Apple Crumble Delight Bars

Apple Crumble Bars are a delightful treat that combines the comforting flavors of apple pie with the convenience of a bar. These bars are perfect for an adventurous twist on a classic dessert, featuring a rich apple filling and a crumbly, buttery topping. Perfect for snacks, desserts, or even breakfast!

Origin Story: Apple Crumble Bars

Apple Crumble Bars are a delightful fusion of the classic apple pie and the beloved crumble dessert, transformed into an easy-to-eat bar form. This unique recipe was inspired by a desire to create an adventurous yet comforting treat that combines the rich flavors of apples and cinnamon with a buttery crumble topping. These bars are perfect for any occasion, from family gatherings to casual snacks.

Historical Roots

The origins of apple desserts trace back to ancient times when apples were first cultivated in Central Asia. The cultivation and consumption of apples spread to Europe and later to North America, where apple pies and crumbles became popular. Apple pie, often considered an American classic, was brought to America by English settlers and has been a staple dessert for centuries.

Crumble, also known as crisp, is a British dessert that gained popularity during World War II due to rationing. The simple mixture of flour, butter, and sugar made it an economical and delicious way to use up fruits. Combining these two beloved desserts into a bar form creates a portable and versatile treat that maintains the flavors and textures of both.

Cultural Significance

Apple Crumble Bars hold a special place in contemporary baking, reflecting a trend towards combining traditional flavors with modern, convenient forms. They are a popular choice for potlucks, picnics, and holiday gatherings, embodying the comforting essence of homemade apple desserts. The versatility of these bars allows for endless variations, making them a favorite among bakers and dessert lovers alike.

The appeal of Apple Crumble Bars lies in their ability to offer the familiar taste of apple pie and crumble in a more accessible and easy-to-serve format. This adaptation makes them suitable for a wide range of occasions, from breakfast to dessert.

Personal Connection

My journey with Apple Crumble Bars began with a desire to create a new and exciting dessert that would capture the essence of my favorite apple desserts while being easy to share and enjoy. The idea of combining the rich, spiced apple filling with a buttery crumble topping in a bar form was both innovative and nostalgic.

Experimenting in the kitchen, I found that using a combination of tart and sweet apples provided the best flavor balance. Adding a touch of lemon juice to the apple filling enhanced the natural sweetness and provided a fresh, tangy contrast to the buttery crumble. The addition of oats to the crumble topping added texture and a wholesome touch.

Recipe Evolution

Creating the perfect Apple Crumble Bars involves several key steps. The crust and crumble topping are made from the same mixture, which simplifies the preparation process. Using cold butter and cutting it into the flour and oats mixture creates a crumbly texture that is both tender and crisp.

The apple filling is made by tossing sliced apples with sugar, cinnamon, nutmeg, and a bit of lemon juice. This mixture is spread over the crust and then topped with the remaining crumble mixture. Baking the bars until the top is golden and the filling is bubbly ensures that the flavors meld together beautifully.

Sharing the Tradition

Today, Apple Crumble Bars are a favorite in my household, especially during the fall when apples are in season. They are the bars I bake when I want to share a taste of comfort and adventure with friends and family. Each bite is a celebration of the rich history and timeless appeal of apple desserts.

Ingredients

✅For the Crust and Crumble Topping:

  • 2 cups all-purpose flour
  • 1/2 cup granulated sugar
  • 1/2 cup brown sugar, packed
  • 1 teaspoon baking powder
  • 1/2 teaspoon salt
  • 1/4 teaspoon ground cinnamon
  • 1 cup unsalted butter, cold and cubed
  • 1 large egg

For the Apple Filling:

  • 4 cups apples, peeled, cored, and diced
  • 2 tablespoons lemon juice
  • 1/2 cup granulated sugar
  • 1/4 cup brown sugar, packed
  • 1 teaspoon ground cinnamon
  • 1/4 teaspoon ground nutmeg
  • 2 tablespoons all-purpose flour

Recipe Duration

  • Preparation: 20 minutes
  • Cooking: 45-50 minutes
  • Yield: 16 bars

Instructions

  1. Preheat and Prepare Pan: Preheat your oven to 350°F (175°C). Grease a 9x13-inch baking pan or line it with parchment paper.

  2. Make the Crust and Crumble Topping: In a large bowl, whisk together the flour, granulated sugar, brown sugar, baking powder, salt, and ground cinnamon. Cut in the cold, cubed butter using a pastry cutter or two forks until the mixture resembles coarse crumbs. Add the egg and mix until combined. Press half of the mixture firmly into the bottom of the prepared pan to form the crust.

  3. Prepare the Apple Filling: In a medium bowl, toss the diced apples with lemon juice. Add the granulated sugar, brown sugar, ground cinnamon, ground nutmeg, and flour. Mix until the apples are evenly coated.

  4. Assemble the Bars: Spread the apple mixture evenly over the crust. Sprinkle the remaining crumb mixture over the apples, pressing lightly.

  5. Bake: Bake in the preheated oven for 45-50 minutes, or until the top is golden brown and the apples are tender. Allow the bars to cool completely in the pan before cutting into squares.

Pro Tips

  • Apples: Use a mix of tart and sweet apples for a balanced flavor.
  • Cold Butter: Ensure the butter is cold to achieve a flaky crust.
  • Extra Crunch: Add chopped nuts to the crumble topping for added texture.

Secret Tips

  • Spice It Up: Add a pinch of ground cloves or allspice for extra warmth.
  • Caramel Drizzle: Drizzle caramel sauce over the cooled bars for an extra layer of flavor.

Serving Options

  • With Ice Cream: Serve warm bars with a scoop of vanilla ice cream.
  • With Whipped Cream: Top with a dollop of whipped cream for added indulgence.
  • With Coffee: Enjoy as a delightful treat with a hot cup of coffee or tea.

Health Benefits

  • Apples: Rich in fiber and vitamins.
  • Moderate Sugar: Controlled sugar content for a balanced treat.

Variations & Customization Options

  • Berry Apple Bars: Mix in 1 cup of fresh or frozen berries with the apple filling.
  • Gluten-Free: Use a gluten-free flour blend for the crust and topping.
  • Vegan: Substitute butter with a vegan butter alternative and use a flax egg.


These Adventurous Unique Apple Crumble Bars are a delicious and versatile treat that combines the best of apple pie and crumble in a convenient bar form. Perfect for any occasion, they are sure to become a favorite. 

Happy baking!

Sam