Turning Your Wishes into Sweet Realities, One Homemade Treat at a Time. 🌟

Wednesday, 31 January 2024

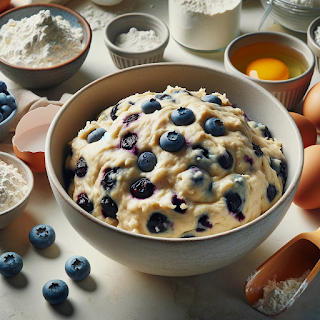
Homemade with Love: Blueberry Muffins Recipe

Embrace the warmth of your kitchen and the joy of sharing with our Homemade with Love Blueberry Muffins. These little delights are a testament to the simple pleasures of baking. With plump, juicy blueberries nestled in tender, buttery muffins, every bite is a hug for your taste buds. Whether enjoyed fresh out of the oven or saved for a delightful morning treat, our Blueberry Muffins are made with love.

Origin Story: Blueberry Muffins

Blueberry muffins are a classic breakfast staple, celebrated for their moist texture, sweet flavor, and burst of juicy blueberries in every bite. This beloved treat has a rich history that reflects the evolution of baking in America and the incorporation of native ingredients.

Historical Roots

Blueberries are native to North America, and indigenous peoples have been consuming them for thousands of years, both fresh and dried, for their nutritional benefits. European settlers quickly adopted blueberries into their diets, incorporating them into various dishes.

The muffin, as we know it today, originated in England but took on a new form in America. American muffins, also known as quick breads, became popular in the 19th century. Unlike their English counterparts, which are yeast-based and cooked on a griddle, American muffins are made with baking powder or soda and baked in an oven. This style of baking led to the creation of the blueberry muffin, a natural combination given the abundance of wild blueberries in New England.

Cultural Significance

Blueberry muffins hold a special place in American culture, particularly in New England where wild blueberries are plentiful. They are a common feature at breakfast tables, coffee shops, and bakeries across the country. Their popularity extends beyond the United States, as they are enjoyed worldwide for their delicious taste and simple preparation.

The use of blueberries, known for their antioxidants and health benefits, also contributes to the appeal of blueberry muffins as a relatively healthy treat. They are often associated with home baking, evoking a sense of nostalgia and comfort.

Personal Connection

My connection to blueberry muffins began with a summer trip to Maine, where wild blueberries grow in abundance. Picking fresh blueberries and baking them into muffins became a cherished activity. The fresh, sweet-tart flavor of wild blueberries made those muffins unforgettable and inspired me to create my own version at home.

Experimenting with different recipes, I found that using buttermilk added a slight tanginess that complemented the sweetness of the blueberries. Incorporating a streusel topping provided a delightful crunch, adding an extra layer of texture and flavor.

Recipe Evolution

Creating the perfect blueberry muffins involves a few key steps. Fresh or frozen blueberries can be used, but fresh is preferred when they are in season. Coating the blueberries in a bit of flour before folding them into the batter helps prevent them from sinking to the bottom.

The batter should be mixed gently to avoid overworking the flour, which can result in tough muffins. A combination of all-purpose flour and baking powder ensures a light and airy texture. Adding lemon zest or a touch of vanilla extract can enhance the flavor.

For a special touch, a streusel topping made from butter, sugar, and flour can be sprinkled on top before baking, creating a sweet, crunchy layer that contrasts beautifully with the soft muffins.

Sharing the Tradition

Today, blueberry muffins are a favorite in my household, especially during the summer when fresh blueberries are in season. They are the muffins I bake when I want to offer a taste of summer and a bit of comfort to friends and family. Each bite is a celebration of the simple pleasures of home baking and the deliciousness of fresh, seasonal ingredients.

Ingredients:

2 cups all-purpose flour
1 cup granulated sugar
1/2 cup unsalted butter, melted
2 large eggs
1 cup milk
1 1/2 cups fresh blueberries
1 1/2 teaspoons baking powder
1/2 teaspoon baking soda
1/2 teaspoon salt
1 teaspoon pure vanilla extract
Zest of 1 lemon (optional)

Preparation Time: 15 minutes
Baking Time: 18-20 minutes
Yield: This recipe yields approximately 12 delicious Blueberry Muffins.

Instructions:

  1. Preheat your oven to 375°F (190°C). Line a muffin tin with paper liners or grease the cups.
  2. In a mixing bowl, whisk together the all-purpose flour, baking powder, baking soda, and salt. If using, add the lemon zest for a citrusy twist.
  3. In another bowl, beat the melted unsalted butter and granulated sugar until well combined.
  4. Add the eggs one at a time, beating well after each addition. Stir in the pure vanilla extract.
  5. Gradually add the dry mixture to the wet mixture, alternating with the milk. Begin and end with the dry mixture. Mix until just combined.
  6. Gently fold in the fresh blueberries, being careful not to overmix.
  7. Spoon the muffin batter into the prepared muffin cups, filling each about two-thirds full.
  8. Bake in the preheated oven for 18-20 minutes or until the muffins are golden and a toothpick inserted into the center comes out clean.
  9. Allow the muffins to cool in the tin for a few minutes, then transfer them to a wire rack to cool completely.

Pro Tips

  • Room Temperature Ingredients: Ensure your eggs, milk, and butter are at room temperature for smoother blending.
  • Gentle Blueberry Folding: When adding blueberries, fold them into the batter gently to avoid smashing them and to distribute them evenly.

Secret Tips

Lemon Zest Enhancement: If you love a hint of citrus, add lemon zest for a refreshing twist to your muffins.


As you savor these Homemade Blueberry Muffins, may you feel the love and care that went into each one. Share them with loved ones, enjoy them as a snack, or make them part of your breakfast routine. Baking with love truly makes life sweeter."


Enjoy creating and savoring this heartwarming Blueberry Muffins recipe!
Sam 

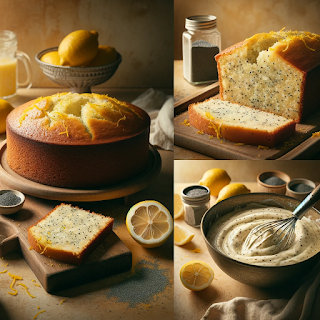
Irresistible Lemon Poppy Seed Cake Recipe

Prepare to be delighted by the zesty and enchanting flavors of our Lemon Poppy Seed Cake! This homemade treat is a burst of sunshine on your taste buds, combining the tangy goodness of lemons with the delightful crunch of poppy seeds. Every bite is a journey into citrusy bliss, making it the perfect dessert for any occasion.

Origin Story: Lemon Poppy Seed Cake

The Lemon Poppy Seed Cake is a timeless dessert that balances the bright, zesty flavor of lemons with the subtle crunch of poppy seeds. This cake has a rich history that spans continents and centuries, making it a beloved treat in many cultures.

Historical Roots

The history of poppy seeds dates back to ancient civilizations. They were cultivated by the Sumerians as early as 3400 BC and were widely used in the cuisines of the ancient Egyptians, Greeks, and Romans. Poppy seeds were valued not only for their flavor but also for their supposed medicinal properties.

Lemons, on the other hand, are believed to have originated in Northeast India or China and were brought to Europe by Arab traders in the Middle Ages. The combination of lemon and poppy seeds in baking likely began in Europe, where both ingredients were popular. The bright citrus flavor of lemons provided a perfect contrast to the nutty taste of poppy seeds, creating a delightful and refreshing dessert.

Cultural Significance

Lemon poppy seed cakes and breads have become staples in many countries. In Europe, particularly in Germany and Austria, poppy seeds are a common ingredient in pastries and cakes. In the United States, lemon poppy seed cakes gained popularity in the mid-20th century, often enjoyed as a breakfast treat or a light dessert.

The cake’s appeal lies in its versatility and the simple yet sophisticated flavor combination. It’s a favorite for afternoon tea, brunches, and festive occasions. The addition of a lemon glaze or cream cheese frosting can elevate it from a humble cake to an elegant dessert.

Personal Connection

My journey with lemon poppy seed cake began during a summer vacation in a quaint village in the south of France. The local bakery was renowned for its lemon poppy seed cake, and one bite was enough to make me fall in love with it. The cake was moist and tender, bursting with the fresh flavor of lemons and the delightful texture of poppy seeds.

Inspired by this experience, I set out to recreate the cake in my own kitchen. The key was to find the perfect balance of tartness from the lemons and the right amount of poppy seeds to add texture without overpowering the cake. I experimented with different types of lemon juice and zest, as well as various ratios of poppy seeds, until I achieved a recipe that captured the essence of that unforgettable cake.

Recipe Evolution

Creating the perfect lemon poppy seed cake involved several tweaks and refinements. I discovered that using both lemon juice and zest in the batter added a more intense lemon flavor. Incorporating yogurt or sour cream into the batter helped keep the cake moist and tender. For an extra burst of flavor, I sometimes add a lemon syrup that soaks into the warm cake, enhancing its citrusy goodness.

To finish the cake, I often drizzle a simple lemon glaze over the top. The glaze adds a touch of sweetness and a beautiful shine, making the cake as visually appealing as it is delicious. For special occasions, I might top it with a cream cheese frosting, which pairs wonderfully with the tangy lemon flavor.

Sharing the Tradition

Today, my lemon poppy seed cake is a favorite among friends and family. It’s the cake I bake for spring and summer gatherings, and it never fails to bring smiles and compliments. Each slice is a reminder of that summer in France and the joy of discovering new flavors.

Ingredients
:

✅For the Cake:

2 cups all-purpose flour
2 tablespoons poppy seeds
1 1/2 teaspoons baking powder
1/2 teaspoon baking soda
1/2 teaspoon salt
1 cup (2 sticks) unsalted butter, softened
1 1/2 cups granulated sugar
3 large eggs
Zest of 2 lemons
1/4 cup fresh lemon juice
1 teaspoon pure vanilla extract
1 cup sour cream

✅For the Lemon Glaze:

1 cup powdered sugar
2-3 tablespoons fresh lemon juice
Zest of 1 lemon

Preparation Time: 15 minutes
Baking Time: 50-60 minutes
Yield: This recipe yields one delicious Lemon Poppy Seed Cake.

Instructions:

  1. Preheat your oven to 350°F (175°C). Grease and flour a 9x5-inch loaf pan.
  2. In a mixing bowl, whisk together the all-purpose flour, poppy seeds, baking powder, baking soda, and salt. Set aside.
  3. In a separate bowl, cream together the softened unsalted butter and granulated sugar until light and fluffy.
  4. Beat in the eggs one at a time, ensuring each is fully incorporated.
  5. Add the lemon zest, fresh lemon juice, and pure vanilla extract to the butter mixture. Mix until well combined.
  6. Gradually add the dry mixture to the wet mixture, alternating with the sour cream. Begin and end with the dry mixture. Mix until just combined.
  7. Pour the batter into the prepared loaf pan and spread it evenly.
  8. Bake in the preheated oven for 50-60 minutes or until a toothpick inserted into the center comes out clean.
  9. While the cake is baking, prepare the lemon glaze. In a small bowl, whisk together the powdered sugar, fresh lemon juice, and lemon zest until smooth.
  10. Once the cake is done, remove it from the oven and let it cool in the pan for about 10 minutes. Then, transfer it to a wire rack.
  11. While the cake is still warm, drizzle the lemon glaze over the top. Allow the glaze to set before slicing and serving.

Pro Tips

  1. Fresh Lemons: Use fresh lemons for the best flavor. Their zest and juice infuse the cake with bright citrus notes.
  2. Room Temperature Ingredients: Ensure your butter, eggs, and sour cream are at room temperature for smoother blending.
  3. Poppy Seed Freshness: Check the expiration date on your poppy seeds to ensure they are fresh and flavorful.

Secret Tips

  1. Zest Technique: When zesting lemons, use a fine grater or zester, being careful not to include the bitter white pith.
  2. Even Glazing: For a beautiful glaze, drizzle it over the cake while it's still warm. The warmth helps the glaze soak in and create a lovely finish.


"Indulge in the irresistible allure of our Lemon Poppy Seed Cake, where every slice is a burst of lemony delight. Whether you're enjoying it with a cup of tea, sharing it with loved ones, or savoring it all on your own, this cake is a treat that brightens your day and leaves you craving for more."

Enjoy creating and savoring this mouthwatering Lemon Poppy Seed Cake recipe!
Sam Salih

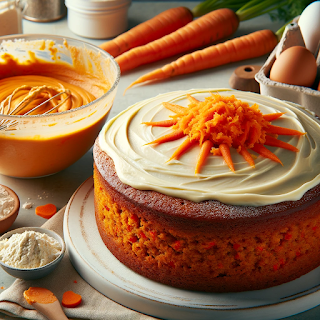
Love in Every Slice: Easy Bake Carrot Cake Recipe

Welcome to a slice of warmth and comfort, where sweet memories and delicious flavors intertwine. Our Easy Bake Carrot Cake recipe is a testament to the simple joys of baking and sharing love through food. This classic favorite brings together the wholesome goodness of carrots, the sweetness of cream cheese frosting, and the magic of homemade treats. Whether you're celebrating a special occasion or simply craving a slice of goodness, let's embark on a baking journey that fills your home with the aroma of happiness.

Origin Story: Carrot Cake Recipe

Carrot cake, with its rich, moist texture and warm spices, is a beloved dessert with a fascinating history. The story of carrot cake is a blend of necessity, innovation, and a touch of nostalgia, making it a classic treat that continues to delight generations.

Historical Roots

The roots of carrot cake can be traced back to the Middle Ages when sweeteners were scarce and expensive. Resourceful bakers used naturally sweet ingredients like carrots to sweeten their cakes and puddings. The use of carrots in desserts can be seen in medieval recipes for carrot puddings, which were precursors to the modern carrot cake.

Carrot cake as we know it today became popular in the 20th century, particularly during World War II when rationing made sugar a luxury. Carrots, rich in natural sugars, became a popular substitute. The recipe evolved over time, incorporating spices like cinnamon and nutmeg, as well as cream cheese frosting, which has become a signature element of the cake.

Personal Connection

My connection to carrot cake began in my grandmother's kitchen. She had a way of making everything from scratch, and her carrot cake was no exception. I remember grating the carrots by hand, the smell of spices filling the air, and the anticipation of tasting the creamy frosting that she made with real butter and cream cheese.

The process was a labor of love, with each step carefully followed. My grandmother's secret was toasting the nuts before adding them to the batter, which gave the cake a deeper, richer flavor. Her carrot cake was always the highlight of family gatherings, and the recipe was a closely guarded family secret.

Recipe Evolution

As I grew older and began to explore baking on my own, I experimented with my grandmother's recipe, adding my own touches while preserving its essence. I found that using freshly grated carrots and high-quality spices made a significant difference in the cake's flavor. I also played with different types of nuts and dried fruits, sometimes adding pineapple for extra moisture and sweetness.

One of the key elements I focused on was the cream cheese frosting. I wanted it to be smooth and tangy, complementing the sweetness of the cake without overpowering it. After numerous attempts, I found the perfect balance of cream cheese, butter, powdered sugar, and a hint of vanilla extract.

Sharing the Tradition

Today, my version of carrot cake is a favorite among friends and family. It’s the cake I bake for birthdays, holidays, and special occasions, each slice a tribute to my grandmother’s legacy. The combination of moist carrot cake, warm spices, and creamy frosting brings back fond memories and creates new ones with every bite.

Ingredients
:

✅For the Cake:

2 cups all-purpose flour
1 1/2 cups granulated sugar
1 cup vegetable oil
4 large eggs
2 cups grated carrots
1/2 cup crushed pineapple, drained
1/2 cup chopped walnuts or pecans (optional)
1 teaspoon baking powder
1/2 teaspoon baking soda
1/2 teaspoon salt
1 teaspoon ground cinnamon
1/2 teaspoon ground nutmeg
1/2 teaspoon ground ginger
1 teaspoon pure vanilla extract


✅For the Cream Cheese Frosting:

8 oz (1 package) cream cheese, softened
1/2 cup (1 stick) unsalted butter, softened
4 cups powdered sugar
1 teaspoon pure vanilla extract

Preparation Time: 20 minutes
Baking Time: 25-30 minutes
Frosting Time: 10 minutes
Yield: This recipe yields one delicious Carrot Cake that serves approximately 12 slices.

Instructions:

  1. Preheat your oven to 350°F (175°C). Grease and flour two 9-inch round cake pans.
  2. In a large mixing bowl, combine the flour, granulated sugar, baking powder, baking soda, salt, ground cinnamon, ground nutmeg, and ground ginger.
  3. In a separate bowl, whisk together the vegetable oil, eggs, and pure vanilla extract until well combined.
  4. Pour the wet ingredients into the dry ingredients and mix until just combined.
  5. Fold in the grated carrots, crushed pineapple, and chopped nuts (if using).
  6. Divide the cake batter equally between the prepared cake pans.
  7. Bake in the preheated oven for 25-30 minutes or until a toothpick inserted into the center comes out clean.
  8. Allow the cakes to cool in the pans for 10 minutes, then transfer them to a wire rack to cool completely.
  9. While the cakes are cooling, prepare the cream cheese frosting. In a mixing bowl, beat together the softened cream cheese and softened unsalted butter until smooth and creamy. Gradually add the powdered sugar and pure vanilla extract, beating until the frosting is light and fluffy.
  10. Once the cakes are completely cool, spread a layer of cream cheese frosting on top of one cake layer. Place the second cake layer on top and frost the top and sides of the entire cake.
  11. Slice, serve, and savor the joy of your homemade Easy Bake Carrot Cake!

Pro Tips

  1. Grate Fresh Carrots: For the best flavor and texture, grate fresh carrots rather than using pre-packaged ones. They have a natural sweetness that elevates the cake.
  2. Room Temperature Ingredients: Ensure that your eggs, cream cheese, and butter are at room temperature. This makes for smoother blending and better incorporation of ingredients.
  3. Crushed Pineapple: The crushed pineapple adds moisture and a hint of sweetness. Drain it well to prevent excess moisture in the cake.

Secret Tips

  1. The Spice Blend: The combination of ground cinnamon, nutmeg, and ginger creates a warm and aromatic spice blend that elevates the flavor of the cake.
  2. Nuts or No Nuts: While chopped nuts are optional, they add a delightful crunch and nutty flavor to the cake. Customize your cake to suit your preference.


"May your journey into the world of baking be filled with joy and satisfaction as you create this Easy Bake Carrot Cake. Whether it graces your table on a special occasion or becomes a comforting treat for your loved ones, every slice is a reminder of the sweet moments we share. Happy baking!"

Enjoy creating and savoring this heartwarming Carrot Cake recipe!

Sam Salih

Oatmeal Raisin Cookies Recipe

Indulge in the wholesome goodness of Oatmeal Raisin Cookies, where chewy oats and plump raisins come together to create a delightful treat. These cookies are a perfect blend of sweet and hearty, making them a comforting favorite.

Origin Story: Oatmeal Raisin Cookies

The creation of my Oatmeal Raisin Cookies is a unique blend of history, innovation, and a personal touch that brings warmth to every bite. This story is not just about a recipe, but about the journey that made these cookies a beloved treat in my kitchen and beyond.

Historical Roots and Cultural Significance

The roots of oatmeal raisin cookies date back to ancient times when oats were first cultivated by the Scots around 1000 BC. Oats were a hardy grain that could grow in the cooler, wetter climate of Scotland, making them a staple in the Scottish diet. They were commonly used in porridge, bannocks, and eventually in baked goods.

The modern oatmeal raisin cookie likely evolved from traditional Scottish oatcakes, which were a simple, unleavened form of bread made from oats. As oats spread across Europe and eventually to America, they were embraced for their nutritional benefits. The introduction of raisins to these oat-based treats added a natural sweetness and a chewy texture, transforming them into a more indulgent dessert.

Personal Connection

My personal connection to oatmeal raisin cookies began during a family trip to a small village in Scotland. I was fascinated by the local bakeries that showcased traditional oatcakes and pastries. One particular bakery, with its warm and inviting aroma, stood out. The baker, an elderly woman with a passion for her craft, shared stories of how oats were a symbol of resilience and sustenance for her ancestors.

Inspired by this experience, I returned home determined to create a version of these oat-based treats that would honor both the traditional Scottish roots and the sweet, comforting flavors I love. I started with a basic oatmeal cookie recipe but felt it needed something more to make it special.

Recipe Evolution

In my quest to perfect the recipe, I experimented with various ingredients and techniques. I discovered that soaking the raisins in warm water or a bit of rum before adding them to the dough made them plumper and more flavorful. Adding a touch of cinnamon and nutmeg brought a warm, aromatic depth to the cookies.

The real breakthrough came when I decided to brown the butter before mixing it into the dough. This added a rich, nutty flavor that elevated the cookies to a new level. Each bite of the final version of my oatmeal raisin cookies offers a perfect balance of crispy edges, chewy centers, and bursts of sweet, juicy raisins.

Sharing the Tradition

These cookies have become a staple in my household and are often requested by friends and family. They are the cookies I bake when I want to bring a touch of home to gatherings or when I need a comforting treat to share. Each batch is a testament to the rich history and personal journey that brought this recipe to life.

For those who want to experience the unique flavors and comforting texture of my oatmeal raisin cookies, you can find the detailed recipe on my blog here. This recipe is a tribute to the resilience and creativity of generations past and a celebration of the simple joys of home baking. Enjoy making and sharing these delicious cookies with your loved ones.

Ingredients
:

1 cup (2 sticks) unsalted butter, softened
1 cup granulated sugar
1 cup packed brown sugar
2 large eggs
1 teaspoon pure vanilla extract
1 1/2 cups all-purpose flour
1 teaspoon baking soda
1 teaspoon ground cinnamon
1/2 teaspoon salt
3 cups old-fashioned rolled oats
1 1/2 cups raisins

  • Preparation Time: 15 minutes
    Baking Time: 10-12 minutes
    Yield: This recipe makes approximately 36 delicious Oatmeal Raisin Cookies.
  • Instructions:

  1. Preheat your oven to 350°F (175°C). Line a baking sheet with parchment paper.
  2. In a mixing bowl, cream together the softened unsalted butter, granulated sugar, and brown sugar until the mixture is light and fluffy.
  3. Beat in the eggs one at a time, then stir in the pure vanilla extract.
  4. In a separate bowl, whisk together the all-purpose flour, baking soda, ground cinnamon, and salt. Gradually add this dry mixture to the butter and sugar mixture and mix until just combined.
  5. Stir in the old-fashioned rolled oats and raisins until they are evenly distributed in the cookie dough.
  6. Drop rounded tablespoons of cookie dough onto the prepared baking sheet. Leave some space between each cookie as they will spread during baking.
  7. Bake in the preheated oven for 10-12 minutes or until the edges are golden but the centers are still soft. Don't overbake for a chewy texture.
  8. Remove the cookies from the oven and let them cool on the baking sheet for a few minutes before transferring them to a wire rack to cool completely.
Crafting Wisdom 🍪
  1. Room Temperature Ingredients: Make sure your butter is softened to room temperature. This allows it to cream easily with the sugars, resulting in a smoother cookie dough.
  2. High-Quality Vanilla: Use pure vanilla extract for the best flavor. It adds a wonderful aroma and enhances the overall taste of the cookies.
  3. Don't Overmix: When adding the dry ingredients to the wet mixture, mix only until they are combined. Overmixing can lead to tough cookies.
  4. Use Old-Fashioned Rolled Oats: Old-fashioned oats provide the best texture for these cookies. Avoid using quick oats, which can make the cookies too soft.
  5. Plump Raisins: If your raisins are dry, plump them by soaking them in hot water for a few minutes, then draining them. This ensures they are soft and juicy in the cookies.
  6. Chill the Dough: If you have time, refrigerate the cookie dough for about 30 minutes before baking. Chilled dough results in thicker, less spread-out cookies.
Baking Magic Tricks ✨

  1. Cinnamon Enhancement: For an extra layer of flavor, toast the ground cinnamon in a dry skillet for a minute or two before adding it to the dough. It intensifies the cinnamon aroma.
  2. Customize with Nuts: If you like nutty cookies, add a cup of chopped walnuts or pecans to the dough. The combination of nuts and raisins is delightful.
  3. Flavor Infusion: Infuse the raisins with flavor by soaking them in a bit of orange juice or rum before adding them to the dough. This adds a subtle citrus or boozy note to your cookies.
  4. Giant Cookies: For jumbo cookies, use an ice cream scoop to portion out the dough. Bake them a little longer, and you'll have big, chewy cookies.
  5. Freezing Cookie Dough: You can freeze portions of cookie dough to have fresh-baked cookies whenever you like. Scoop out portions onto a baking sheet, freeze until solid, then transfer to a freezer bag. Bake them straight from the freezer, adding a minute or two to the baking time.

Why these cookies are special:

Oatmeal Raisin Cookies are a timeless classic with a warm, homey feel. The combination of oats and raisins not only adds sweetness but also a delightful texture that's both chewy and satisfying.

How to enjoy them:

These cookies are perfect for any occasion, whether you're craving a sweet snack or want to share a comforting treat with loved ones. Enjoy them with a glass of milk, a cup of tea, or simply on their own.

Let’s get baking:

With this easy recipe, you can whip up a batch of Oatmeal Raisin Cookies in no time. Share the joy of freshly baked cookies with family and friends.

Happy baking!
Sam Salih